Top 4 TensorFlow callbacks to implement in your next deep learning project
Training deep learning models can take days or weeks, but how long is long enough? Your model likely won’t be learning after some point, and continuing the training session costs you both time and money.
Picture this — you’re training a large image recognition model for many epochs, and hope to get a usable model. After a couple of dozens of epochs, the loss isn’t decreasing, and the accuracy isn’t increasing. Training for longer without tweaking the parameters first is, you’ve guessed it, a waste of time.
Thankfully, there’s a solution, and it’s built into TensorFlow API. It’s named callbacks and represents special functions executed during model training. You can use them to save models, save training logs, reduce the learning rate if the model is stuck, and much more.
Don’t feel like reading? Watch my video instead:
You can download the source code on GitHub.
Dataset used and data preprocessing
I don’t plan to spend much dealing with data today. We’ll use the same dataset as in the previous articles — the wine quality dataset from Kaggle:
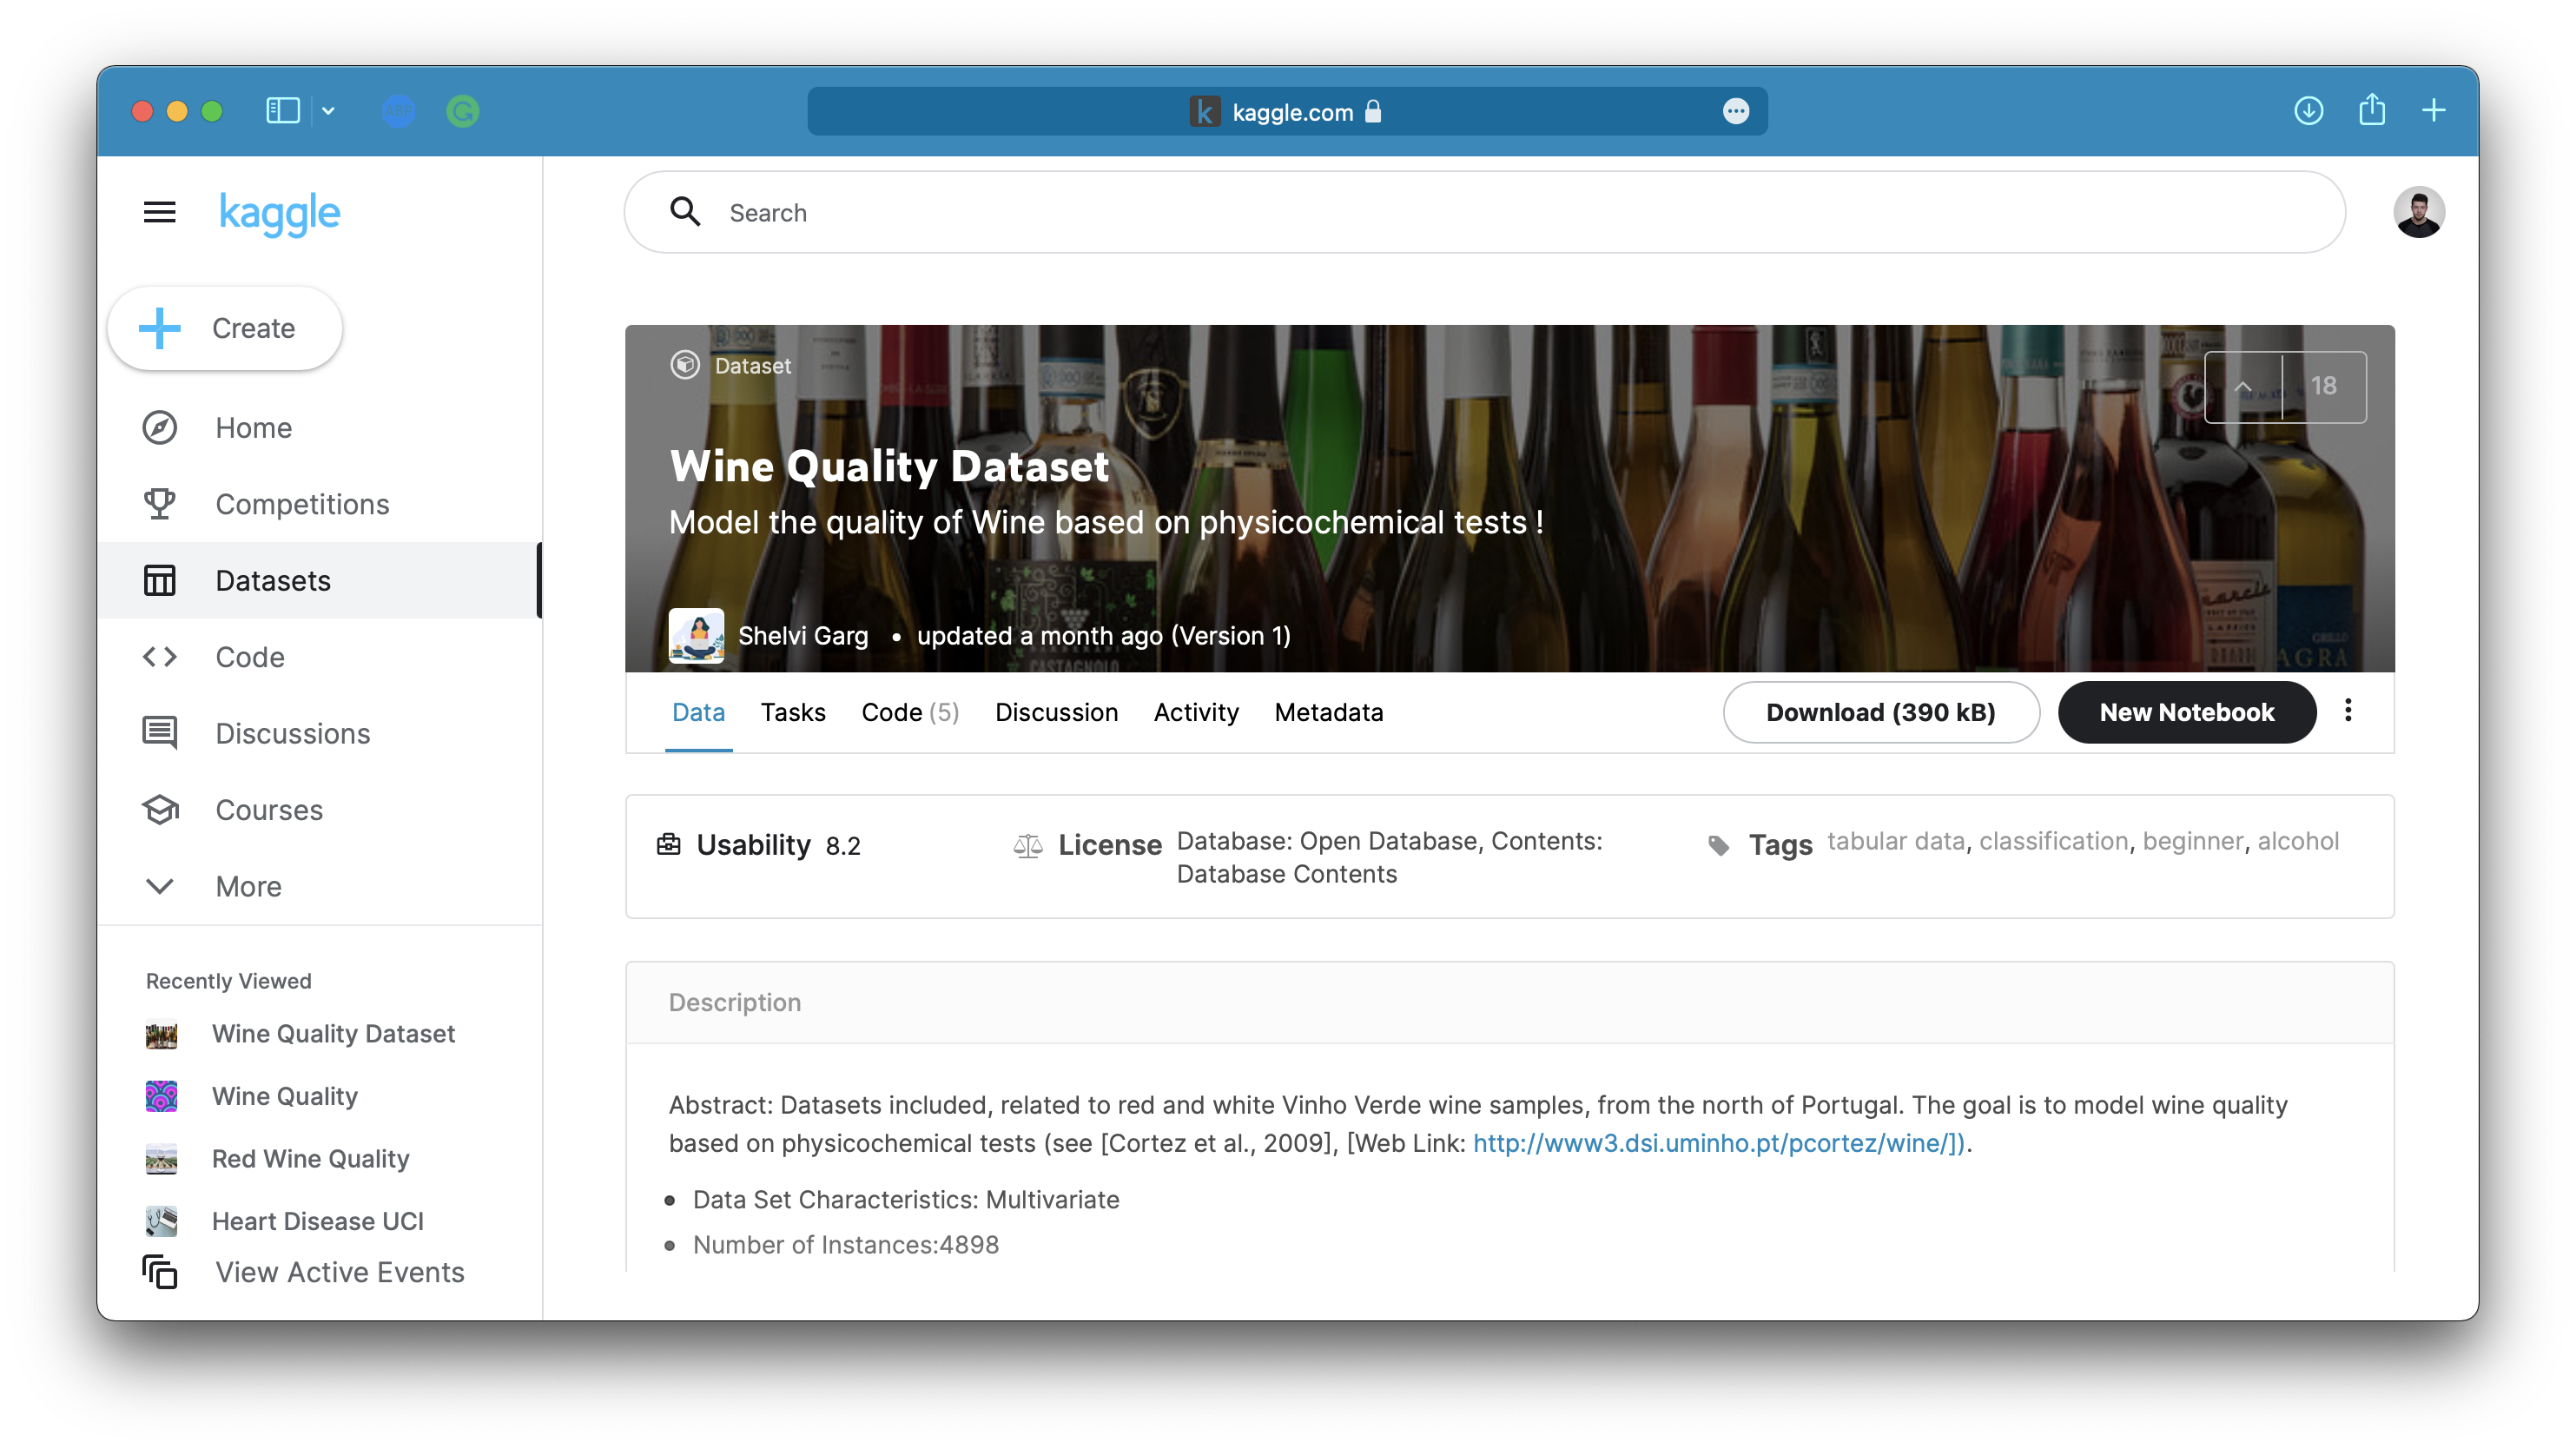
Image 1 — Wine quality dataset from Kaggle (image by author)
You can use the following code to import it to Python and print a random couple of rows:
import os
import numpy as np
import pandas as pd
import warnings
os.environ['TF_CPP_MIN_LOG_LEVEL'] = '2'
warnings.filterwarnings('ignore')

df = pd.read_csv('data/winequalityN.csv')
df.sample(5)
We’re ignoring the warnings and changing the default TensorFlow log level just so we don’t get overwhelmed with the output.
Here’s how the dataset looks like:

Image 2 — A random sample of the wine quality dataset (image by author)
The dataset is mostly clean, but isn’t designed for binary classification by default (good/bad wine). Instead, the wines are rated on a scale. We’ll address that now, with numerous other things:
- Delete missing values— There’s only a handful of them, so we won’t waste time on imputation.
- Handle categorical features— The only one is
type, indicating whether the wine is white or red. - Convert to a binary classification task— We’ll declare any wine with a grade of 6 and above as good, and anything below as bad.
- Train/test split— A classic 80:20 split.
- Scale the data— The scale between predictors differs significantly, so we’ll use the
StandardScalerto bring the values closer.
Here’s the entire data preprocessing code snippet:
from sklearn.model_selection import train_test_split
from sklearn.preprocessing import StandardScaler

# Prepare the data
df = df.dropna()
df['is_white_wine'] = [1 if typ == 'white' else 0 for typ in df['type']]
df['is_good_wine'] = [1 if quality >= 6 else 0 for quality in df['quality']]
df.drop(['type', 'quality'], axis=1, inplace=True)

# Train/test split
X = df.drop('is_good_wine', axis=1)
y = df['is_good_wine']
X_train, X_test, y_train, y_test = train_test_split(
    X, y,
    test_size=0.2, random_state=42
)

# Scaling
scaler = StandardScaler()
X_train_scaled = scaler.fit_transform(X_train)
X_test_scaled = scaler.transform(X_test)
Once again, please refer to the previous article if you want more detailed insights into the logic behind data preprocessing.
With that out of the way, let’s see how to approach declaring callbacks in TensorFlow.
Declaring callbacks with TensorFlow
If you’ve read my previous article on optimizing the learning rate with TensorFlow, you already know how callbacks work. Basically, you’ll include them in the fit() function. There’s no one stopping you from declaring a list of callbacks beforehand, just to keep the training function extra clean.
TensorFlow has a bunch of callbacks built-in. You can also write custom callback functions, but that’s a topic for another time. I use only four built-in callbacks for most projects.
ModelCheckpoint
You can use this one to save the model locally on the current epoch if it beats the performance obtained on the previous one. The performance with any metric you want, such as loss, or accuracy. I recommend monitoring the performance on the validation set, as deep learning models tend to overfit the training data.
You can save the model either as a checkpoint folder or as an hdf5 file. I recommend the latter, as it looks much cleaner on your file system. Also, you can specify a much nicer file path that contains the epoch number and the value of the evaluation metric at that epoch.
Here’s how to declare ModelCheckpoint callback:
cb_checkpoint = tf.keras.callbacks.ModelCheckpoint(
    filepath='checkpoints/model-{epoch:02d}-{val_accuracy:.2f}.hdf5',
    monitor='val_accuracy',
    mode='max',
    save_best_only=True,
    verbose=1
)
In a nutshell, it will save the model on the current epoch only if it outperforms the one at the previous epoch, regarding the accuracy on the validation set.
ReduceLROnPlateau
If a value of the evaluation metric doesn’t change for several epochs, ReduceLROnPlateau reduces the learning rate. For example, if validation loss didn’t decrease for 10 epochs, this callback tells TensorFlow to reduce the learning rate.
The new learning rate is calculated as the old learning rate multiplied by a user-defined factor. So, if the old learning rate is 0.01, and the factor is 0.1, the new learning rate is 0.01 * 0.1 = 0.001.
Here’s how to declare it:
cb_reducelr = tf.keras.callbacks.ReduceLROnPlateau(
    monitor='val_loss',
    mode='min',
    factor=0.1,
    patience=10,
    verbose=1,
    min_lr=0.00001
)
To summarize, the above declaration instructs TensorFlow to reduce the learning rate by a factor of 0.1 if the validation loss didn’t decrease in the last 10 epochs. The learning rate will never go below 0.00001.
EarlyStopping
If a metric doesn’t change by a minimum delta in a given number of epochs, the EarlyStopping callback kills the training process. For example, if validation accuracy doesn’t increase at least 0.001 in 10 epochs, this callback tells TensorFlow to stop the training.
Here’s how to declare it:
cb_earlystop = tf.keras.callbacks.EarlyStopping(
    monitor='val_accuracy',
    mode='max',
    min_delta=0.001,
    patience=10,
    verbose=1
)
There’s not much to it — it’s simple but extremely useful.
CSVLogger
The CSVLogger callback captures model training history and dumps it into a CSV file. It’s useful for analyzing the performance later, and comparing multiple models. It saves data for all the metrics you’re tracking, such as loss, accuracy, precision, recall — both for training and validation sets.
Here’s how to declare it:
cb_csvlogger = tf.keras.callbacks.CSVLogger(
    filename='training_log.csv',
    separator=',',
    append=False
)
Easy, right? Definitely, but the best is yet to come. Let’s train the model with these callbacks next.
Training a model with TensorFlow callbacks
It’s a common practice in deep learning to split the dataset into training, validation, and test set. We did a two-way split, so for simplicity’s sake, we’ll treat the test set as a validation set.
We’ll train the model for 1000 epochs — a lot, but the EarlyStopping callback will kill the training process way before. You can specify the callbacks as a list inside the fit() function. Here’s the code:
model = tf.keras.Sequential([
    tf.keras.layers.Dense(64, activation='relu'),
    tf.keras.layers.Dense(64, activation='relu'),
    tf.keras.layers.Dense(64, activation='relu'),
    tf.keras.layers.Dense(1, activation='sigmoid')
])

model.compile(
    loss=tf.keras.losses.binary_crossentropy,
    optimizer=tf.keras.optimizers.Adam(),
    metrics=[tf.keras.metrics.BinaryAccuracy(name='accuracy')]
)

model.fit(
    X_train_scaled,
    y_train,
    epochs=1000,
    validation_data=(X_test_scaled, y_test),
    callbacks=[cb_checkpoint, cb_reducelr, cb_earlystop, cb_csvlogger]
)
The model training will start now, and you’ll see something similar printed out:

Image 3 — Starting the training process (image by author)
The output is a bit more detailed than before, due to callbacks. You can see the ModelCheckpoint callback doing its job, and saving the model after the first epoch. The hdf5 file name tells you what validation accuracy was achieved at which epoch.
The EarlyStopping callback will kill the training process around epoch 35:
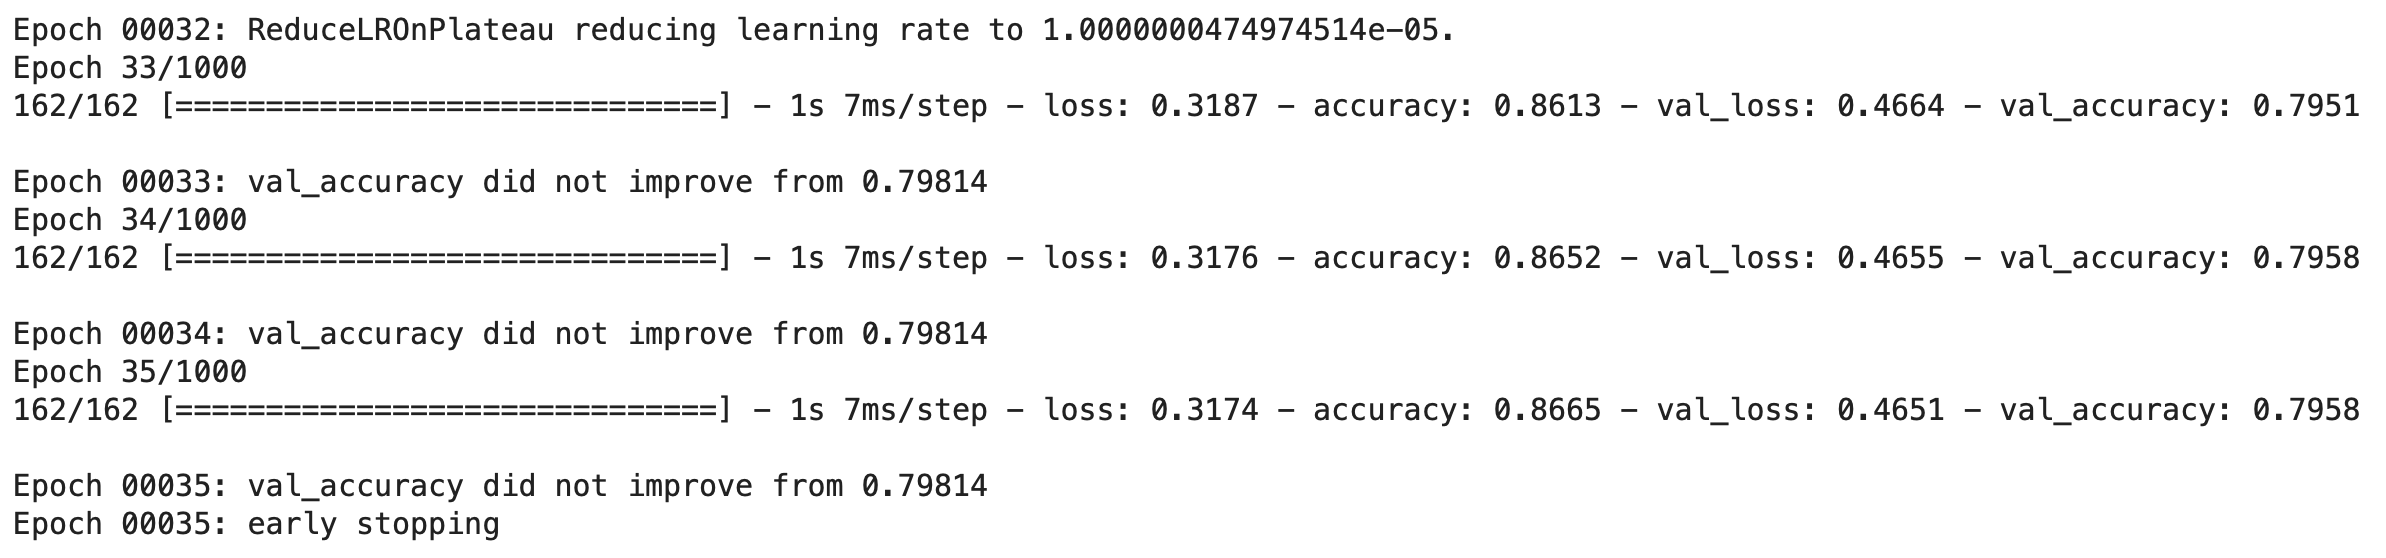
Image 4 — Finishing the training process (image by author)
And that’s it — why waste time training for 965 epochs more if the model is already stuck here. It’s maybe not a huge time saver for simple tabular models, but imagine training for hours or days unnecessarily on rented GPU machines.
Yours checkpoints/ folder should look similar to mine after the training finishes:
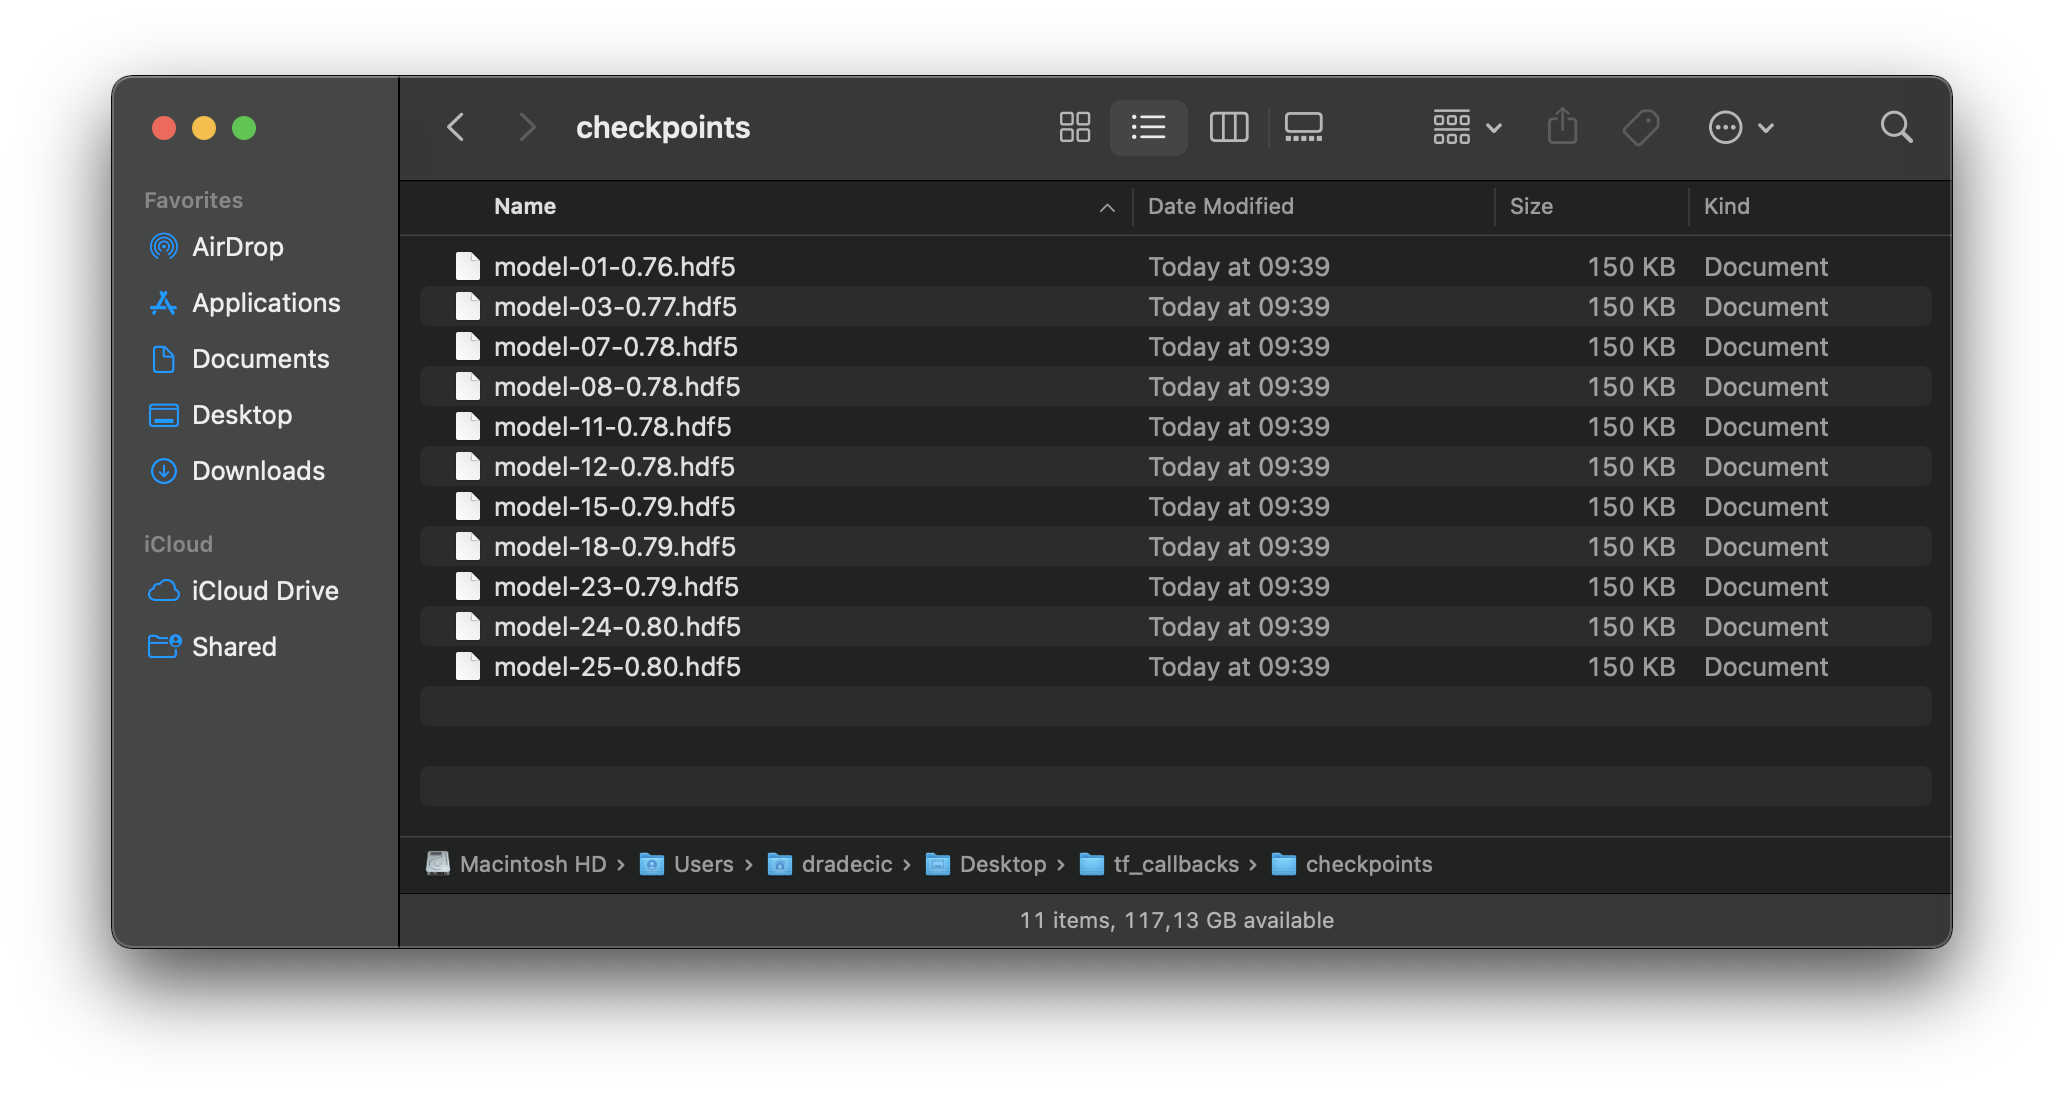
Image 5 — Checkpoints folder (image by author)
You should always choose the one with the highest epoch number for further tweaks or evaluation. Don’t let the accuracy of 0.80 on the last two models confuse you — it’s only rounded to two decimal places.
You can load the best model with TensorFlow’s load_model() function:
best_model = tf.keras.models.load_model('checkpoints/model-25-0.80.hdf5')
And you can proceed with predictions and evaluations as you usually would — no need to cover that today.
If you wonder about the contents of the training_log.csv, here’s how it looks on my machine:
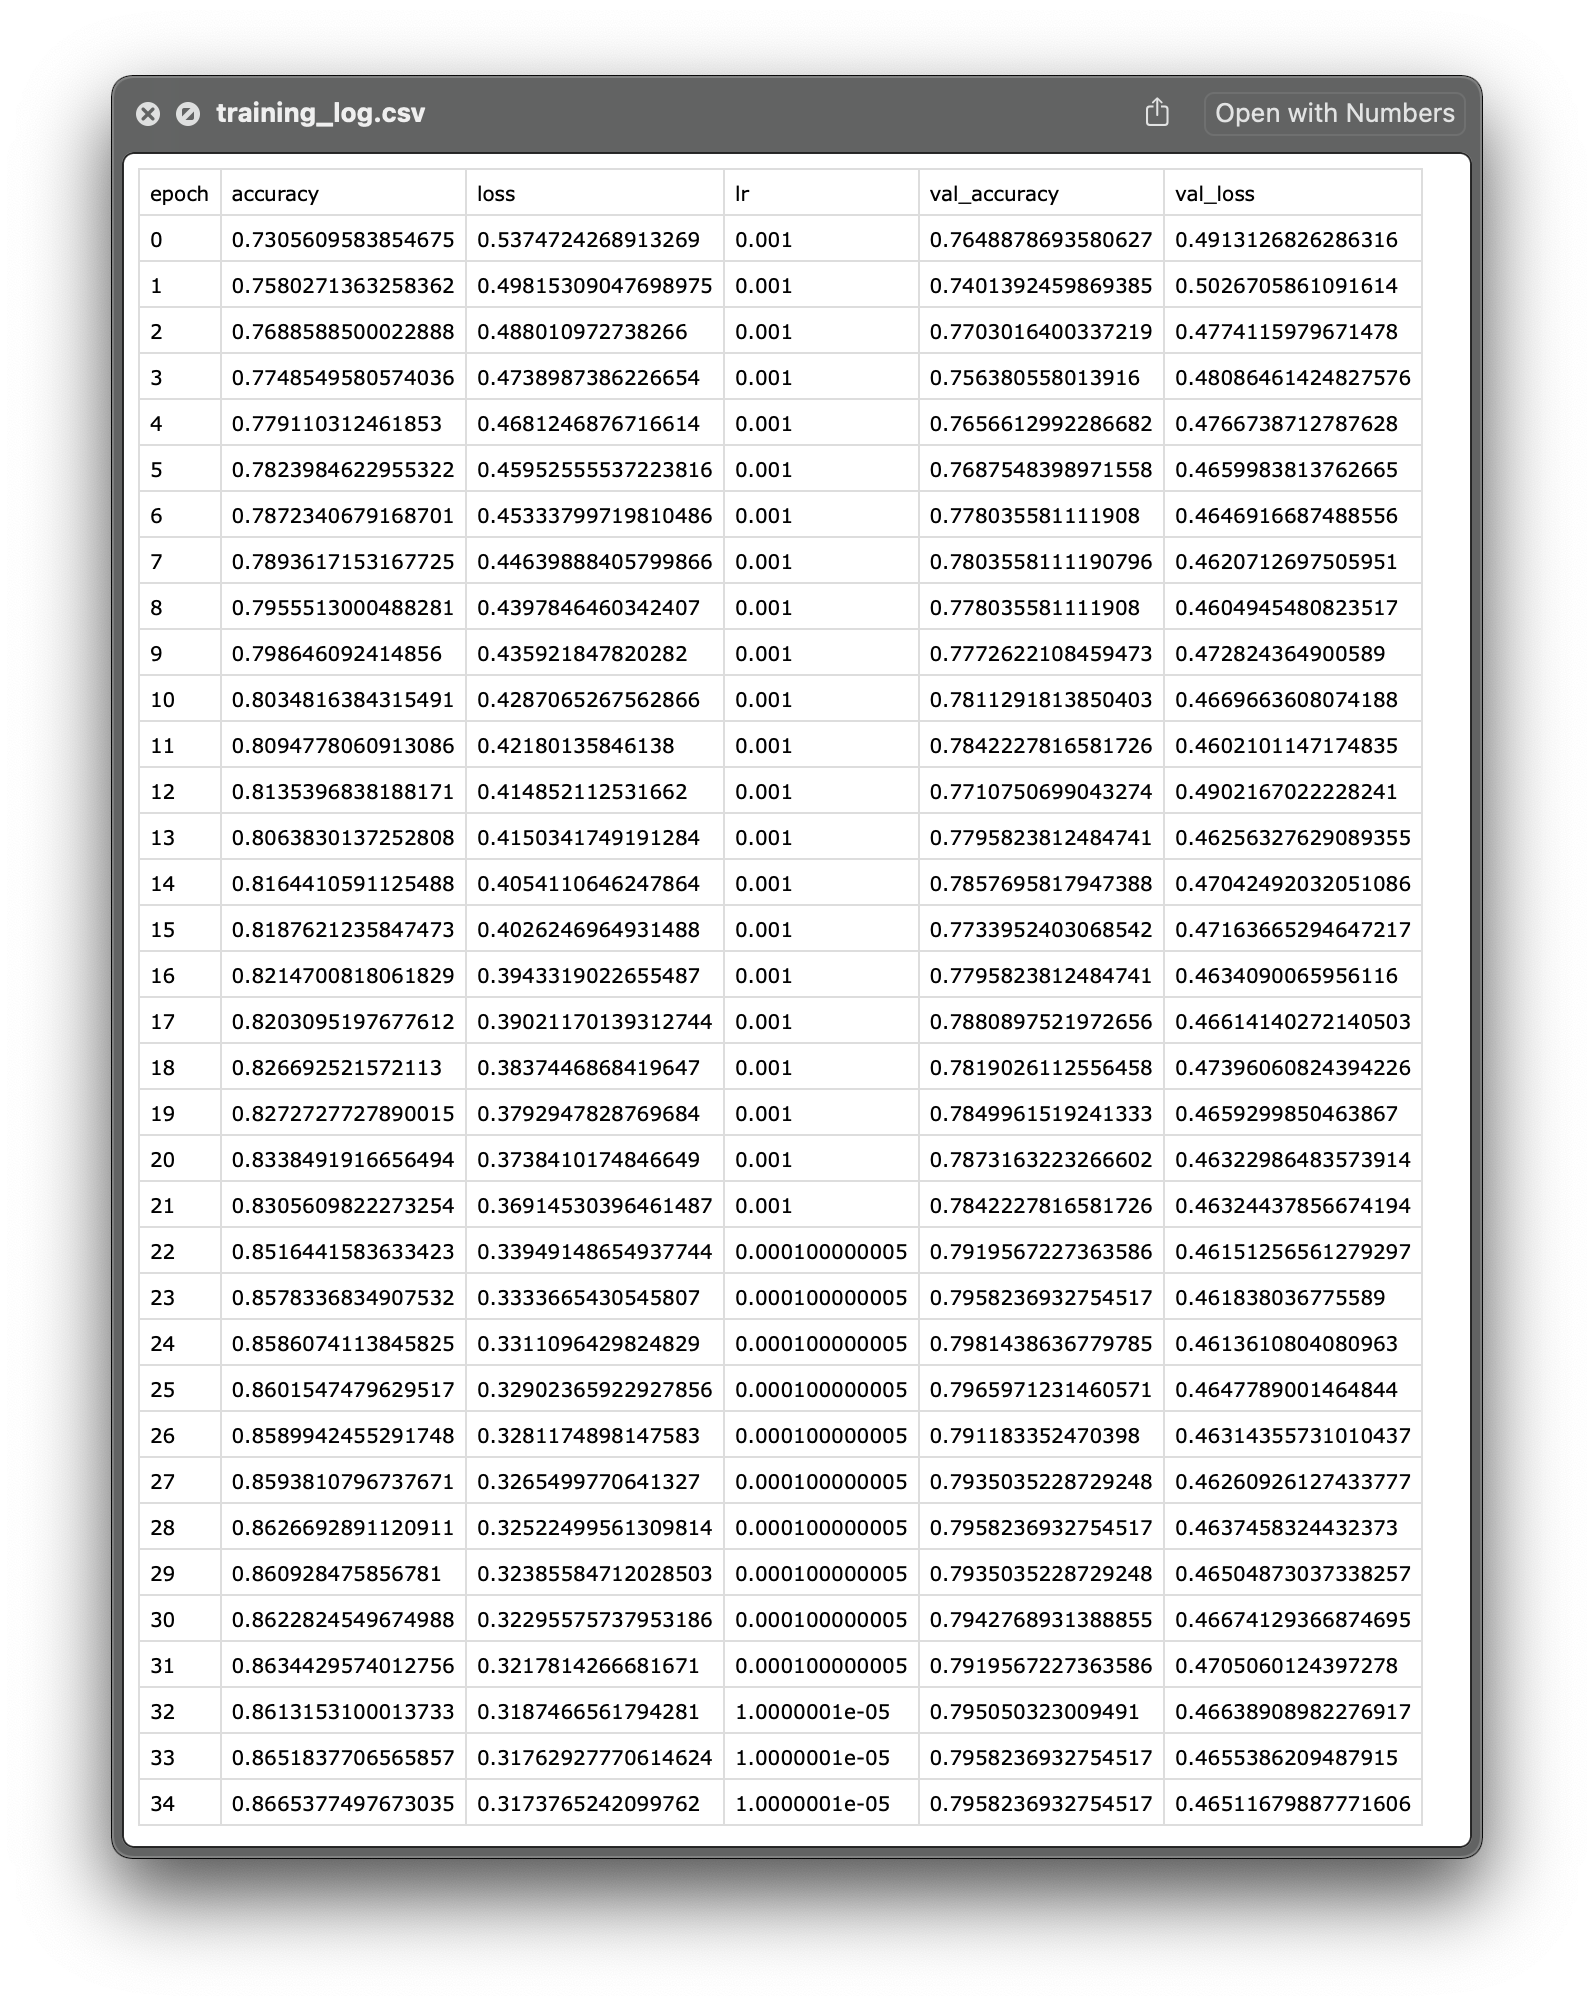
Image 6 — Training log CSV file (image by author)
You can see how both loss and accuracy were tracked on training and validation sets, and how learning rate decreased over time thanks to the ReduceLROnPlateau callback. In short — everything works as advertised.
That’s all I wanted to cover today. Let’s wrap things up next.
Parting words
Training deep learning models doesn’t have to take so long. Pay attention to your evaluation metrics, and stop the training if the model isn’t learning. You don’t have to do that manually, of course, as there are built-in callback functions. You’ve learned four of them today, and for the rest, please visit the official documentation.
Stay tuned if you want to learn more about custom callbacks, and also stay tuned for the upcoming convolutional neural network articles. I’ll cover everything you need to know to get hired as a machine learning engineer.
Stay connected
- Sign up for my newsletter
- Subscribe on YouTube
- Connect on LinkedIn