
Do you find built-in TensorFlow callbacks limiting? Here’s a solution you’ve been looking for
Do you find built-in TensorFlow callbacks limiting? You’re in luck, as today you’ll learn how to write custom TensorFlow callbacks from scratch! It might come in handy when you want to modify how the default callbacks work or if you want to do something crazy.
Today you’ll write a custom callback that redesigns the training loop, prints evaluation metrics on the test set after the training is complete, and also plots training loss vs. validation loss and training accuracy vs. validation accuracy at each epoch.
Don’t feel like reading? Watch my video instead:
You can download the source code on GitHub.
Dataset used and data preprocessing
I don’t plan to spend much dealing with data today. We’ll use the same dataset as in the previous articles — the wine quality dataset from Kaggle. It’s an open source dataset licensed under Database Contents License:
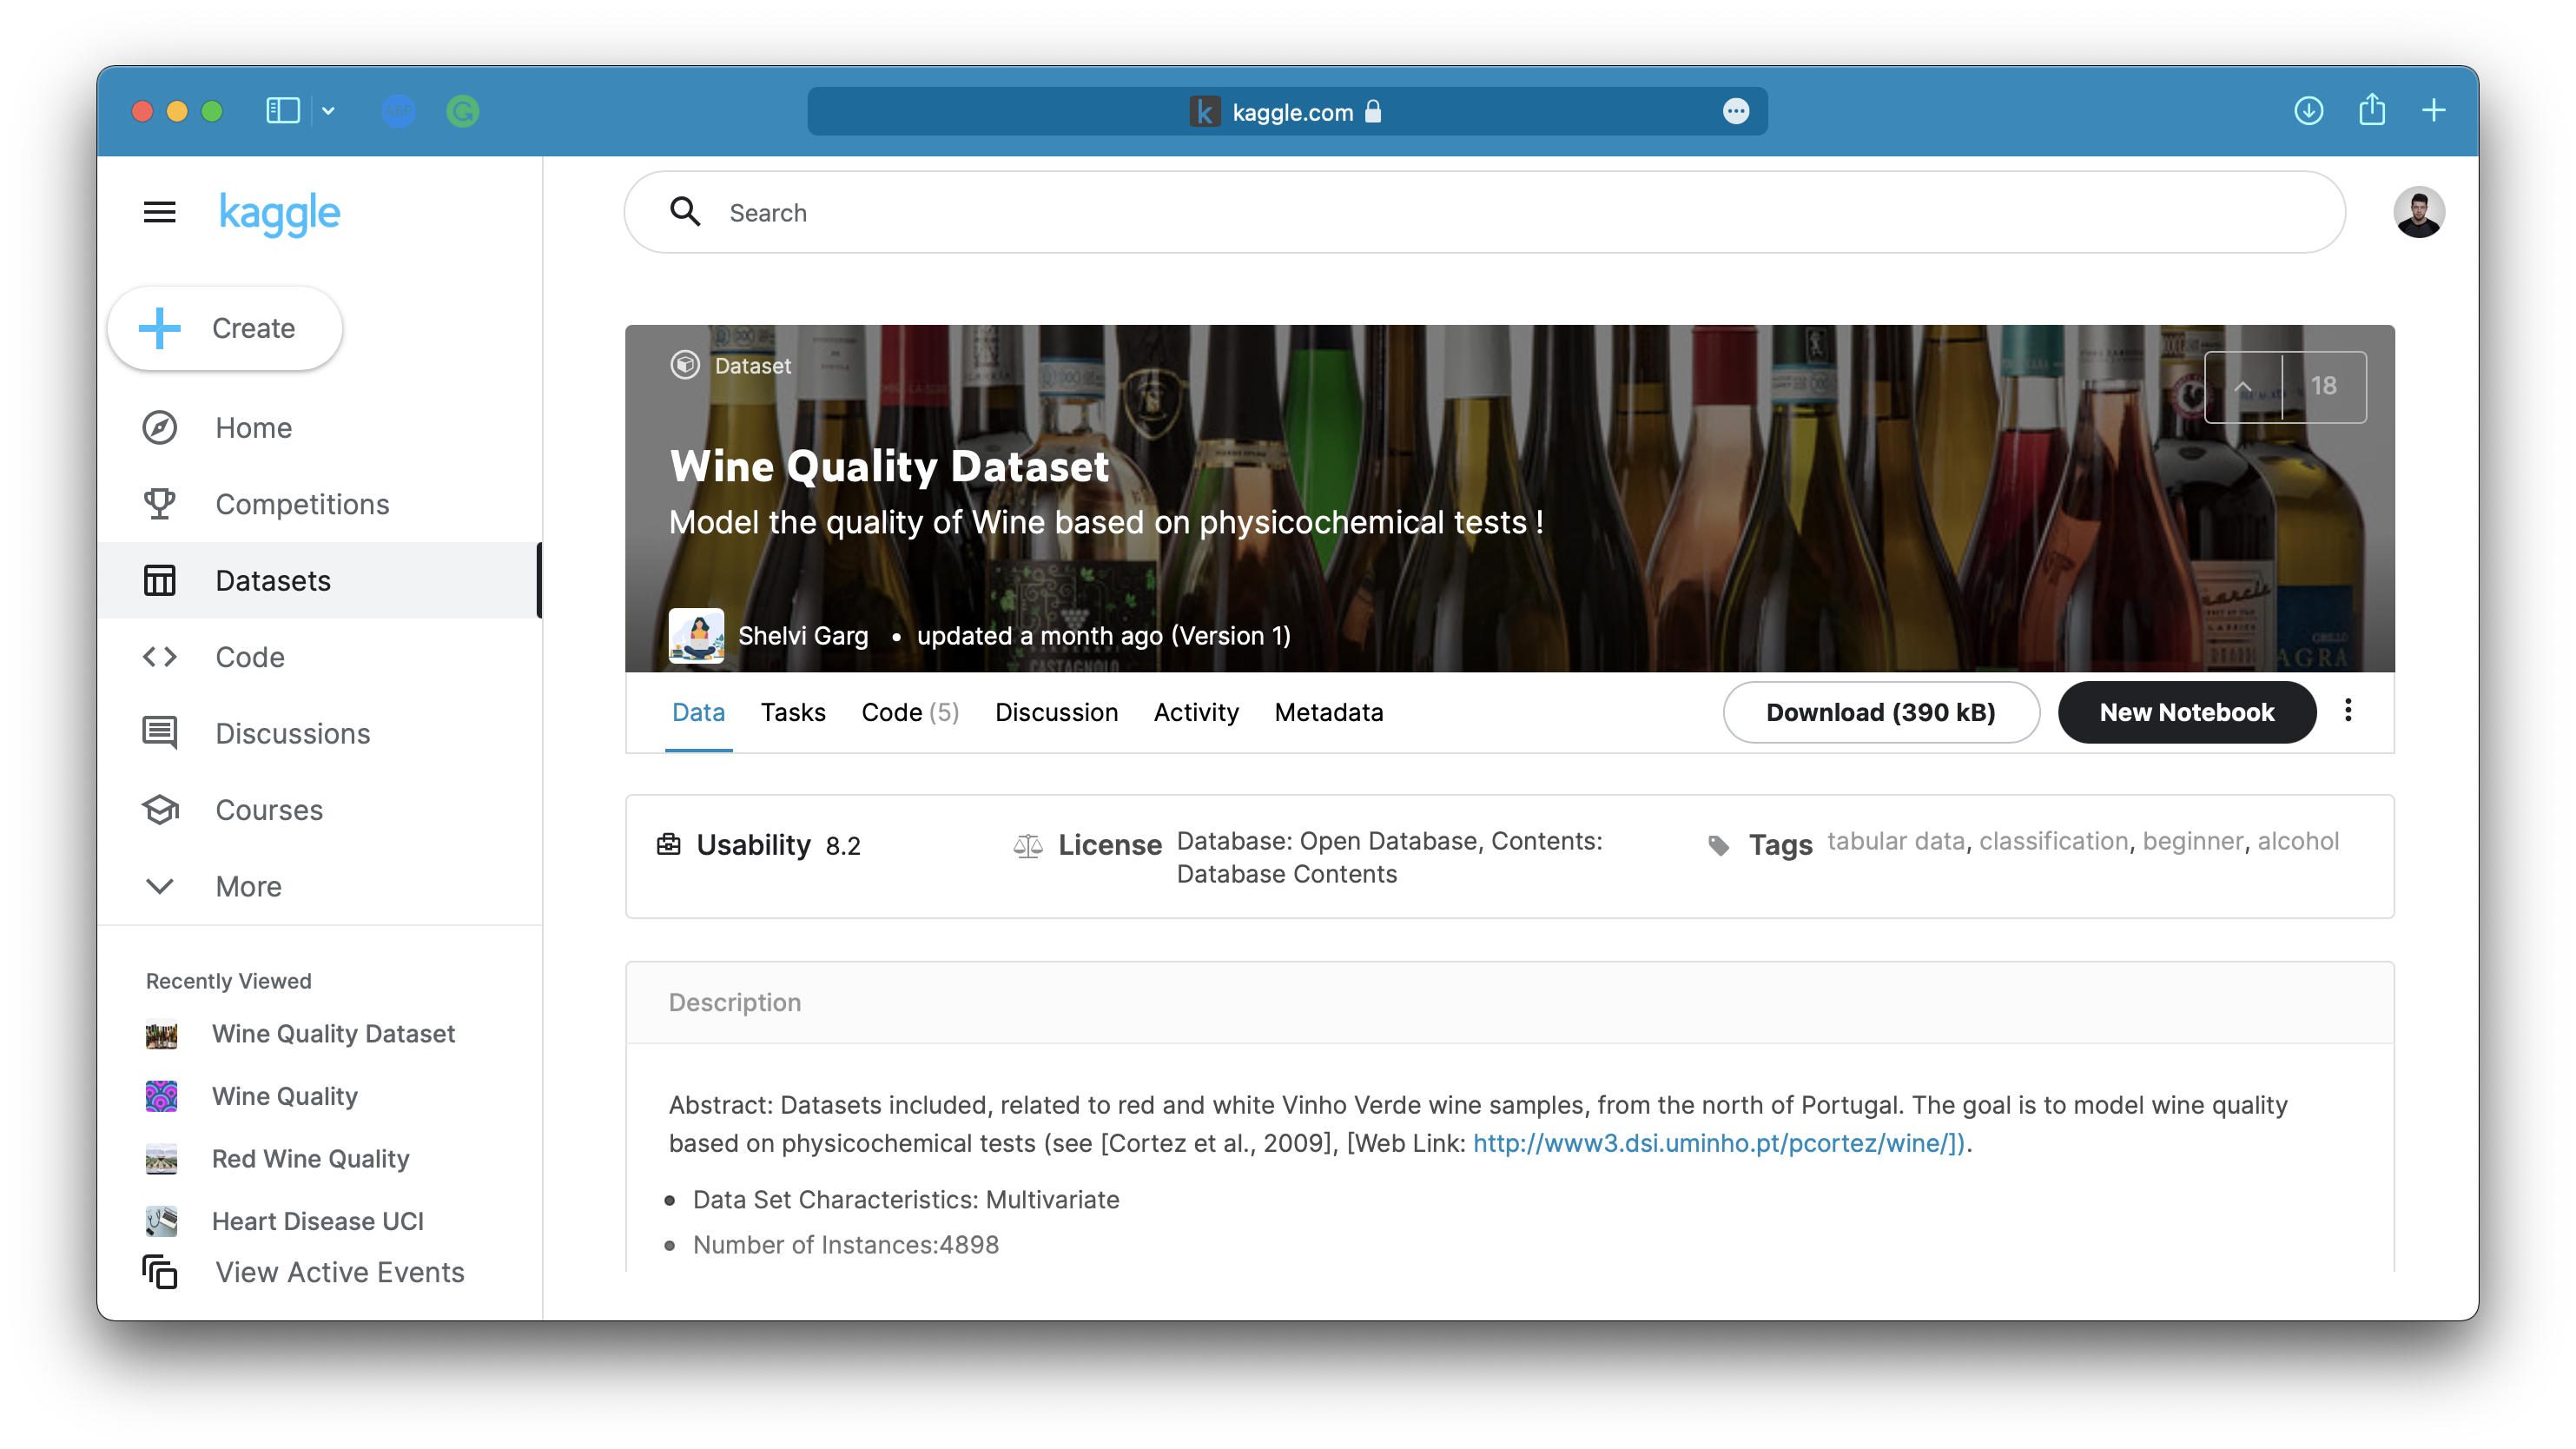
Image 1 — Wine quality dataset from Kaggle (image by author)
You can use the following code to import it to Python and print a random couple of rows:
import os
import numpy as np
import pandas as pd
import warnings
os.environ['TF_CPP_MIN_LOG_LEVEL'] = '2'
warnings.filterwarnings('ignore')

df = pd.read_csv('data/winequalityN.csv')
df.sample(5)
We’re ignoring the warnings and changing the default TensorFlow log level just so we don’t get overwhelmed with the output.
Here’s how the dataset looks like:

Image 2 — A random sample of the wine quality dataset (image by author)
The dataset is mostly clean, but isn’t designed for binary classification by default (good/bad wine). Instead, the wines are rated on a scale. We’ll address that now, with numerous other things:
- Delete missing values— There’s only a handful of them, so we won’t waste time on imputation.
- Handle categorical features— The only one is
type, indicating whether the wine is white or red. - Convert to a binary classification task— We’ll declare any wine with a grade of 6 and above as good, and anything below as bad.
- Train/test split— A classic 80:20 split.
- Scale the data— The scale between predictors differs significantly, so we’ll use the
StandardScalerto bring the values closer.
Here’s the entire data preprocessing code snippet:
from sklearn.model_selection import train_test_split
from sklearn.preprocessing import StandardScaler

# Prepare the data
df = df.dropna()
df['is_white_wine'] = [1 if typ == 'white' else 0 for typ in df['type']]
df['is_good_wine'] = [1 if quality >= 6 else 0 for quality in df['quality']]
df.drop(['type', 'quality'], axis=1, inplace=True)

# Train/test split
X = df.drop('is_good_wine', axis=1)
y = df['is_good_wine']
X_train, X_test, y_train, y_test = train_test_split(
    X, y,
    test_size=0.2, random_state=42
)

# Scaling
scaler = StandardScaler()
X_train_scaled = scaler.fit_transform(X_train)
X_test_scaled = scaler.transform(X_test)
Once again, please refer to the previous article if you want more detailed insights into the logic behind data preprocessing.
With that out of the way, let’s see how to approach declaring callbacks in TensorFlow.
Write a model training function
Let’s make our lives somewhat easier by writing a function that builds, compiles, and trains the model. You can continue without it, but you’ll need to copy/paste the model training code several times, which isn’t ideal.
The function allows you to specify a list of callbacks and change the number of epochs the model will train for. The number of epochs is set to 5 by default. Everything else is hardcoded, including training and validation sets and verbosity parameter. It’s ideal to set it to 0, as our callback will generate training progress statements of its own.
Here’s the code for the function:
import tensorflow as tf
tf.random.set_seed(42)

def build_and_train(callbacks: list, num_epochs: int = 5) -> tf.keras.Sequential:
    model = tf.keras.Sequential([
        tf.keras.layers.Dense(64, activation='relu'),
        tf.keras.layers.Dense(64, activation='relu'),
        tf.keras.layers.Dense(64, activation='relu'),
        tf.keras.layers.Dense(1, activation='sigmoid')
    ])

    model.compile(
        loss=tf.keras.losses.binary_crossentropy,
        optimizer=tf.keras.optimizers.Adam(),
        metrics=[tf.keras.metrics.BinaryAccuracy(name='accuracy')]
    )

    model.fit(
        X_train_scaled,
        y_train,
        epochs=num_epochs,
        validation_data=(X_test_scaled, y_test),
        callbacks=callbacks,
        verbose=0
    )

    return model
It should feel familiar if you know the basics of TensorFlow. With that out of the way, let’s write our first callback.
Write a basic custom TensorFlow callback
Every custom TensorFlow callback class must extend the tf.keras.callbacks.Callback class. It gives you access to many class methods, but we’ll only deal with two in this section. These are on_train_begin() and on_train_end(). TensorFlow’s development team really nailed the function names, so there’s no point in further explaining what they do.
As with any Python class, you can declare a constructor. Ours will contain timestamps when the model started and finished training. We’ll set both to None initially.
The on_train_begin() function will set the current time to the start timestamp in the constructor and print the time when the training started.
The on_train_end() function will set the current time to the time end timestamp in the constructor, calculate and print the training duration, and print the values of training loss, training accuracy, validation loss, and validation accuracy.
Here’s the code:
class MyCallback(tf.keras.callbacks.Callback):
    def __init__(self):
        self.time_started = None
        self.time_finished = None

    def on_train_begin(self, logs=None):
        self.time_started = datetime.now()
        print(f'TRAINING STARTED | {self.time_started}\n')

    def on_train_end(self, logs=None):
        self.time_finished = datetime.now()
        train_duration = str(self.time_finished - self.time_started)
        print(f'\nTRAINING FINISHED | {self.time_finished} | Duration: {train_duration}')

        tl = f"Training loss:       {logs['loss']:.5f}"
        ta = f"Training accuracy:   {logs['accuracy']:.5f}"
        vl = f"Validation loss:     {logs['val_loss']:.5f}"
        va = f"Validation accuracy: {logs['val_accuracy']:.5f}"

        print('\n'.join([tl, vl, ta, va]))
Simple, right? Definitely, but it will be enough to start customizing the training log output. You can use the following code to train the model for five epochs (default):
model = build_and_train(
    callbacks=[MyCallback()]
)
Here’s the output you’ll see:
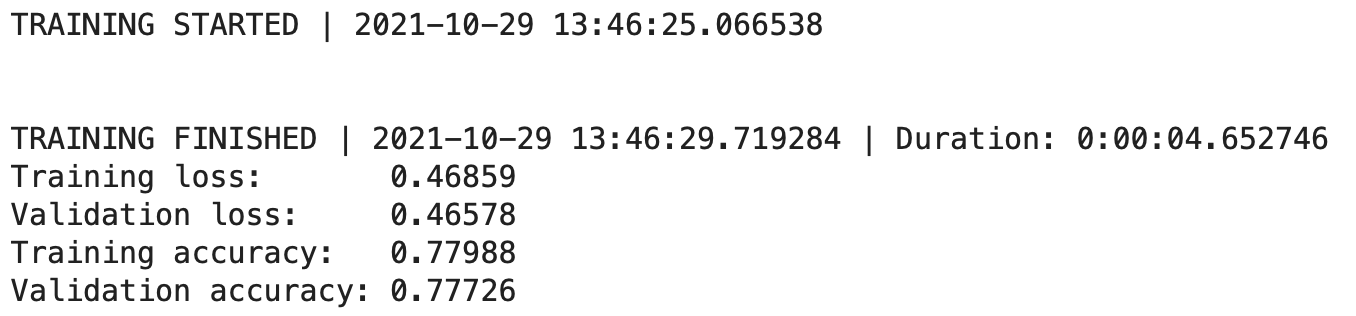
Image 3 — Custom TensorFlow callback v1 (image by author)
It’s a decent start, but we don’t see what happens at each epoch. Let’s change that next.
Modify epoch behavior with custom TensorFlow callbacks
You can modify what happens at the start and end of each epoch in the same way. We’ll print the epoch number, epoch duration, training loss and accuracy, and validation loss and accuracy.
Let’s start by adding an additional variable to the constructor —time_curr_epoch— it will get overriden each time a new epoch starts.
The on_epoch_begin() function will set the value of the current time to the time_curr_epoch variable in the constructor.
The on_epoch_end() function will calculate the epoch duration and get training loss, training accuracy, validation loss, and validation accuracy from the epoch logs. It will then print them out using a bit of Python’s f-string magic.
Here’s the code:
class MyCallback(tf.keras.callbacks.Callback):
    def __init__(self):
        self.time_started = None
        self.time_finished = None
        self.time_curr_epoch = None

    def on_train_begin(self, logs=None):
        self.time_started = datetime.now()
        print(f'TRAINING STARTED | {self.time_started}\n')

    def on_train_end(self, logs=None):
        self.time_finished = datetime.now()
        train_duration = str(self.time_finished - self.time_started)
        print(f'\nTRAINING FINISHED | {self.time_finished} | Duration: {train_duration}')

        tl = f"Training loss:       {logs['loss']:.5f}"
        ta = f"Training accuracy:   {logs['accuracy']:.5f}"
        vl = f"Validation loss:     {logs['val_loss']:.5f}"
        va = f"Validation accuracy: {logs['val_accuracy']:.5f}"

        print('\n'.join([tl, vl, ta, va]))

    def on_epoch_begin(self, epoch, logs=None):
        self.time_curr_epoch = datetime.now()

    def on_epoch_end(self, epoch, logs=None):
        epoch_dur = (datetime.now() - self.time_curr_epoch).total_seconds()
        tl = logs['loss']
        ta = logs['accuracy']
        vl = logs['val_loss']
        va = logs['val_accuracy']

        train_metrics = f"train_loss: {tl:.5f}, train_accuracy: {ta:.5f}"
        valid_metrics = f"valid_loss: {vl:.5f}, valid_accuracy: {va:.5f}"

        print(f"Epoch: {epoch:4} | Runtime: {epoch_dur:.3f}s | {train_metrics} | {valid_metrics}")
Let’s test the thing — remember, you should see new line printed at every epoch in addition to what we had before:
model = build_and_train(
    callbacks=[MyCallback()]
)
Here’s the output:
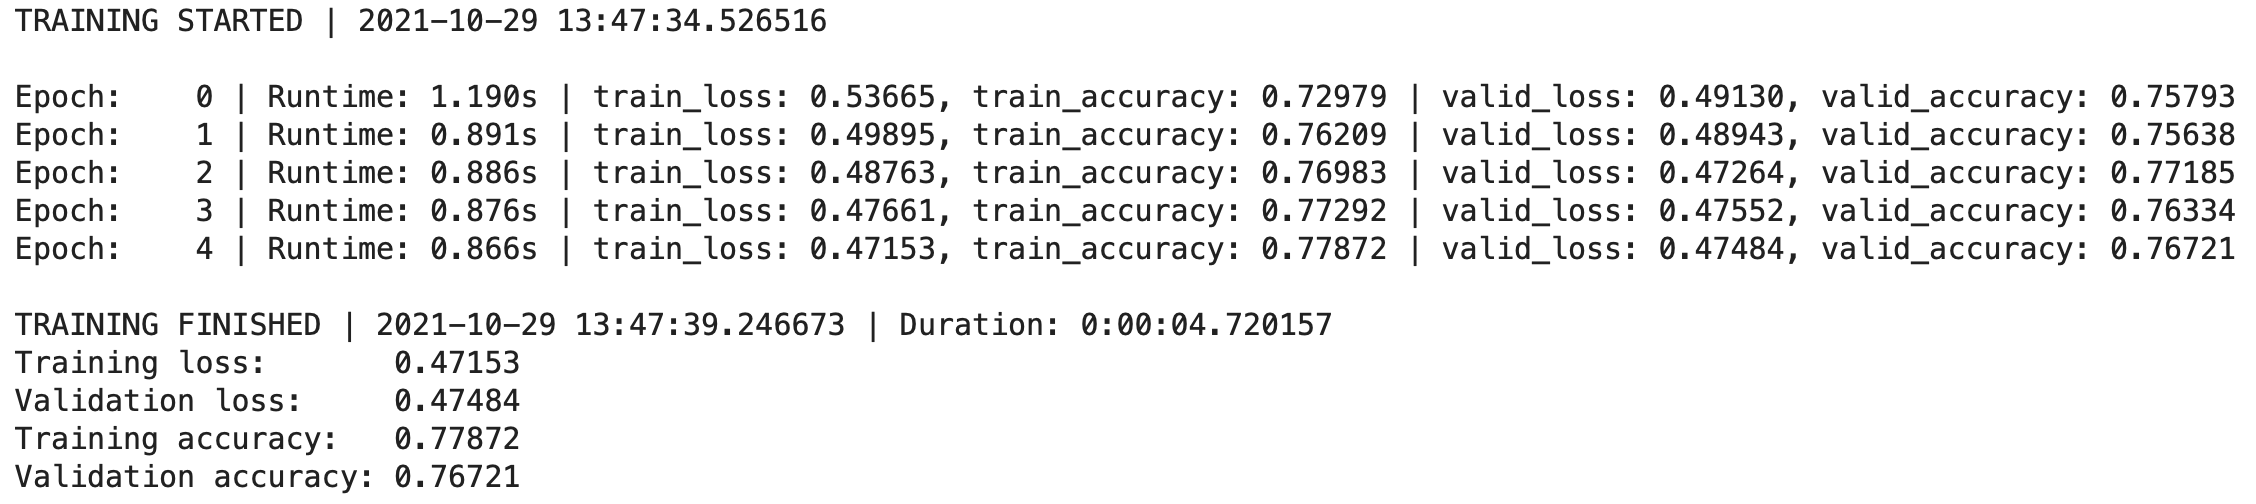
Image 4 — Custom TensorFlow callback v2 (image by author)
Neat, right? The story doesn’t end here. Let’s see how to visualize the model performance after the training completes next.
Visualize model performance with custom TensorFlow callbacks
Plotting training and validation metrics immediately tells you if the model is stuck or overfitting, and when it’s the right time to stop the training. That’s what we’ll do now. We’ll declare a helper function for visualizing model performance and then call it after training finishes.
To start, add a couple of variables to the constructor. You’ll need to track the number of epochs, loss, and accuracy — both on training and validation sets.
The _plot_model_performance() function will create a chart of 1 rows and 2 columns showing training and validation loss on the left, and training and validation accuracy on the right.
Inside the on_training_end() just call the _plot_model_performance() below everything.
Inside the on_epoch_end(), increment the number of epoch, and append the values of training loss, training accuracy, validation loss, and validation accuracy to the lists in the constructor.
Here’s the code:
class MyCallback(tf.keras.callbacks.Callback):
    def __init__(self):
        self.time_started = None
        self.time_finished = None
        self.time_curr_epoch = None
        self.num_epochs = 0
        self._loss, self._acc, self._val_loss, self._val_acc = [], [], [], []

    def _plot_model_performance(self):
        fig, (ax1, ax2) = plt.subplots(1, 2)
        fig.suptitle('Model performance', size=20)

        ax1.plot(range(self.num_epochs), self._loss, label='Training loss')
        ax1.plot(range(self.num_epochs), self._val_loss, label='Validation loss')
        ax1.set_xlabel('Epoch', size=14)
        ax1.set_ylabel('Loss', size=14)
        ax1.legend()

        ax2.plot(range(self.num_epochs), self._acc, label='Training accuracy')
        ax2.plot(range(self.num_epochs), self._val_acc, label='Validation Accuracy')
        ax2.set_xlabel('Epoch', size=14)
        ax2.set_ylabel('Accuracy', size=14)
        ax2.legend()

    def on_train_begin(self, logs=None):
        self.time_started = datetime.now()
        print(f'TRAINING STARTED | {self.time_started}\n')

    def on_train_end(self, logs=None):
        self.time_finished = datetime.now()
        train_duration = str(self.time_finished - self.time_started)
        print(f'\nTRAINING FINISHED | {self.time_finished} | Duration: {train_duration}')

        tl = f"Training loss:       {logs['loss']:.5f}"
        ta = f"Training accuracy:   {logs['accuracy']:.5f}"
        vl = f"Validation loss:     {logs['val_loss']:.5f}"
        va = f"Validation accuracy: {logs['val_accuracy']:.5f}"

        print('\n'.join([tl, vl, ta, va]))
        self._plot_model_performance()

    def on_epoch_begin(self, epoch, logs=None):
        self.time_curr_epoch = datetime.now()

    def on_epoch_end(self, epoch, logs=None):
        self.num_epochs += 1
        epoch_dur = (datetime.now() - self.time_curr_epoch).total_seconds()
        tl = logs['loss']
        ta = logs['accuracy']
        vl = logs['val_loss']
        va = logs['val_accuracy']

        self._loss.append(tl); self._acc.append(ta); self._val_loss.append(vl); self._val_acc.append(va)

        train_metrics = f"train_loss: {tl:.5f}, train_accuracy: {ta:.5f}"
        valid_metrics = f"valid_loss: {vl:.5f}, valid_accuracy: {va:.5f}"

        print(f"Epoch: {epoch:4} | Runtime: {epoch_dur:.3f}s | {train_metrics} | {valid_metrics}")
And that’s it! Let’s test it now — we’ll train the model for 50 epochs, just so the charts have a bit more data to show:
model = build_and_train(
    callbacks=[MyCallback()],
    num_epochs=50
)
Here’s what you’ll see after the training finishes:
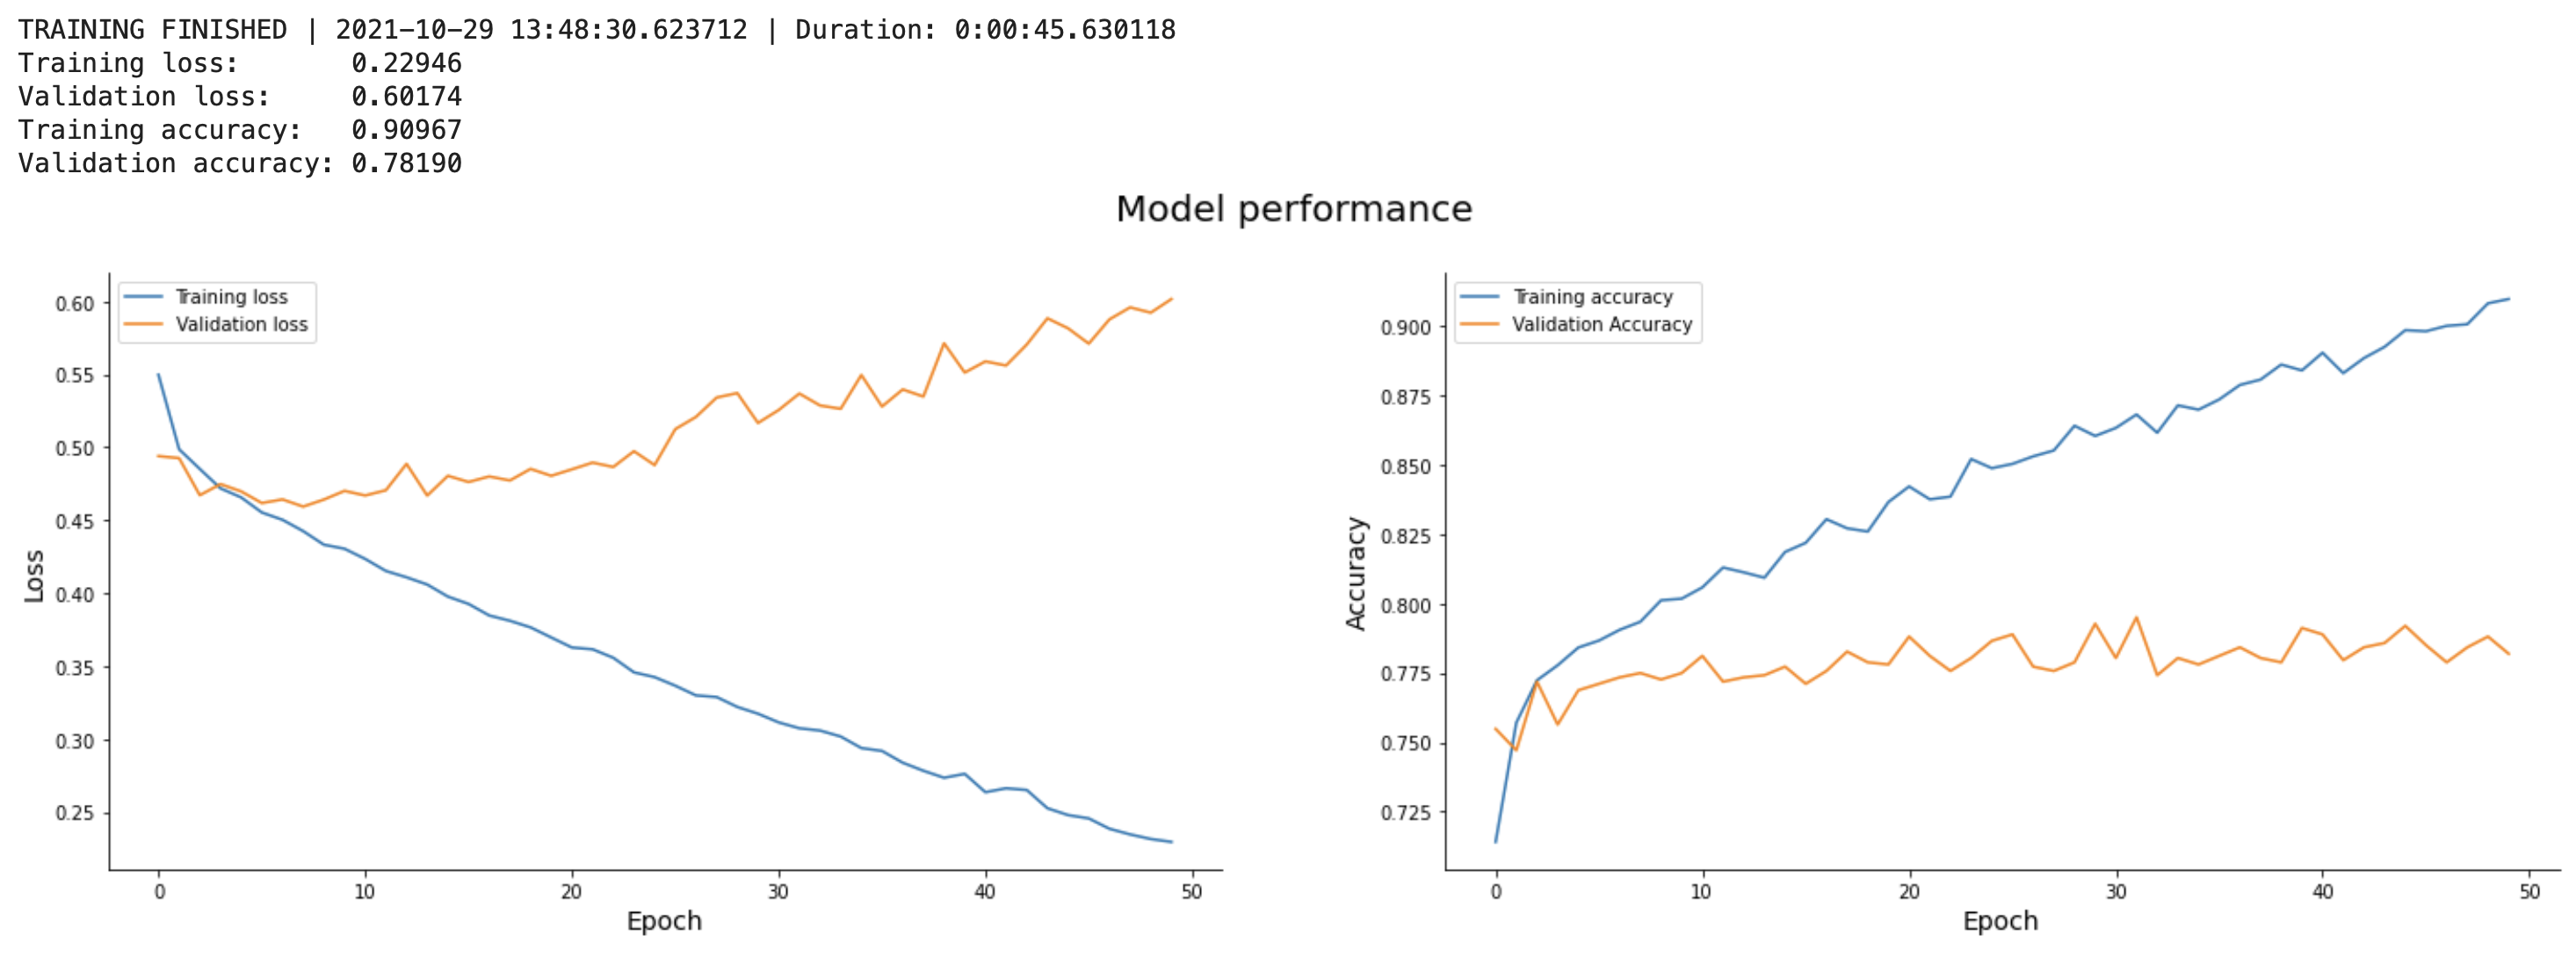
Image 5 — Custom TensorFlow callback v3 (image by author)
In a nutshell, training the model with the current architecture and parameters for 50 epochs doesn’t make sense. The validation loss starts to increase approximately after the 5th epoch, and the validation accuracy more or less plateaus at the same time.
Still, it’s one less thing you need to visualize manually.
Conclusion
And there you have it — the basics of custom callbacks with TensorFlow. We’ve covered only a fraction of available functions, so make sure to explore the official documentation for additional resources. It’s really well-written, and you’ll find examples on writing custom early stopping and learning rate scheduler callbacks.
Before you go all-in with writing custom callbacks from scratch, make sure the functionality you need isn’t already built into TensorFlow. You can check my previous article on four built-in callbacks I use on every deep learning project to get you started.
Stay tuned for the upcoming articles, as we’re starting a deep dive and computer vision and convolutional neural networks with TensorFlow from the following article.
Stay connected
- Sign up for my newsletter
- Subscribe on YouTube
- Connect on LinkedIn