How to Install PyTorch
TL;DR: You can install PyTorch by running the pip install pytorch command if you’re using Pip, or conda install pytorch if you’re using Anaconda. The overall installation for GPU/MPS support takes a bit more manual work, so that’s where the rest of the article comes in.
If you don’t know what PyTorch is, well, it’s an open-source machine learning framework often used for computer vision and natural language processing. It was originally developed by Meta AI in 2016 but is now a part of the Linux Foundation umbrella.
Today’s article will teach you everything you need to know about PyTorch 2.0+ installation with a special emphasis on M1 Mac configuration with MPS acceleration. You won’t have any trouble following this guide f you don’t have a M1 MacBook, since the M1 configuration is part of a bonus article section.
Table of contents:
Find The PyTorch Installation Command
Okay, so the first step is to find the correct installation command. It will differ based on your operating system (Mac, Windows, Linux), Python configuration (Pip, Anaconda), and whether you’re using CUDA or not.
Head over to the official get started page and click on the options that match your environment.
For reference, I’m installing PyTorch on an M1 Pro MacBook. I want to install the most recent stable release through Anaconda, so my options look like this:
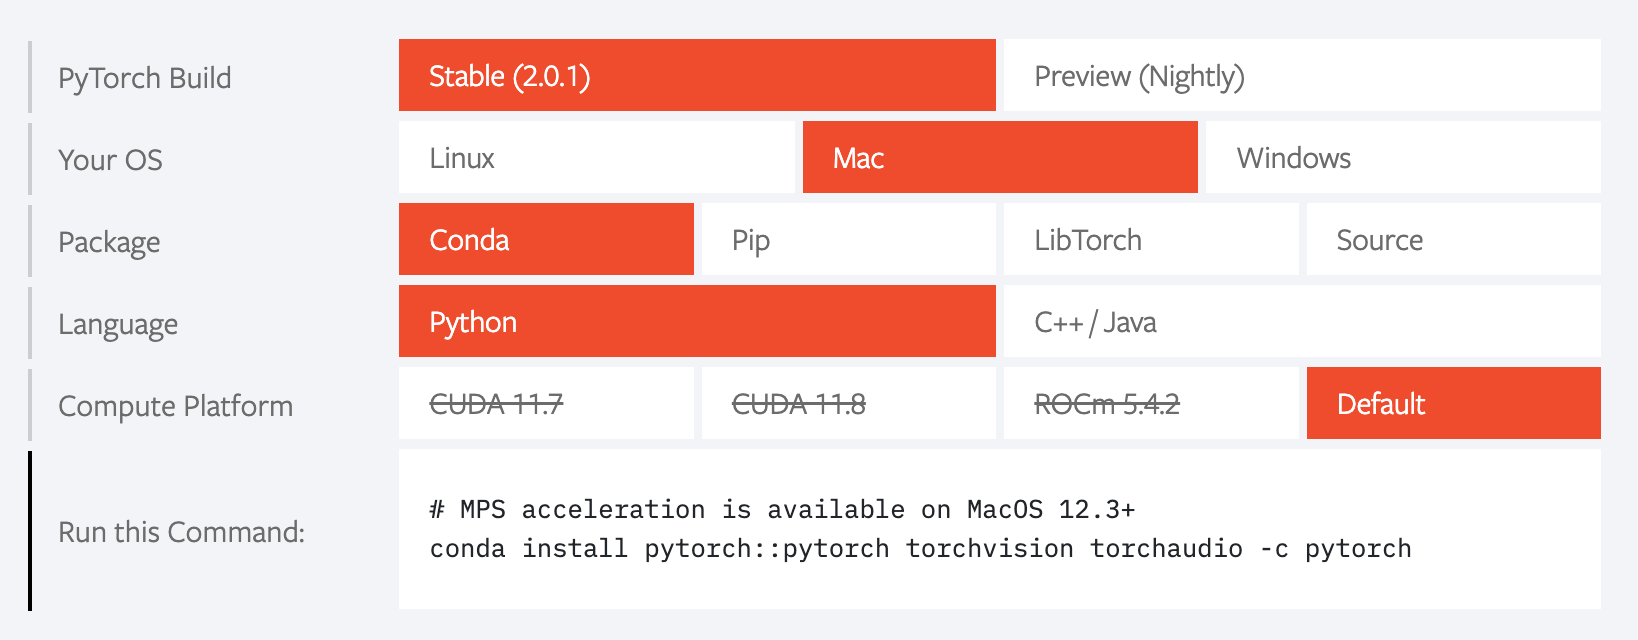
Image 1 - PyTorch installation command (Image by author)
You can see that PyTorch gives you an installation command. But should you run it as is? Probably not, since it’s the best idea to configure a virtual environment first.
Install PyTorch Locally
This section will show you how to create and activate a new Python virtual environment, how to install PyTorch, and how to install a couple of other necessary data science libraries. Let’s start with the virtual environment.
Create a New Virtual Environment
I’m using Anaconda, so the environment creation boils down to issuing a conda create command followed by the environment name and Python version. The optional -y flag will accept any prompt for installing additional dependencies:
conda create --name env_pytorch python=3.9 -y
Here’s what you should see on the screen:
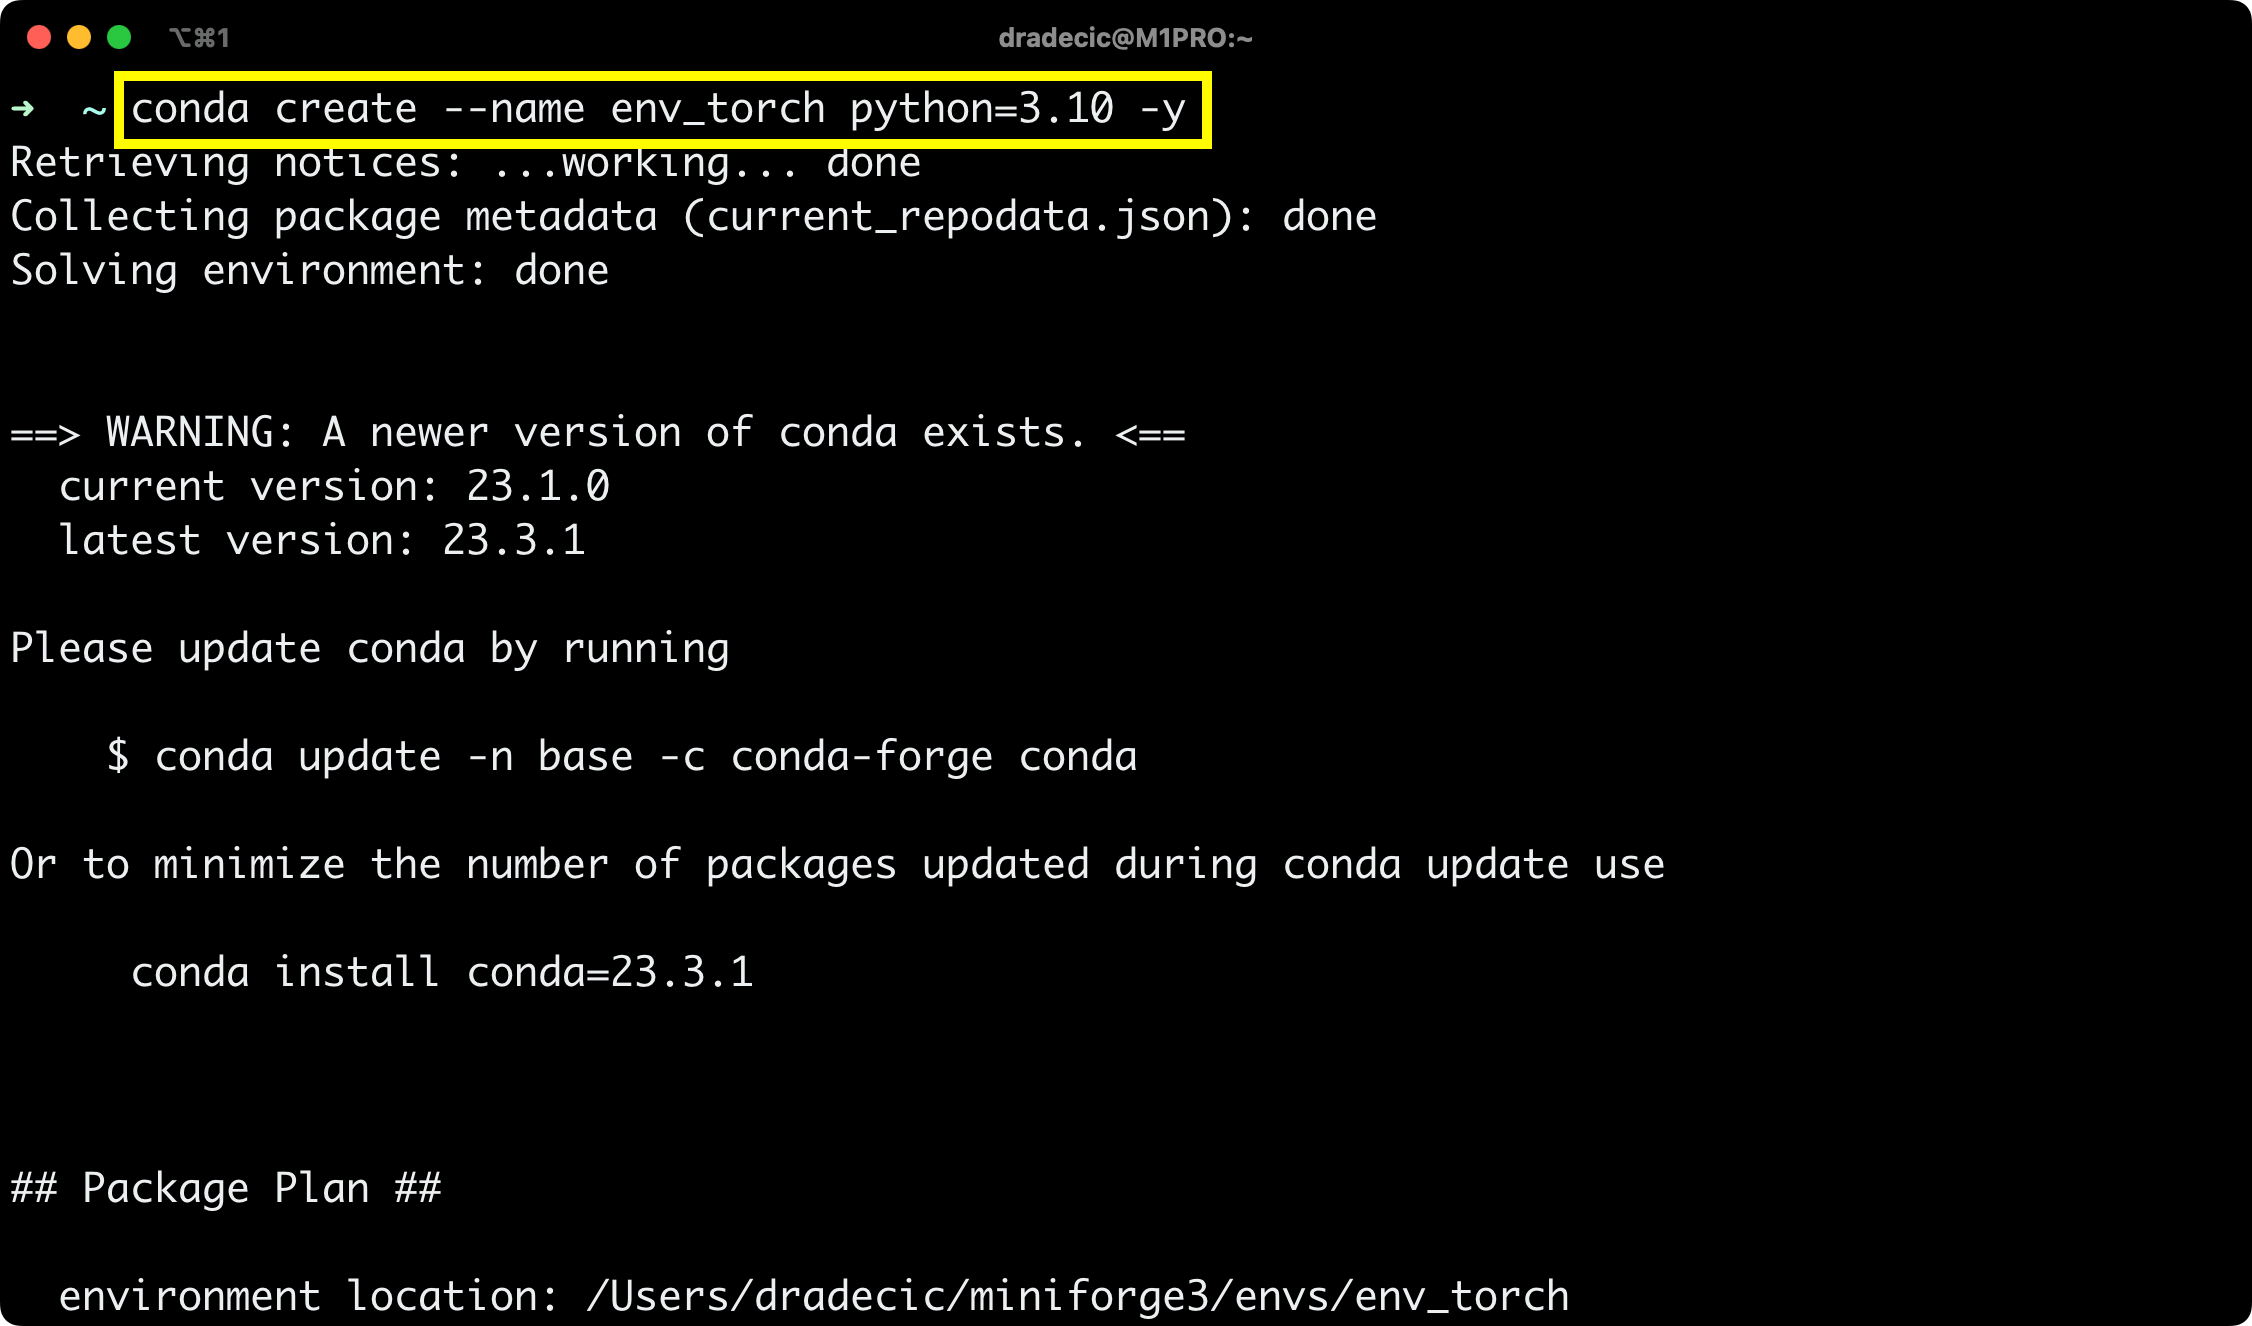
Image 2 - Creating a new virtual environment (Image by author)
If you’re using pip, run python -m venv env_pytorch instead.
To activate the environment using Anaconda, run the following command:
conda activate env_pytorch
You’ll immediately see the environment name in brackets before the current working directory marker:
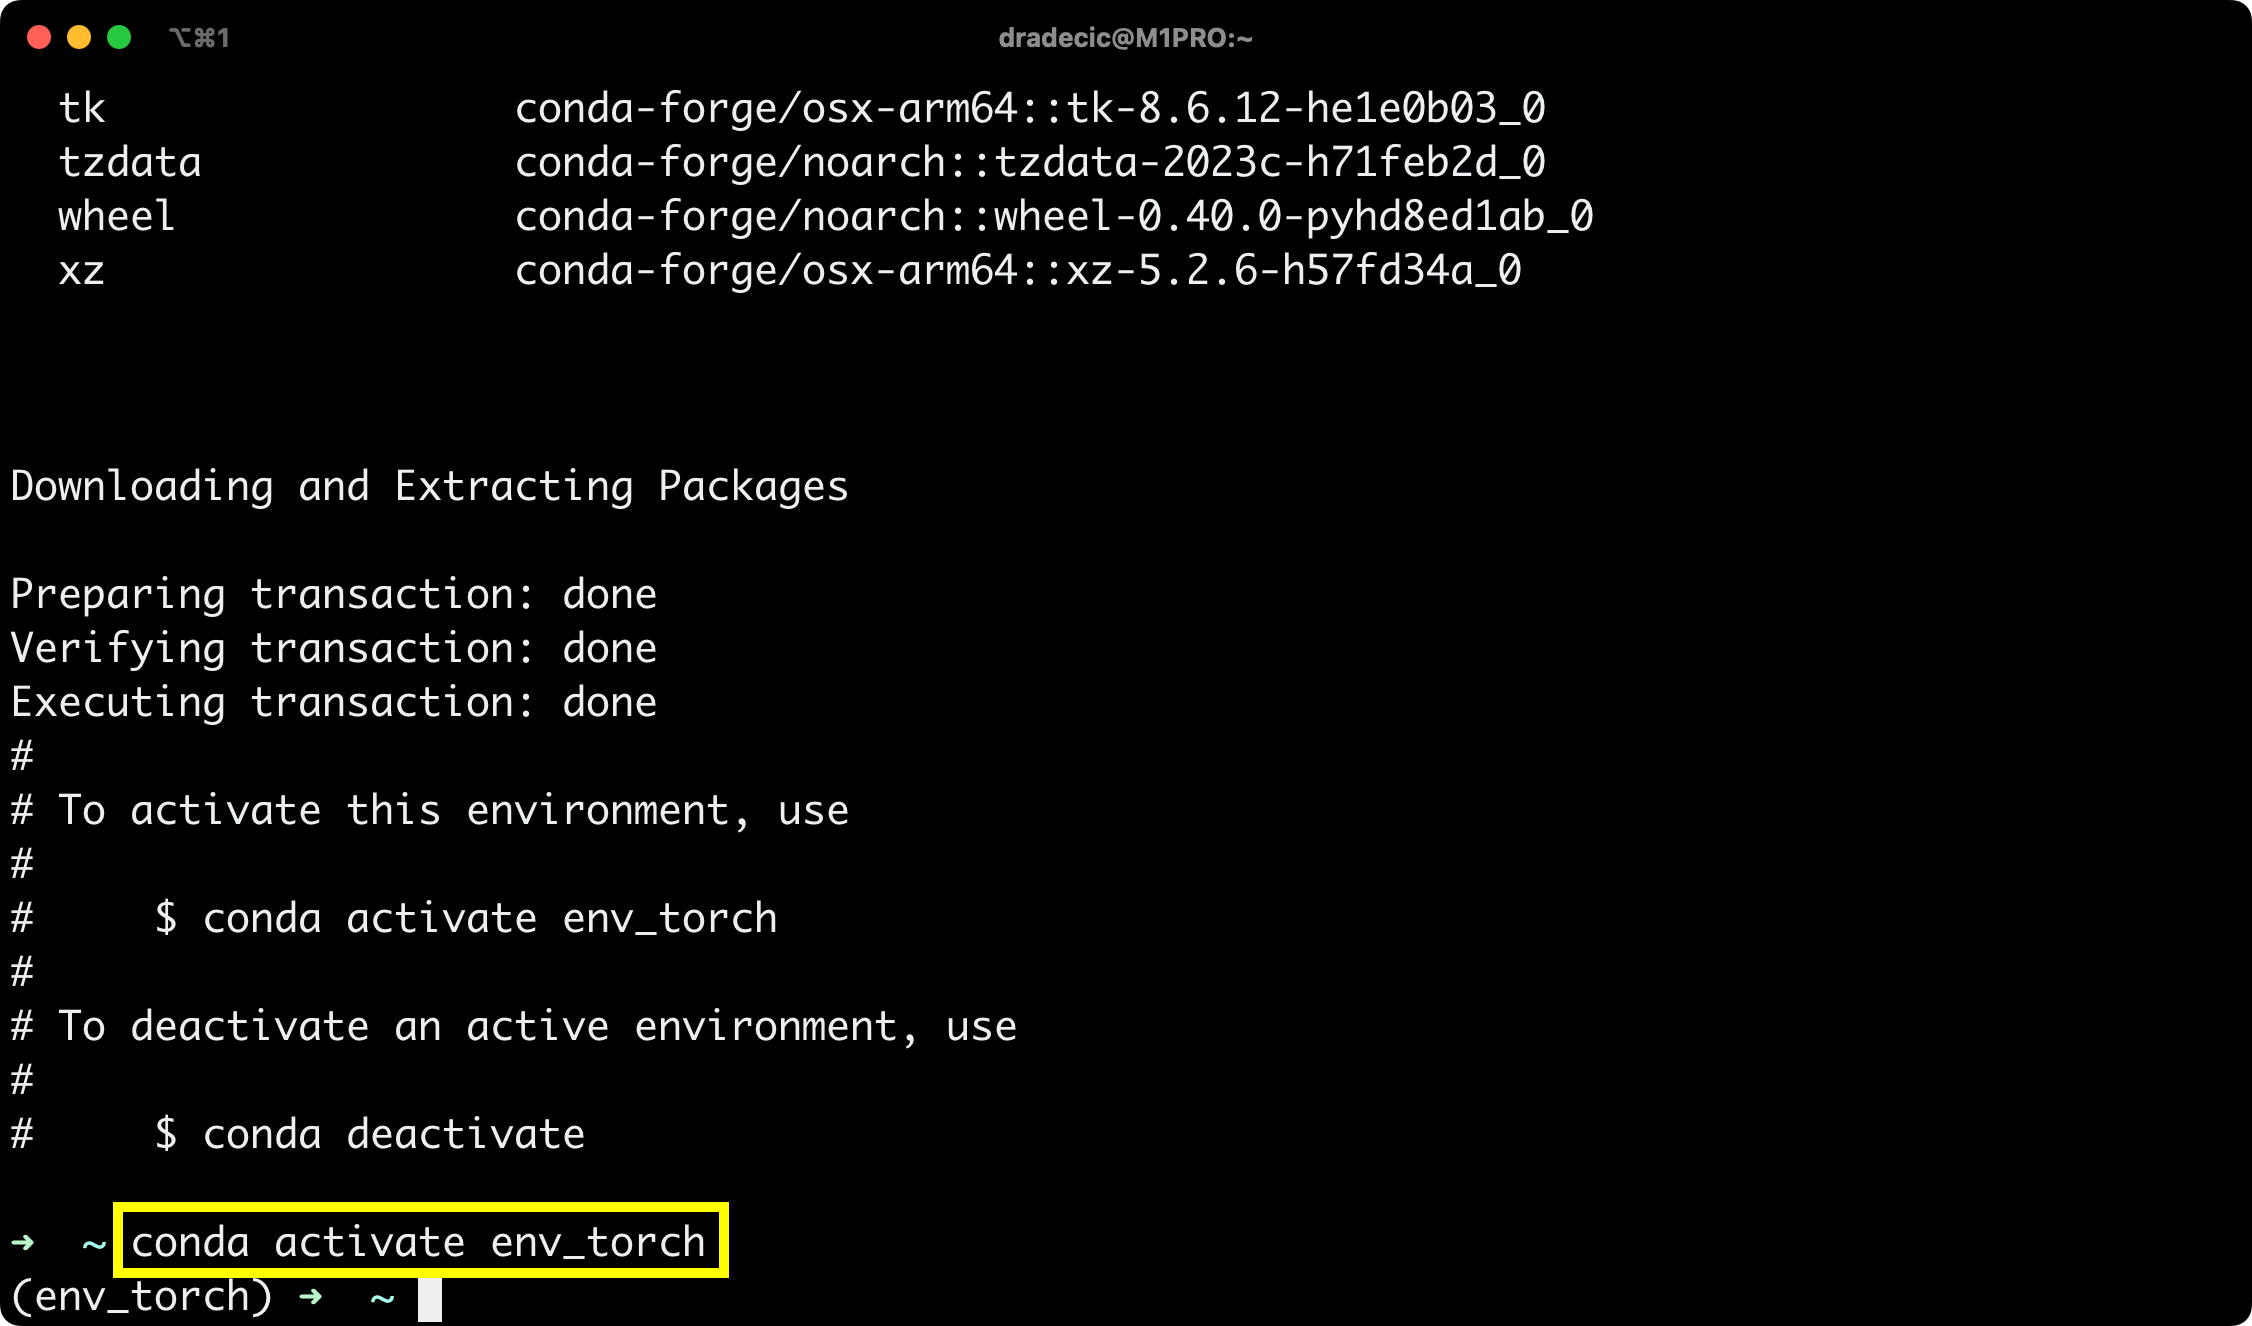
Image 3 - Activating a new virtual environment (Image by author)
The alternative Pip command would be source env_pytorch/bin/activate.
You’re now inside a fresh virtual environment, which means you can proceed with installing PyTorch.
Install PyTorch
Remember your customized PyTorch installation command from the beginning of the article? Paste it into the Terminal.
Here’s what mine looks like:
conda install pytorch::pytorch torchvision torchaudio -c pytorch
You’ll see a bunch of messages during the installation, and the whole process might take a while, depending on your Internet speed:
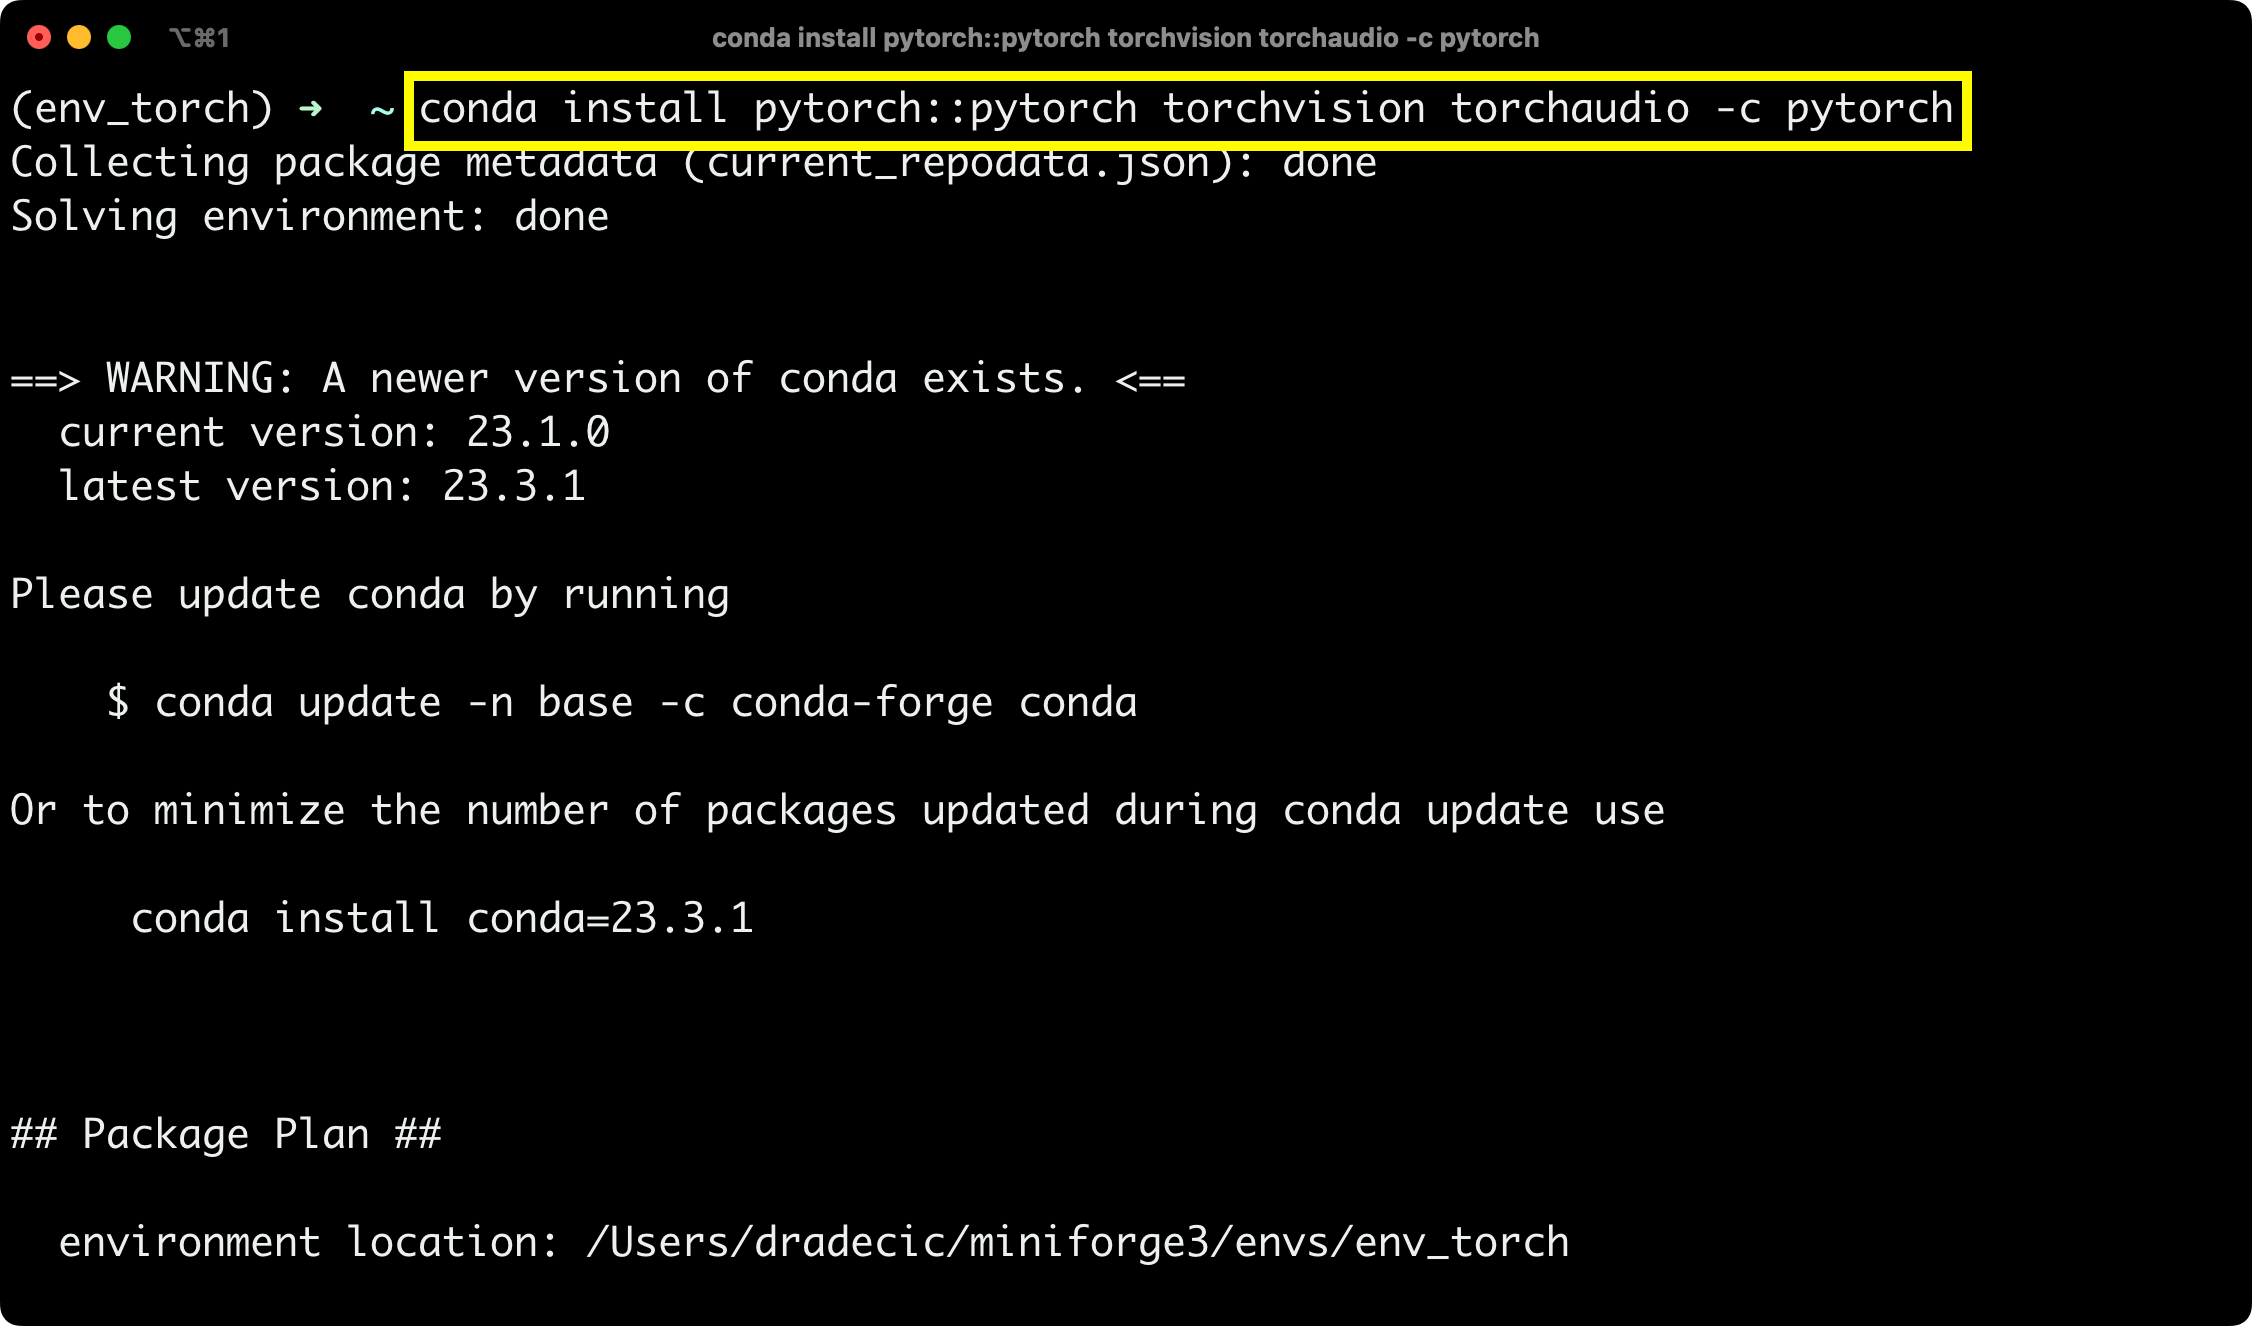
Image 4 - Installing PyTorch (Image by author)
If you don’t see any error messages, this means PyTorch was successfully installed! Let’s also grab some essential data science libraries while we’re here.
Install Additional Libraries (Optional)
PyTorch is now configured, but it’s a good idea to install other libraries you’ll need when working with it. In my case, these include Pandas, Jupyter, Matplotlib, and Scikit-Learn.
Feel free to add any other to the list, and then run the appropriate installation command:
conda install pandas jupyter jupyterlab scikit-learn matplotlib
This is the output you should see:
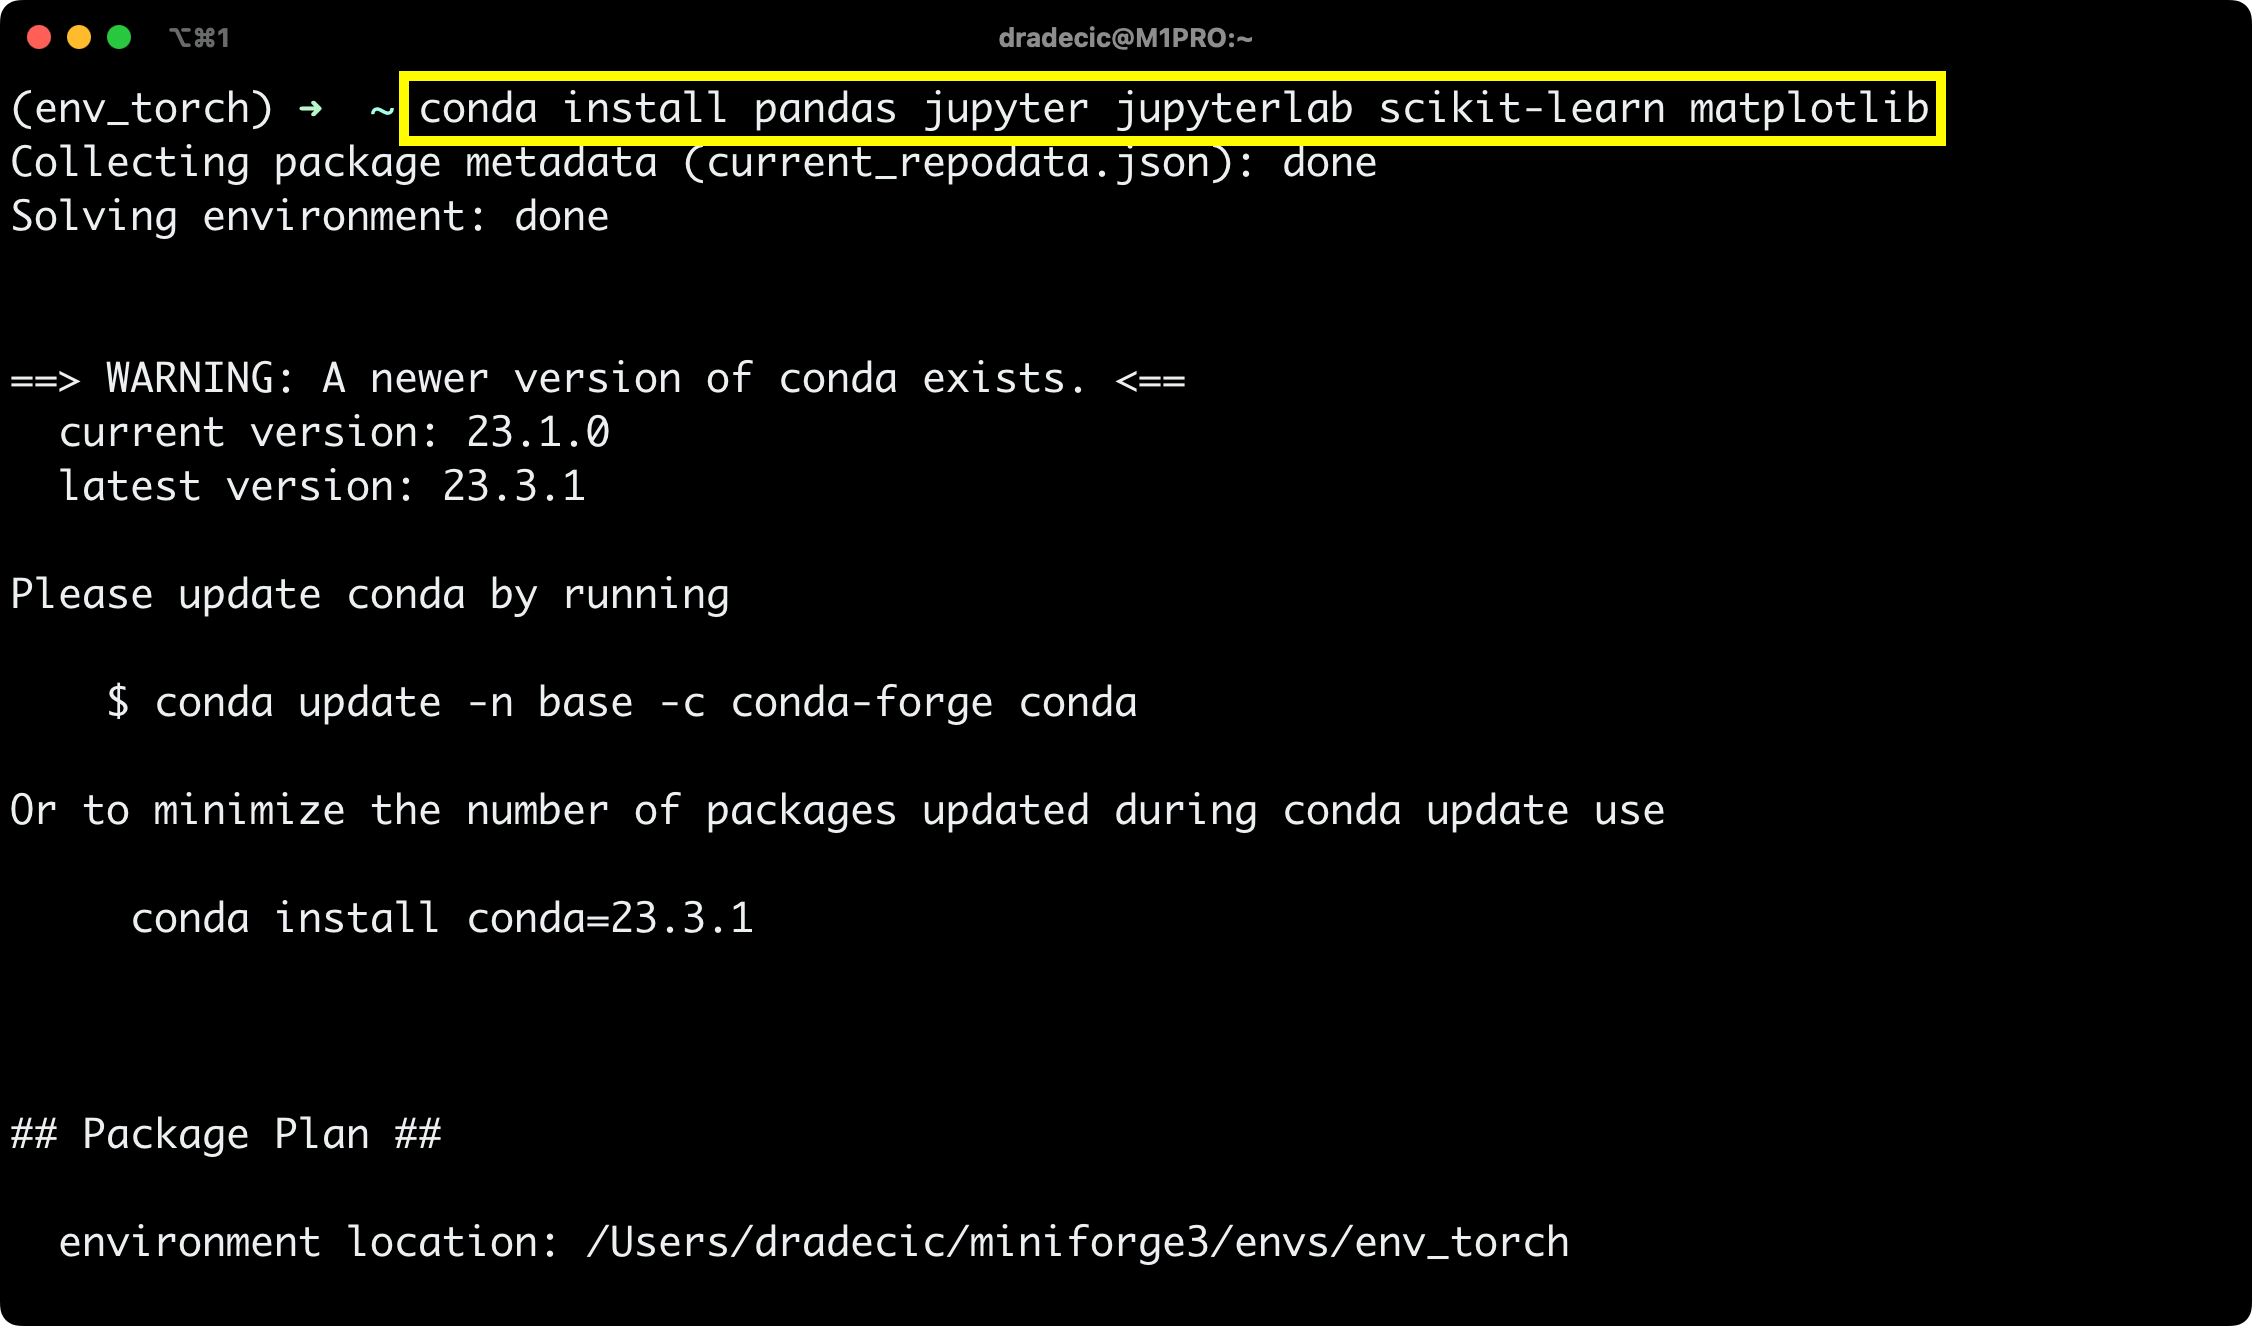
Image 5 - Installing additional data science libraries (Image by author)
These are now installed, which means we have everything needed to make a couple of PyTorch checks.
Test PyTorch Installation
I’ll use Jupyter Lab for this section. You can do the same by running the following shell command inside your virtual environment:
jupyter lab
Jupyter Lab will now open in a new browser tab.
PyTorch Version Check
Up first, let’s check the PyTorch version. At the time of writing this article (May 2023), the latest stable version is 2.0.1.
You can import PyTorch and access its __version__ property:
import torch

print(torch.__version__)
This is the output you should see:
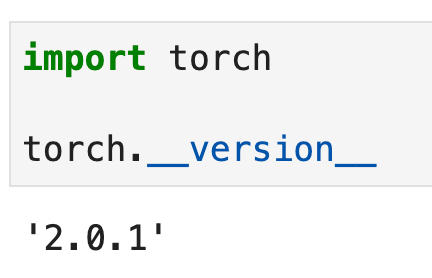
Image 6 - PyTorch version check (Image by author)
Congratulations - you have the most recent stable version of PyTorch installed. What follows is an optional section of additional Apple M1 configurations.
MPS Check (Apple M1)
Apple Silicon machines can’t accelerate the neural network training process with CUDA, since it’s only available on Nvidia GPUs. Since macOS version 12.3, you can use MPS to make training faster.
MPS stands for Metal Performance Shaders, and enables high-performance training on GPU for macOS devices with Metal programming framework.
You can use the following two commands to verify if the MPS backend is available and if your PyTorch version was built with MPS:
# Is MPS even available? macOS 12.3+
print(torch.backends.mps.is_available())

# Was the current version of PyTorch built with MPS activated?
print(torch.backends.mps.is_built())
This is the output you should see:

Image 7 - PyTorch MPS check (Image by author)
So far, so good.
But the ultimate installation test is actually going through the “learning” process. To do this, I’ll copy the code snippet from Nikos Kafritsas’s article on Medium. This example will move all the computations to the Mac’s GPU:
import math

dtype = torch.float
device = torch.device("mps")

# Create random input and output data
x = torch.linspace(-math.pi, math.pi, 2000, device=device, dtype=dtype)
y = torch.sin(x)

# Randomly initialize weights
a = torch.randn((), device=device, dtype=dtype)
b = torch.randn((), device=device, dtype=dtype)
c = torch.randn((), device=device, dtype=dtype)
d = torch.randn((), device=device, dtype=dtype)

learning_rate = 1e-6
for t in range(2000):
    # Forward pass: compute predicted y
    y_pred = a + b * x + c * x ** 2 + d * x ** 3

    # Compute and print loss
    loss = (y_pred - y).pow(2).sum().item()
    if t % 100 == 99:
        print(t, loss)

    # Backprop to compute gradients of a, b, c, d with respect to loss
    grad_y_pred = 2.0 * (y_pred - y)
    grad_a = grad_y_pred.sum()
    grad_b = (grad_y_pred * x).sum()
    grad_c = (grad_y_pred * x ** 2).sum()
    grad_d = (grad_y_pred * x ** 3).sum()

    # Update weights using gradient descent
    a -= learning_rate * grad_a
    b -= learning_rate * grad_b
    c -= learning_rate * grad_c
    d -= learning_rate * grad_d


print(f'Result: y = {a.item()} + {b.item()} x + {c.item()} x^2 + {d.item()} x^3')
This is the output I got after a couple of seconds:
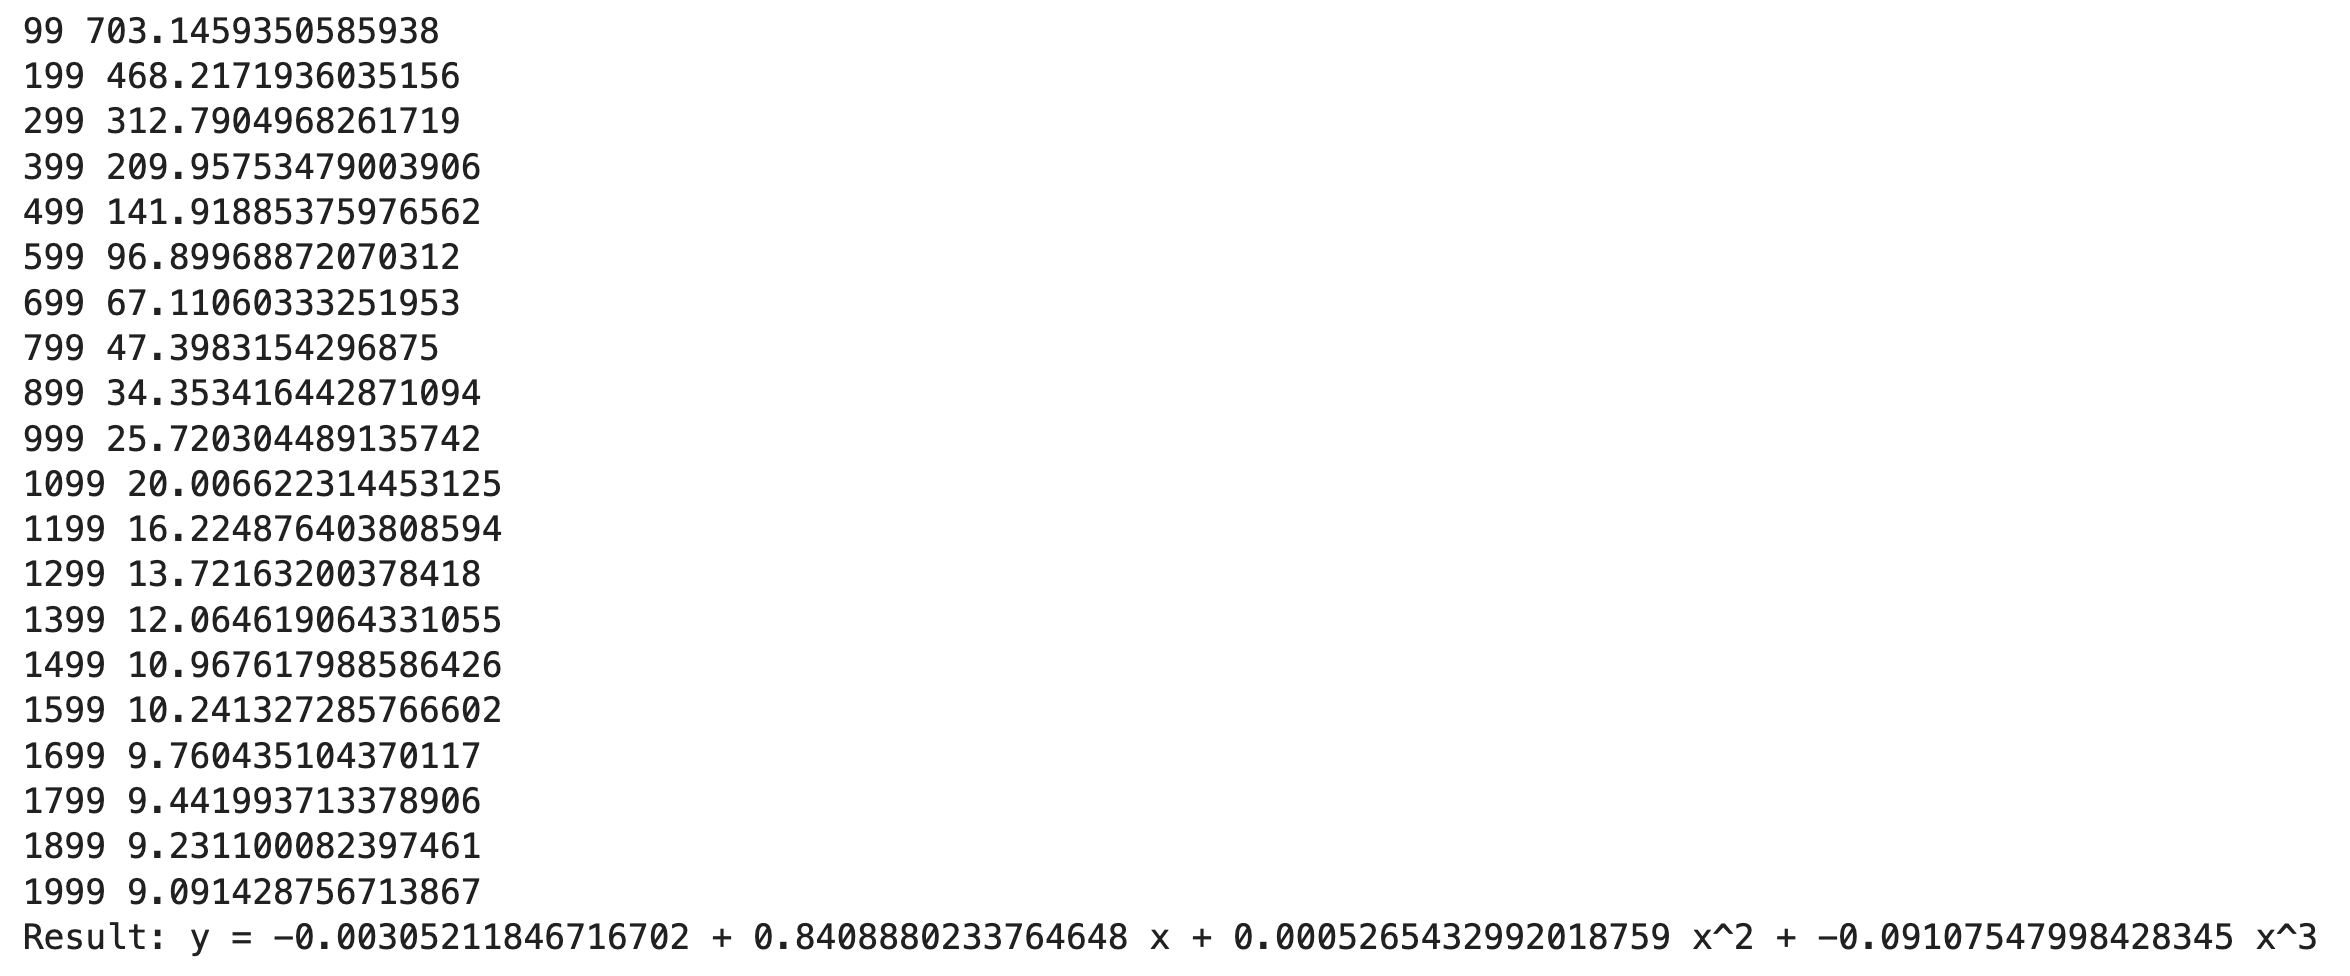
Image 8 - PyTorch MPS check (2) (Image by author)
And that’s how you can install PyTorch 2.0 on an M1 Mac. Easy!
Summing Up How to Install PyTorch
Installing PyTorch locally was the necessary first step to start exploring neural network models. You now have everything configured, so join me in the following article in which I’ll go over a basic PyTorch regression example.