Python Dotenv
Managing your Python application’s environment variables can be a challenge, especially if you’re dealing with sensitive information like API keys or database credentials. This is where python-dotenv comes into play. It’s a library that allows you to manage and organize your environment variables securely and conveniently.
With Python-dotenv, you can store your environment variables in a .env file. This file can be easily managed and kept separate from your application code, preventing sensitive information from being accidentally leaked or hard-coded into your Python script. To get started, all you need to do is install the Python-dotenv package and use the load_dotenv() function to automatically load your environment variables from the .env file.
By integrating Python-dotenv into your projects, you’ll be better equipped to manage your application’s settings while adhering to security best practices. Not only does it make your code more secure, but it also simplifies the processes of local development, testing, and deployment.
Let’s dive in!
Table of contents:
Getting Started with Python Dotenv
This section will walk you through the installation of the python-dotenv library and will show you how to configure your .env file.
Installation
To begin using Python Dotenv, you first need to install it in your project. You can easily do this using the package installer pip. Open your terminal or command prompt and run the following command:
pip install python-dotenv
You’ll see a similar-looking output:
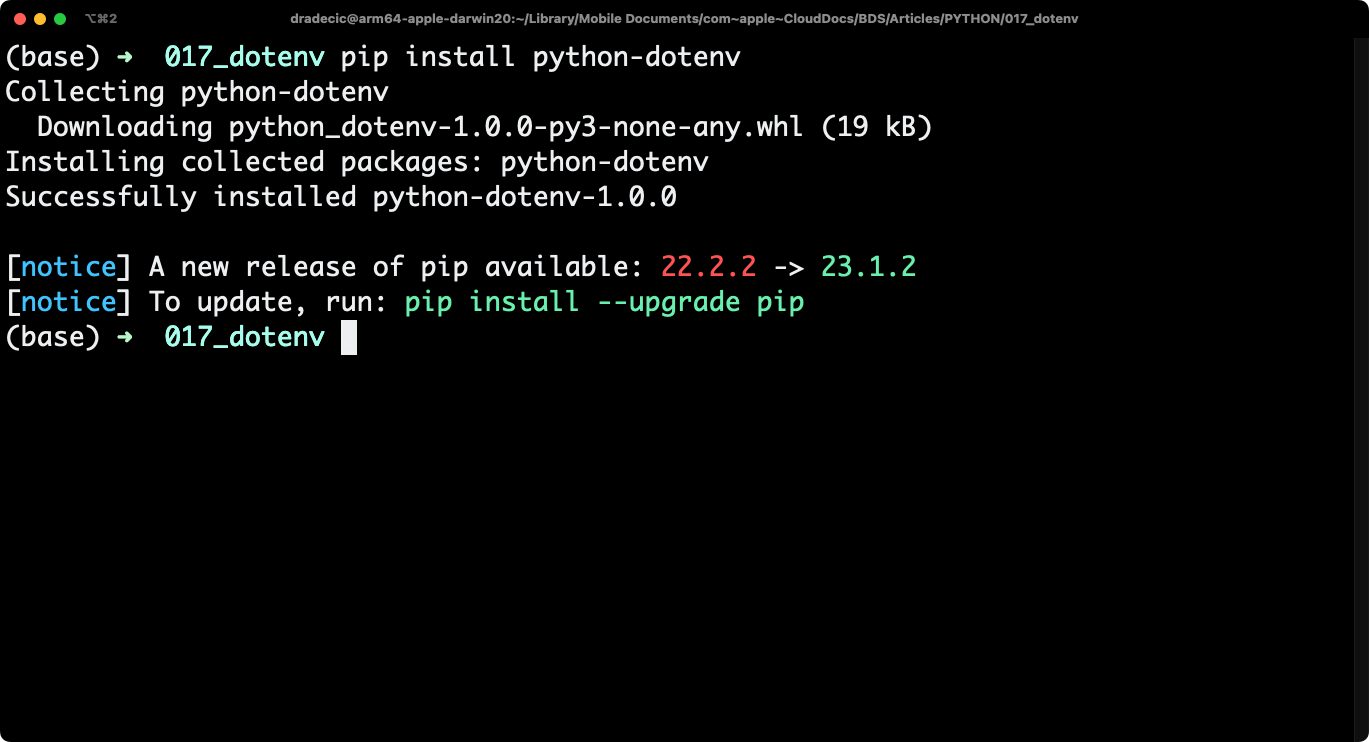
Image 1 - Installing Python Dotenv (Image by author)
This took care of the library installation, so next, let’s set up the .env file.
Setting up the .env File
After installing the package, it’s time to create a new .env file in the root directory of your project. This file is where you’ll store sensitive information, such as API keys and database credentials, which should not be publicly accessible.
To set up the .env file, follow these simple steps:
- In your project root directory, create a new file named
.env. - Open the file and add key-value pairs for each environment variable you want to store. For example:
API_KEY=abcd1234ef56
DATABASE_URL=mydatabase://123
SECRET_KEY=secret
- Save the file and close it.
Here’s what it should look like:
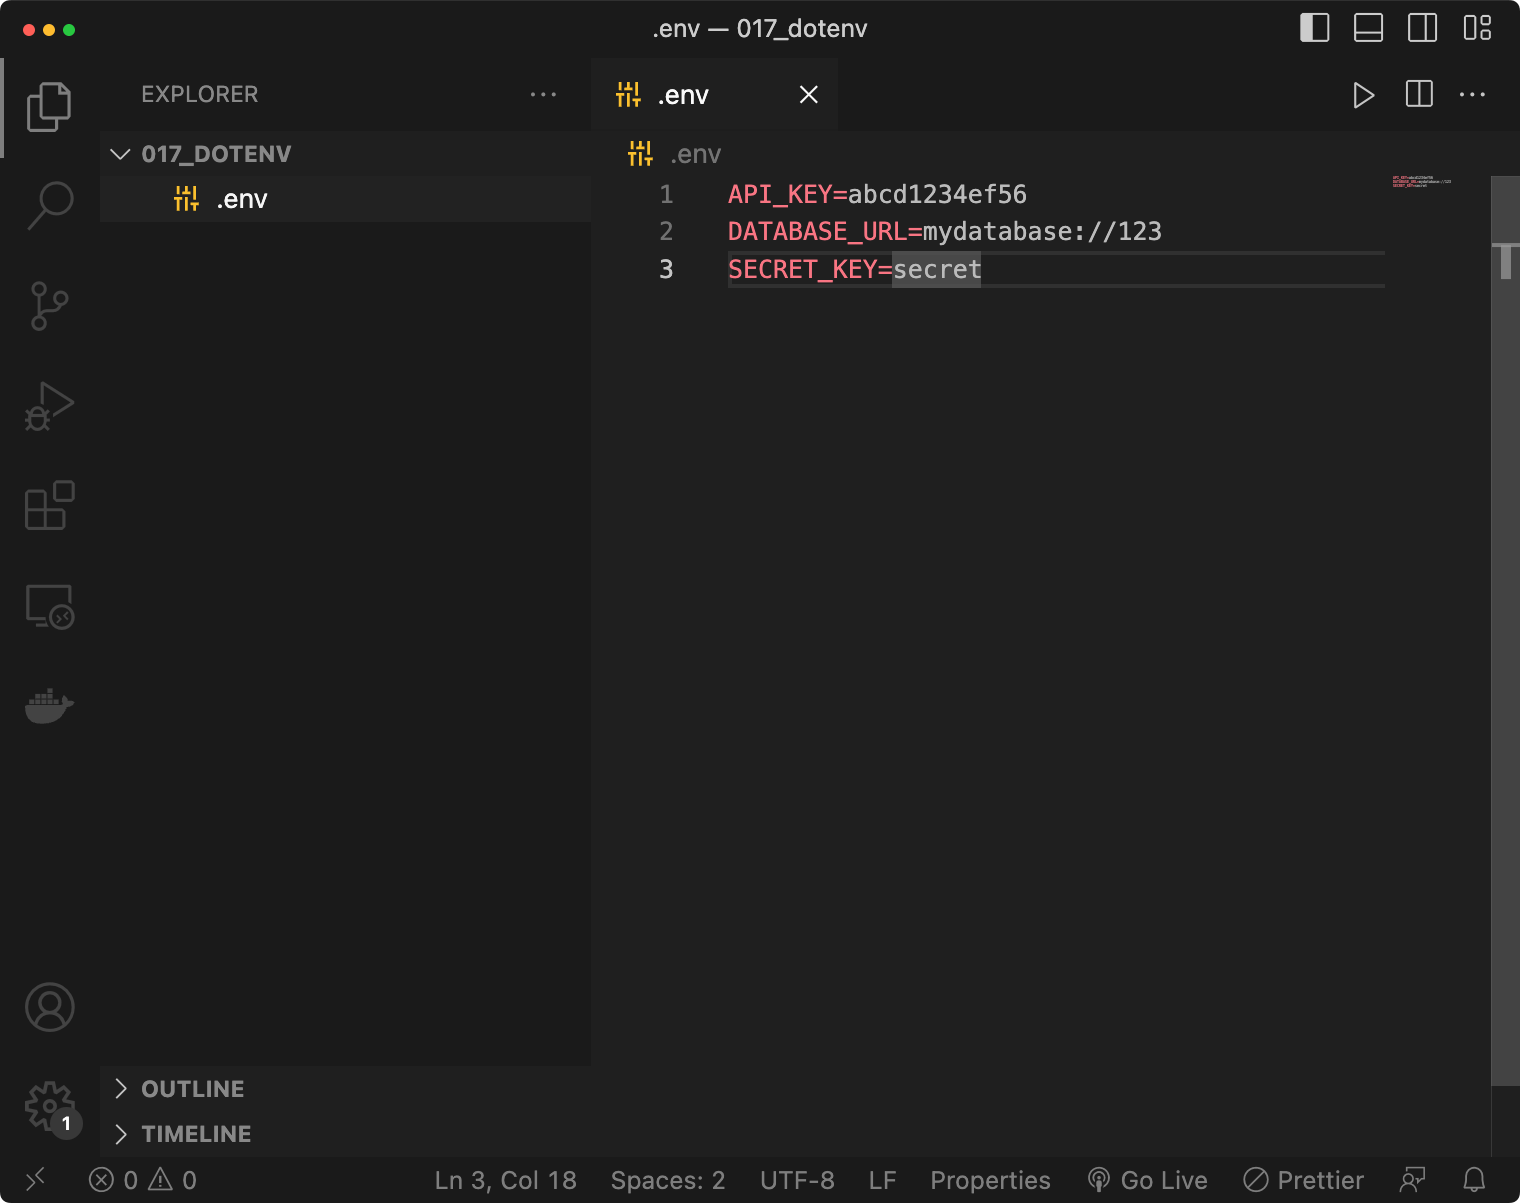
Image 2 - Python Dotenv file structure (Image by author)
You now have the .env file created. The next step is to actually use it in your Python scripts. There are a couple of ways to do so, so let’s go over them next.
Loading Environment Variables with Python Dotenv
Now that your .env file is set up, you can utilize the load_dotenv() function to load the stored environment variables into your application. We’ll explore two ways of doing this now.
Basic Setup with load_dotenv()
Create a new Python file and name it however you want - we’ve named ours app.py. Inside, import the load_dotenv function from the dotenv module, and call the load_dotenv() after library imports to load the stored environment variables into your application.
The following snippet does just that, and it also fetches each environment variable individually and prints them out:
import os
from dotenv import load_dotenv

# Load the stored environment variables
load_dotenv()

# Get the values
api_key = os.getenv("API_KEY")
database_url = os.getenv("DATABASE_URL")
secret = os.getenv("SECRET_KEY")

# Print the values
print(f"API_KEY = {api_key}")
print(f"DATABASE_URL = {database_url}")
print(f"SECRET = {secret}")
This is what you’ll see after running the Python script:
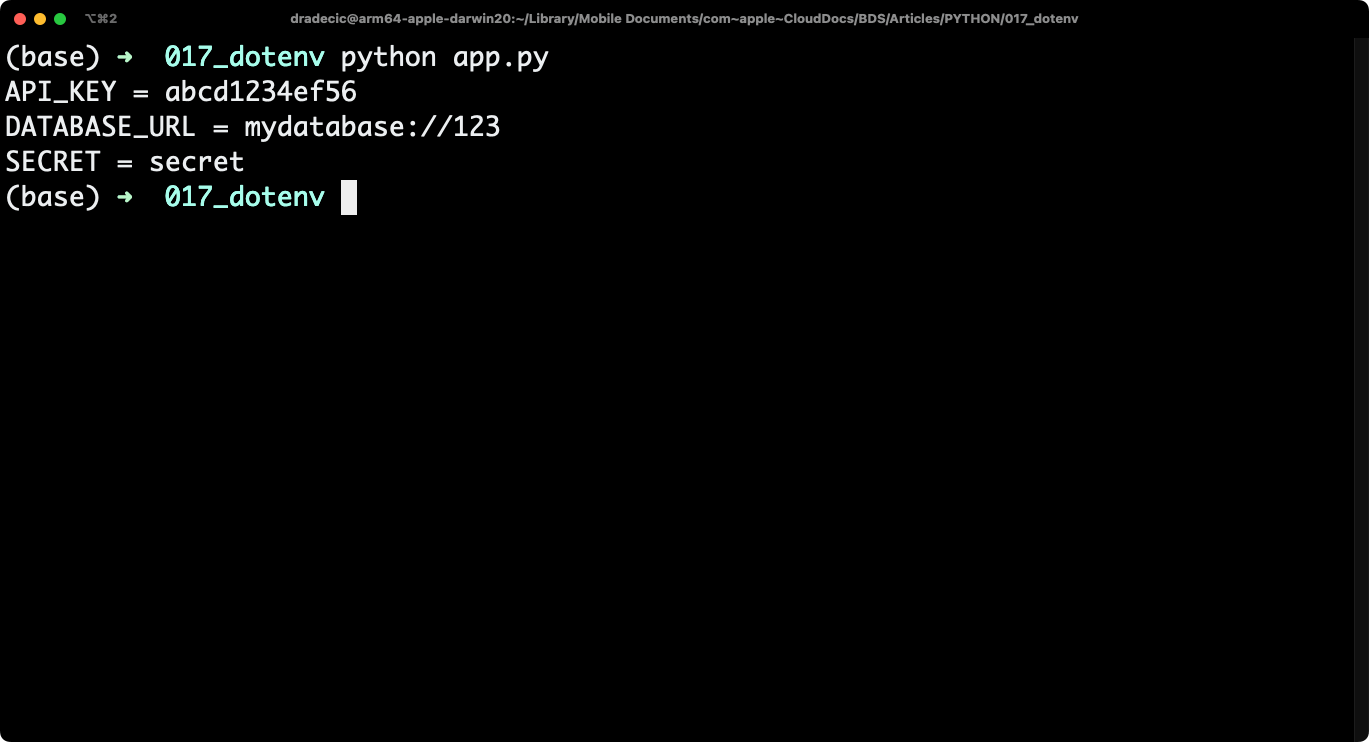
Image 3 - The load_env() function (Image by author)
And that’s it! With Python Dotenv installed and your .env file set up, you can now keep sensitive information secure while still making it easily accessible throughout your application. Remember to always keep your .env file out of version control systems such as Git to prevent accidental exposure of your private data. That’s something we’ll go over in a couple of sections.
Loading Environment Variables as a Dictionary
In this example, we’ll use the same load_dotenv() function to load the environment variables, but this time, we’ll store all environment variables in a single Python dictionary.
This means you won’t have a single Python variable for every environment variable you want to reference, as you’ll extract all of them from the dictionary itself. This approach is preferred by some when there are many environment variables in your application:
import os
from dotenv import load_dotenv

# Load the stored environment variables
load_dotenv()

# Get them
ev = dict(os.environ)

# Print them
print(f"API_KEY = {ev['API_KEY']}")
print(f"DATABASE_URL = {ev['DATABASE_URL']}")
print(f"SECRET = {ev['SECRET_KEY']}")
Here’s the output you should see:
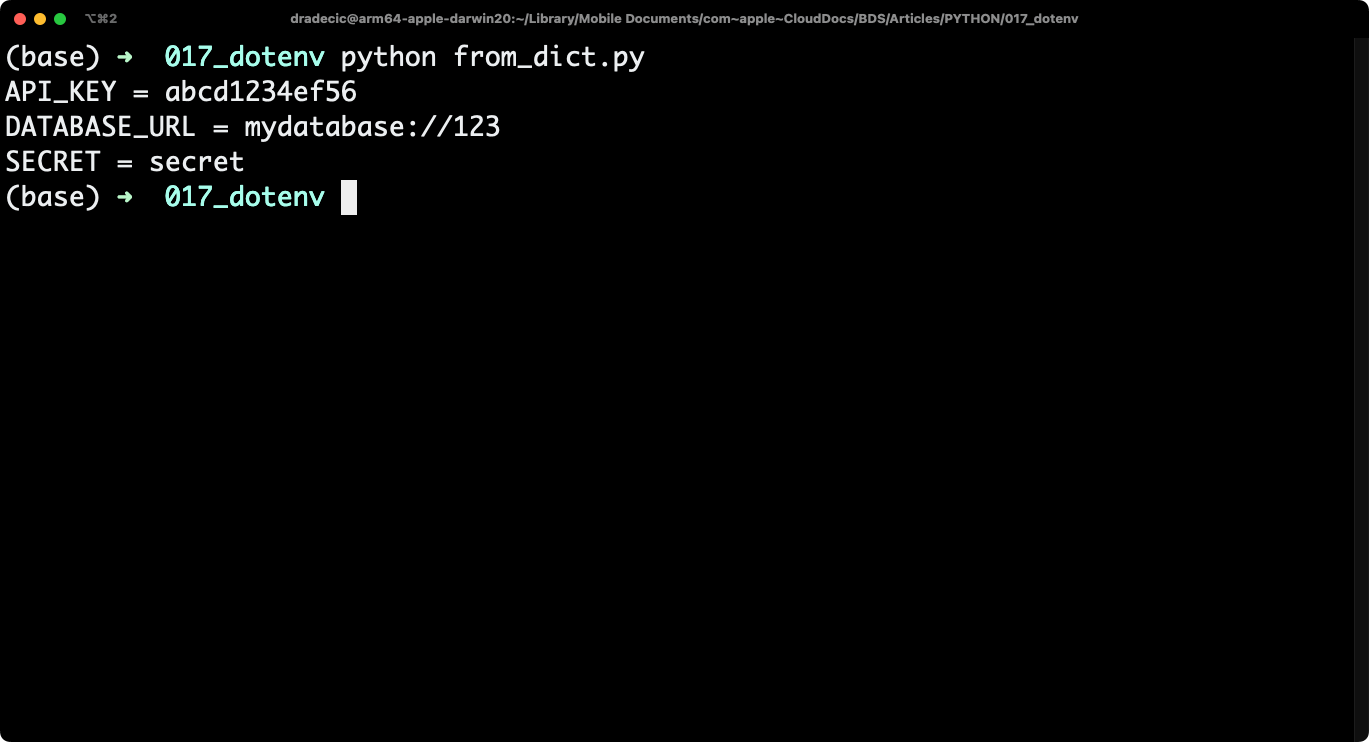
Image 4 - Environment variables from a dictionary (Image by author)
You now know how to load environment variables from .env file in Python. Next, we’ll go over managing environment variables among different code environments.
Managing Variables in Different Environments
When working with Python applications, you need to manage environment variables effectively to ensure smooth operation across different environments. In this section, we’ll look into how you can successfully handle variables in development and production environments.
To start, change the contents of your .env file to the following:
DEV_DB_USER="user_dev"
DEV_DB_PASS="pass_dev"
PROD_DB_USER="user_prod"
PROD_DB_PASS="pass_prod"
And now, let’s go over the best way to load the correct set of variables, depending on your code environment.
Development and Production Environments
You can use Python’s built-in platform module to get the OS on which the Python script is currently running. By doing so, you can make a distinction:
- If Linux, it’s a production environment
- Else, it’s a development environment
Now, I don’t have a Linux machine near me so I’ll do the manipulation with darwin (macOS) instead.
Depending on the detected operating system, you’ll know whether the environment variable should start with DEV or PROD. Then, it’s just a matter of using Python’s f-strings to get the correct ones from the .env file.
Refer to the following code snippet:
import os
import platform
from dotenv import load_dotenv

# Detect platform to set the environment
environ = "DEV" if platform.system().lower() == "darwin" else "PROD"

# Load the stored environment variables
load_dotenv()

# Get the values
db_user = os.getenv(f"{environ}_DB_USER")
db_pass = os.getenv(f"{environ}_DB_PASS")

# Print the values
print(f"USER = {db_user}")
print(f"PASS = {db_pass}")
This is the output you should see if you’re running the code on macOS:
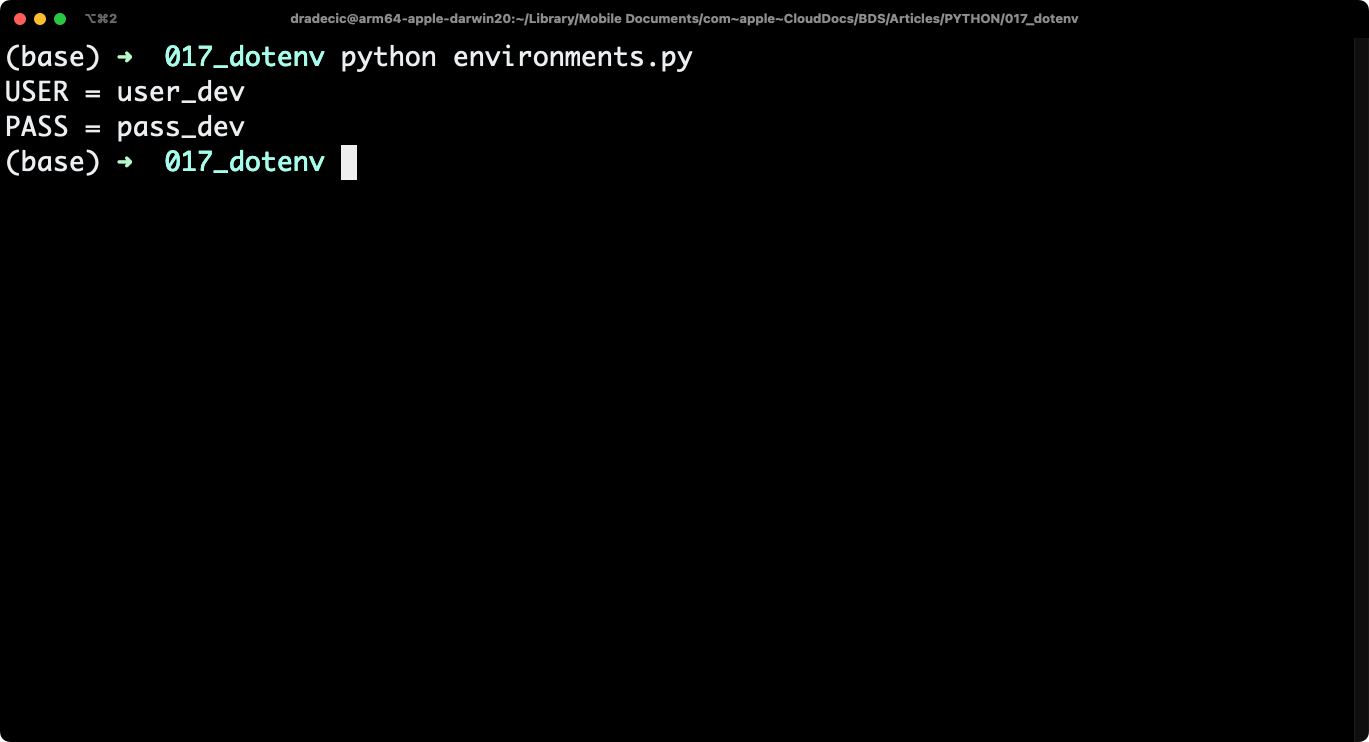
Image 5 - Managing different environments (dev) (Image by author)
I’ll now set Linux to be the development environment to make sure the conditional statement works. Everything else stays the same:
import os
import platform
from dotenv import load_dotenv

# Detect platform to set the environment
environ = "DEV" if platform.system().lower() == "linux" else "PROD"

# Load the stored environment variables
load_dotenv()

# Get the values
db_user = os.getenv(f"{environ}_DB_USER")
db_pass = os.getenv(f"{environ}_DB_PASS")

# Print the values
print(f"USER = {db_user}")
print(f"PASS = {db_pass}")
Here’s what you should see:
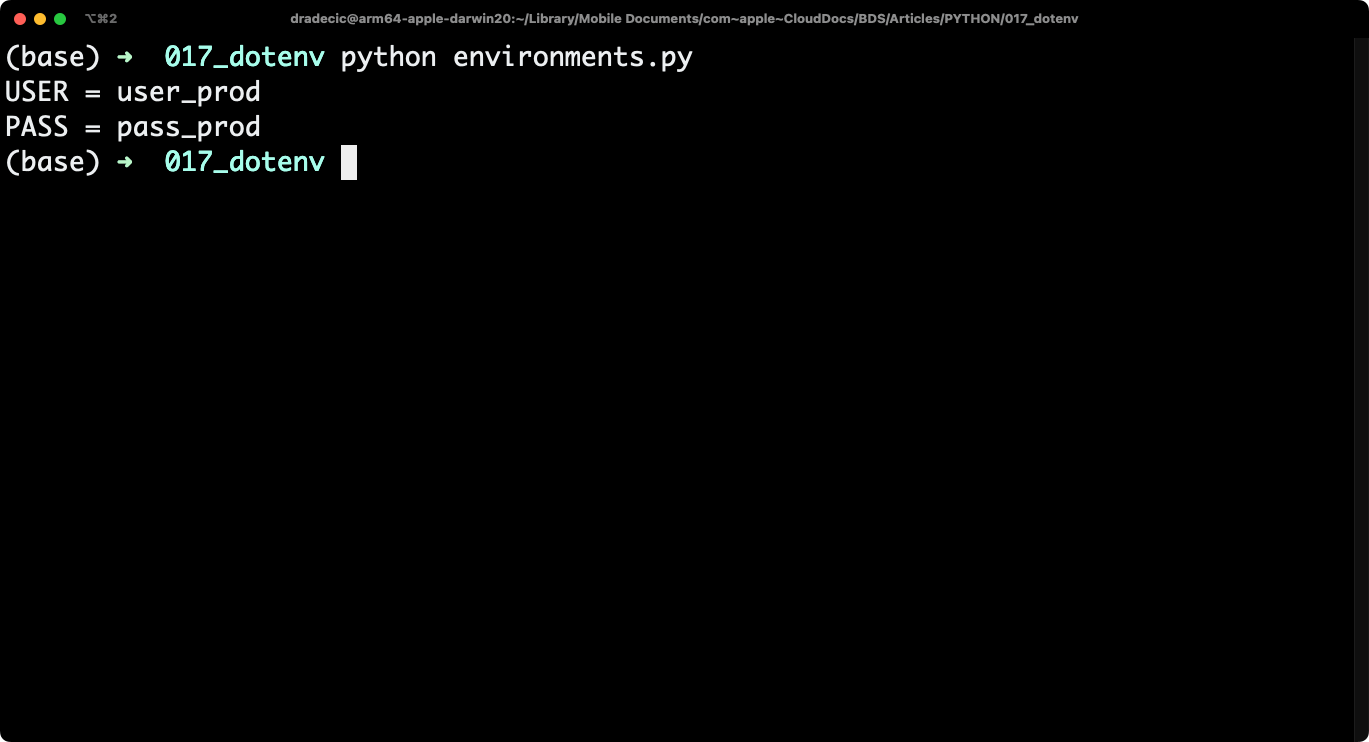
Image 6 - Managing different environments (prod) (Image by author)
Outputs from these code snippets will depend on your operating system. Feel free to change the conditional logic behind environ if you’re using Linux or Windows.
Security and Sensitive Information with Python Dotenv
When working with version control systems like Git, it’s important to avoid accidentally committing sensitive information. To prevent pushing your .env file to the repository, add it to a .gitignore file. This file tells Git which files or directories to ignore when committing changes.
Create a .gitignore file in your project’s root directory and include the following line:
.env
Here’s what your .gitignore file should look like:
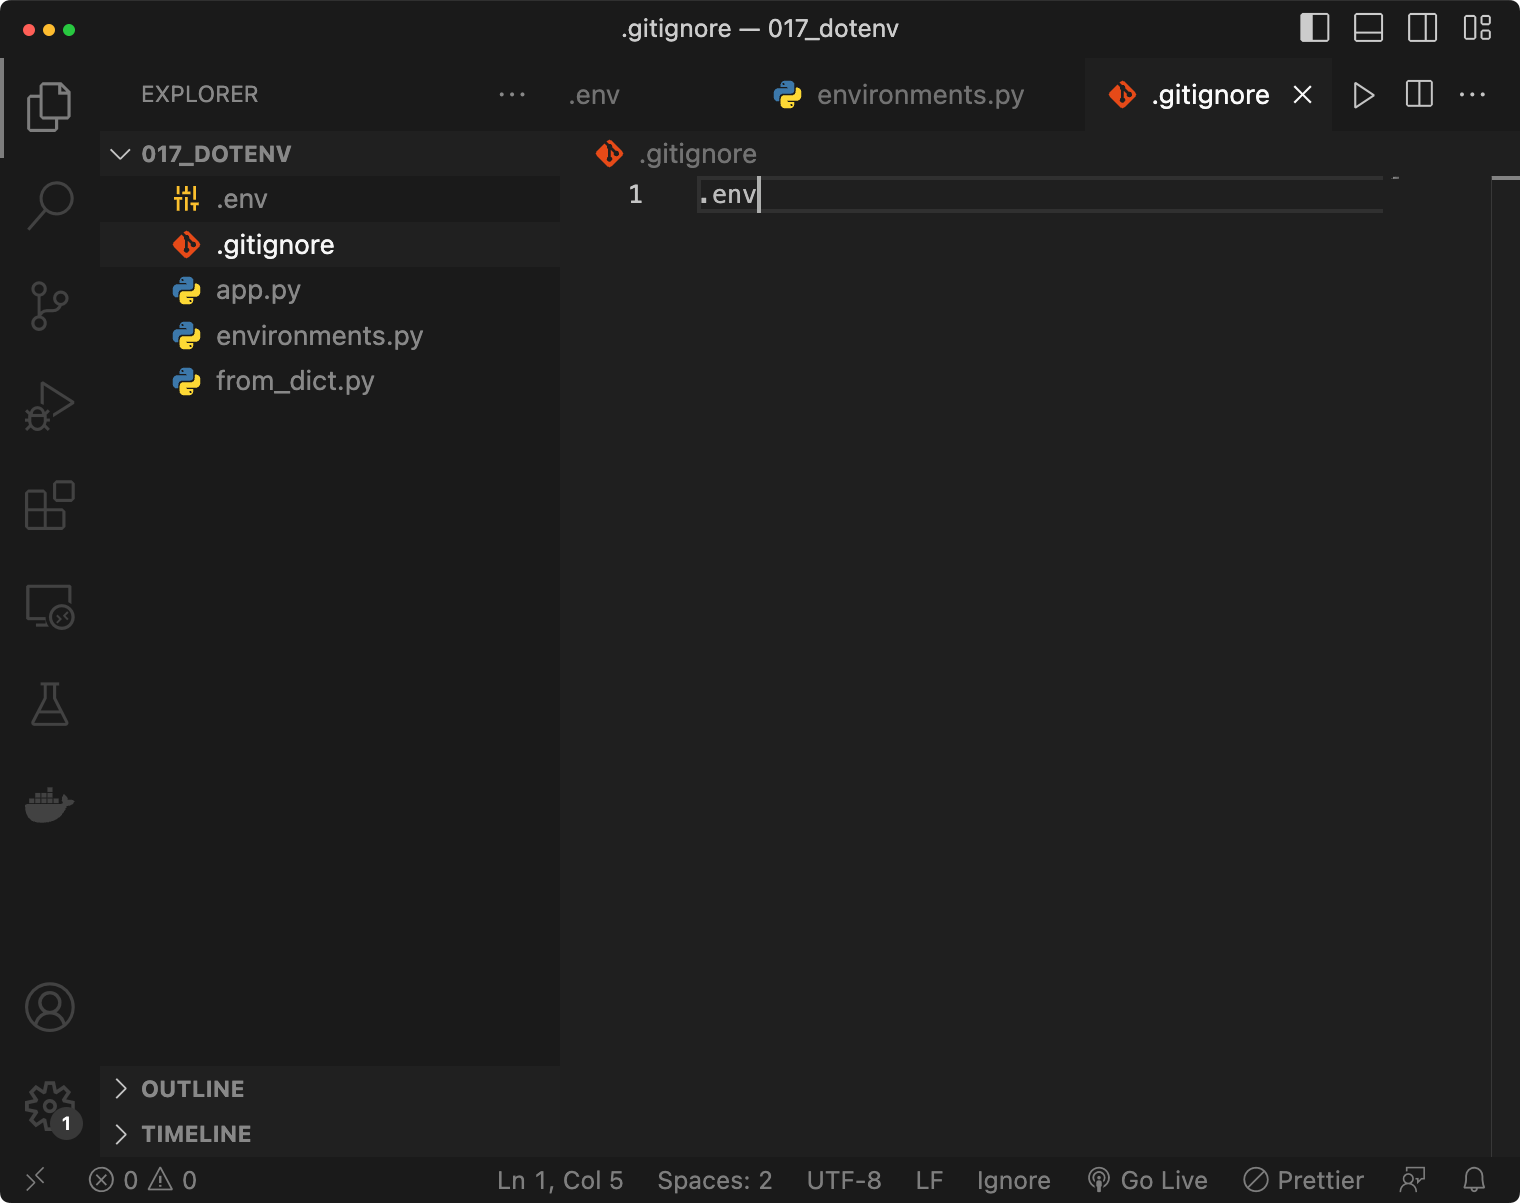
Image 7 - Python dotenv .gitignore file (Image by author)
Now the .env file won’t get pushed to the repository.
Advanced Python Dotenv
This section will walk you through a couple of advanced and niche-specific use cases of the Python dotenv package. Let’s start with variable expansions.
Variable Expansions
Python dotenv supports variable expansion, which is a helpful feature when dealing with multiline values or referencing pre-existing environment variables. To use variable expansion, simply reference the desired variable using the ${VAR_NAME} syntax.
Here’s an example:
DB_HOST=localhost
DB_PORT=5432
DB_NAME=database
DB_URL=jdbc:postgresql://${DB_HOST}:${DB_PORT}/${DB_NAME}
Use this .env file in Python scripts like you normally would. You can now grab only DB_URL which will automatically reference the other three environment variables:
import os
from dotenv import load_dotenv

# Load the stored environment variables
load_dotenv()

# Get the value
db_url = os.getenv("DB_URL")

# Print the value
print(f"DB_URL = {db_url}")
This is the output you will see:
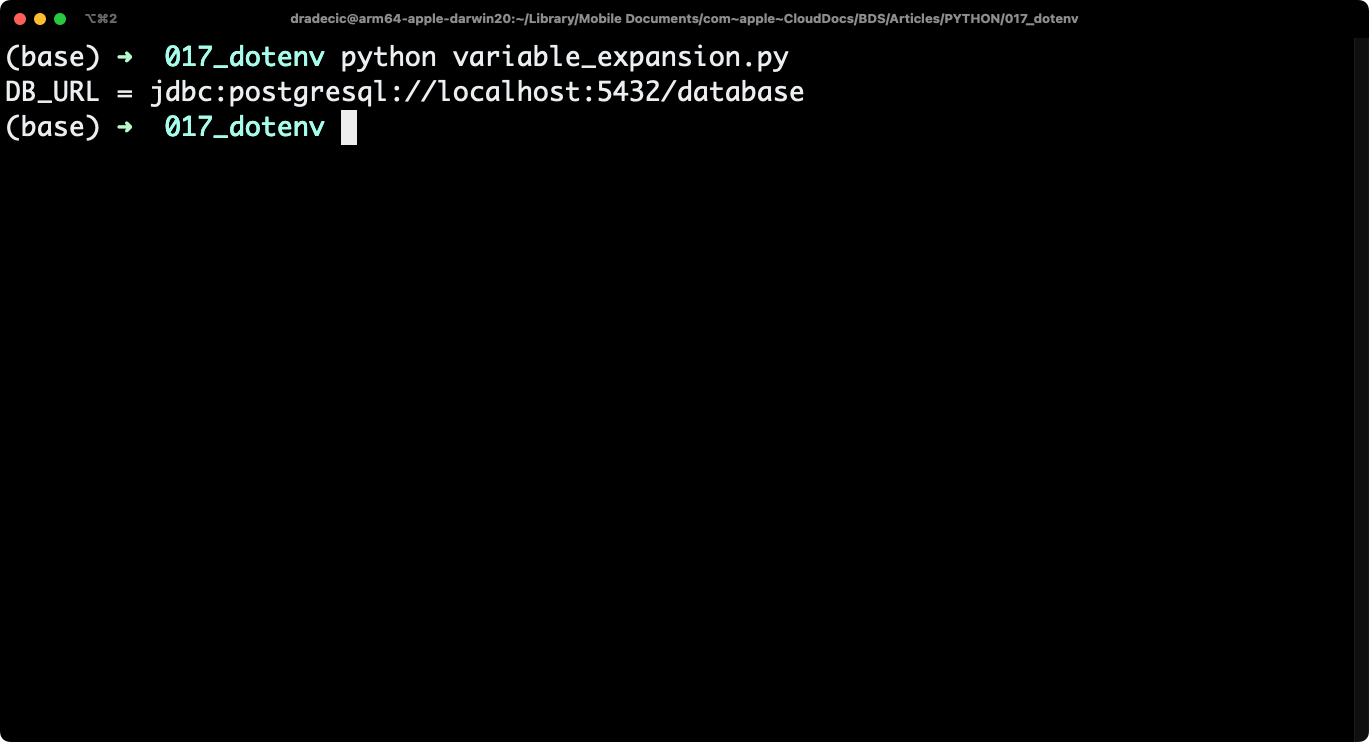
Image 8 - Variable expansion example (Image by author)
Django Support
To safely manage your environment variables and follow the 12-factor principles in your Django project, you can easily integrate Python dotenv. Create the .env file like you normally would and make sure to load it in settings.py:
# settings.py

from dotenv import load_dotenv
load_dotenv()
You can now access your environment variables from anywhere within the app:
import os

db_url = os.getenv('DB_URL')
Up next, let’s go over the CLI interface behind Python dotenv.
CLI Interface
Besides using Python dotenv programmatically, you can also interact with it through the command-line interface (CLI). The CLI provides functionality like setting or exporting environment variables, creating a .env file, or running a command with specific variables.
We’ll show you how to set an environment variable and how to list all of them within the file.
To set a new environment variable to .env, run the following command:
dotenv set <key> <value>
You can see it in action on the following image - it also prints the .env file by using the cat command, just for the reference:
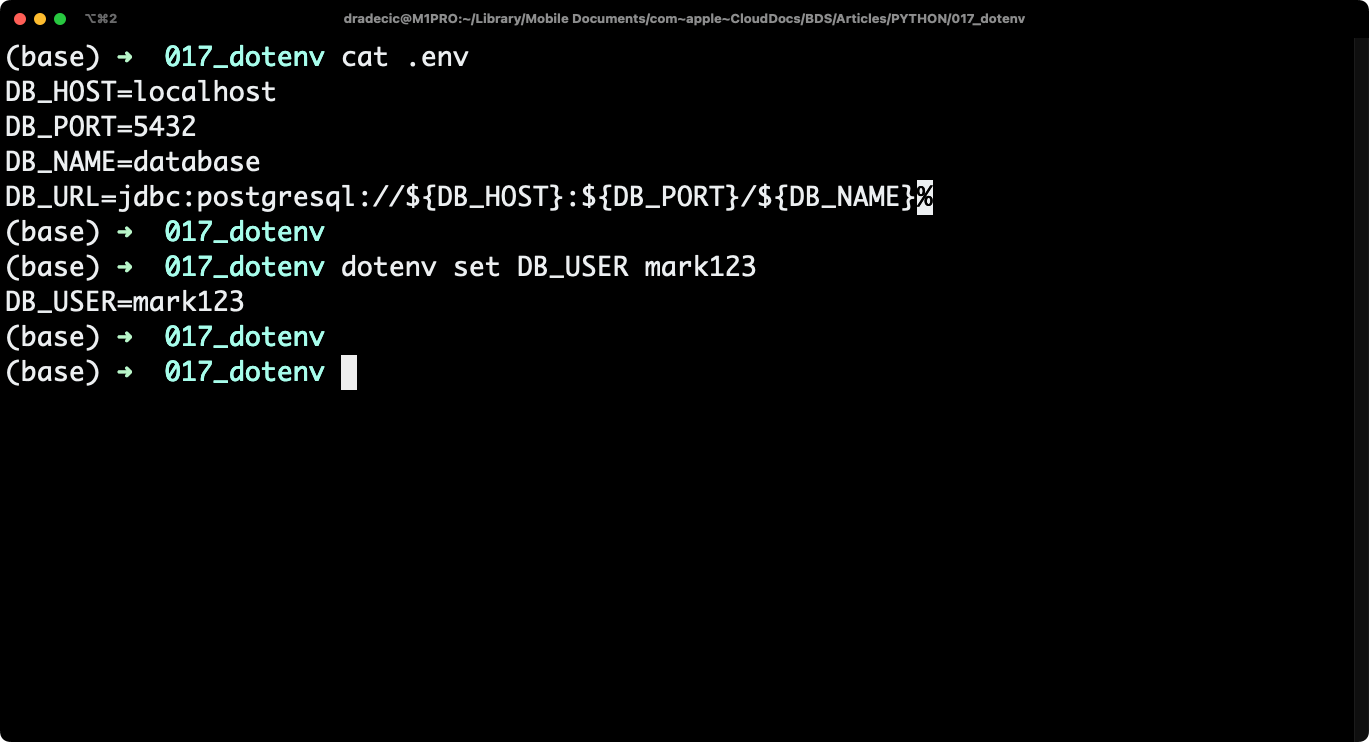
Image 9 - CLI interface example 1 (Image by author)
To list all environment variables in .env, run the following command:
dotenv list
You can see the variable was successfully written to the file:
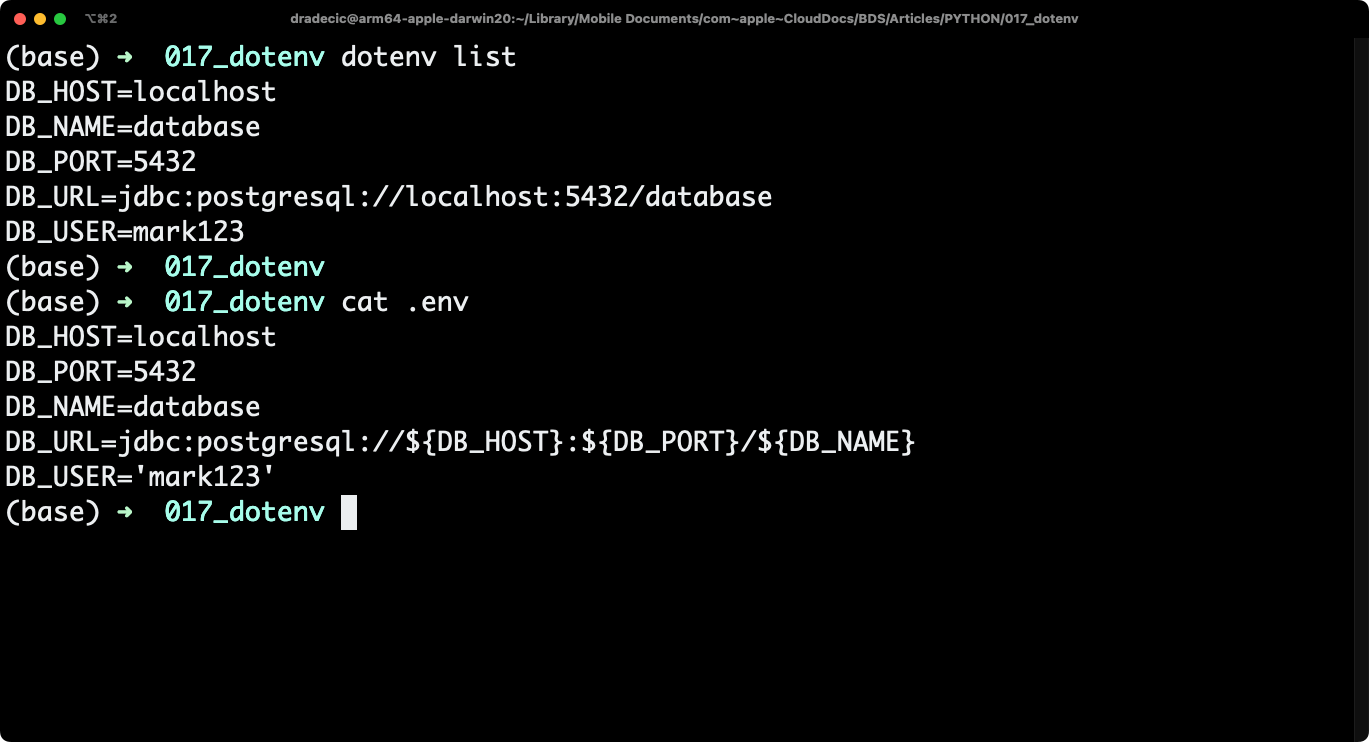
Image 10 - CLI interface example 2 (Image by author)
Extended Libraries
In addition to dotenv’s core functionality, some extended libraries help enhance the feature set for specific use cases:
- dotenv-linter: This utility assists you in enforcing best practices, checks for syntax errors, and keeps your
.envfiles clean. - python-dotenv[vault]: This variation of Python dotenv, known as dotenv-vault, provides secret management, allowing you to encrypt and decrypt your
.envfiles securely. - python-decouple: Offers additional support for multiple configuration formats and unifies the process of reading configuration regardless of whether it’s in a
.envor a different format.
Python Dotenv Best Practices
It’s a good idea to further enhance the security of your .env file. Here’s a list of best practices for doing so:
- Limit access to the
.envfile: Set appropriate file permissions to restrict access to authorized users only. - Use different environment files for different stages: Use separate
.envfiles for development, staging, and production environments, tailoring the sensitive information within each file.