Make a full CRUD REST API with Python. Did I mention it’s database driven?
REST APIs are everywhere around us and are used to build good-quality software. In data science, they are used to deploy machine learning models to production, so no, you can’t avoid them in the long run. Today we’ll create a simple but fully functional database-driven API with Python and Flask-RESTful.
Here’s a quick rundown of the technologies used:
- Python— a fantastic programming language used widely for all types of tasks
- Flask-RESTful— an extension of the
Flasklibrary. Enables us to develop APIs quickly - SQLAlchemy— an ORM (Object Relational Mapper). Helps us to communicate with the database without writing SQL
And that’s pretty much it. This article should be easy to follow, and it shouldn’t take you more than 10–15 minutes to complete (if following along with the code).
The article is structured as follows:
You can download the source code here. Let’s get started.
Problem description
We want to create a database in which user data is stored (think registration form on a website). We have access to information such as usernames, passwords, actual names, and ages.
Next, we want to develop a REST API to make the database handling easier. Also, API makes our logic available to any programming language, terminals, and tools like .
We want to read from the database, insert into it, update and delete records — in the simplest way possible. So let’s do just that, starting from the next section.
Setup and model declaration
To start, create a new directory somewhere, and inside it create a Python file. I’ve named mine app.py, as that’s a convention, but it’s not a requirement — so name yours as you wish.
Let’s proceed with the imports, shall we? We need a couple of libraries: Flask, Flask-RESTful, Flask-SQLAlchemy, and Flask-Marshmallow. Here are the imports:
from flask import Flask, request, jsonify
from flask_sqlalchemy import SQLAlchemy
from flask_marshmallow import Marshmallow
from flask_restful import Resource, Api
When that’s out of the way, we can proceed with the initializations. We must make an instance of the Flask application and the API and specify where the database is located. We’re using , so make sure you’re familiar with it first:
We also have to make an instance of the SQLAlchemy and Marshmallow. The latter is used to make working with JSON responses a breeze. Here’s the code:
app = Flask(__name__)
api = Api(app)
app.config['SQLALCHEMY_DATABASE_URI'] = 'sqlite:///users.db'
app.config['SQLALCHEMY_TRACK_MODIFICATIONS'] = False
db = SQLAlchemy(app)
ma = Marshmallow(app)
Awesome! Let’s jump into the good stuff now, which is declaring a model for our users. SQLAlchemy needs this to construct and execute SQL on the fly, so we don’t have to worry about that. As mentioned in the introduction section, we’ll deal with data such as name, age, username, and password.
We need to specify data types and their size, so SQLAlchemy can create the table. That all happens within a class which inherits from SQLAlchemy.Model. Finally, we’ll pass the arguments to the constructor of the class. Here’s the code:
class User(db.Model):
    id = db.Column(db.Integer, primary_key=True)
    username = db.Column(db.String(32), unique=True)
    password = db.Column(db.String(32))
    first_name = db.Column(db.String(32))
    last_name = db.Column(db.String(32))
    age = db.Column(db.Integer)

    def __init__(self, username, password, first_name, last_name, age):
        self.username = username
        self.password = password
        self.first_name = first_name
        self.last_name = last_name
        self.age = age
The above snippet should be easy to read and understand, as there’s nothing complex going on. Now we can declare a schema for our users. It’s just another class that inherits from Marshmallow.Schema, and is used to avoid the headache of JSON parsing. Here’s the code:
class UserSchema(ma.Schema):
    class Meta:
        fields = ('id', 'username', 'password', 'first_name', 'last_name', 'age')
At this point, we are ready to initialize the database and to create the users table. To do so, open up a new window at the root folder, and do everything as shown below:
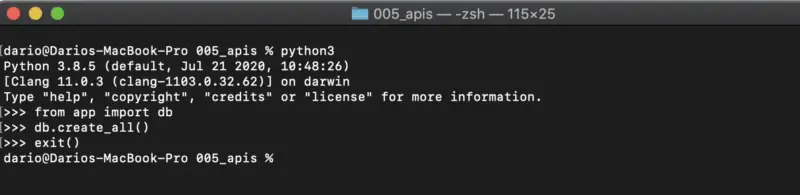
Image by author
Awesome! The last thing we need to do is to use the declared UserSchema. We’ll declare two variables - one for fetching a single user and the other for fetching multiple users:
user_schema = UserSchema()
users_schema = UserSchema(many=True)
We can now proceed with the actual API development.
API development
Right now, we’ll handle five different things:
And all of that logic is written in a single class, called UserManager. Feel free to name yours as you wish, but this one seems appropriate. Flask-RESTful is very friendly when it comes to the amount of boilerplate code we need to write. It’s minimal. To start, we need to declare a class that inherits from Flask-RESTful.Resource. Here’s a starter code:
class UserManager(Resource):
    pass
We’ll start by implementing the logic for fetching one/all users. Every following code block be inside the UserManager class.
Get user(s)
Inside the UserManager class, we’ll declare a static method called get. The naming is essential this time, as the method’s name stands for the type of HTTP request we intend to make. A request is the most appropriate one for fetching data, so that’s what we’ll use.
Here’s the logic:
- Check to see if a user appended the
IDparameter to the URL - if yes, we want data for a single user. If not, we want data for all users - Make a query through
SQLAlchemyaccordingly - Return the data in JSON format using the
flask.jsonifyfunction
And here’s the code:
@staticmethod
def get():
    try: id = request.args['id']
    except Exception as _: id = None

    if not id:
        users = User.query.all()
        return jsonify(users_schema.dump(users))
    user = User.query.get(id)
    return jsonify(user_schema.dump(user))
Let’s proceed with the insertion of new users.
Insert user
This time we’ll use the HTTP request. That means the user should pass the data for a new user in the JSON format — more on that in the testing section. Also, our new static method must be named post.
Here’s the logic we have to implement:
- Fetch provided JSON data for username, password, first name, last name, and age
- Create an instance of the
Userclass with the provided data - Add this user to the database and commit the transaction
- Return a message indicating the user was inserted
It’s a relatively simple function. Here’s the code:
@staticmethod
def post():
    username = request.json['username']
    password = request.json['password']
    first_name = request.json['first_name']
    last_name = request.json['last_name']
    age = request.json['age']

    user = User(username, password, first_name, last_name, age)
    db.session.add(user)
    db.session.commit()

    return jsonify({
        'Message': f'User {first_name} {last_name} inserted.'
    })
Let’s proceed with the update of existing users.
Update user
To update an existing user, we’ll use the HTTP request. The static method is then named, you’ve guessed it, put. Here’s the overview of the logic:
- Check if a user
IDwas passed in the call. If not, an error message is returned. That’s because we are updating only a single user at a time - Fetch provided JSON data for username, password, first name, last name, and age
- Set the values to the database user according to the provided data and commit the transaction
- Return a message indicating the user was updated
This method is a bit more complicated than the previous one, but is still reasonably easy to implement:
@staticmethod
def put():
    try: id = request.args['id']
    except Exception as _: id = None

    if not id:
        return jsonify({ 'Message': 'Must provide the user ID' })

    user = User.query.get(id)
    username = request.json['username']
    password = request.json['password']
    first_name = request.json['first_name']
    last_name = request.json['last_name']
    age = request.json['age']

    user.username = username
    user.password = password
    user.first_name = first_name
    user.last_name = last_name
    user.age = age

    db.session.commit()
    return jsonify({
        'Message': f'User {first_name} {last_name} altered.'
    })
Delete user
This is the final methods we’ll implement. Its task is to remove an individual user from the database. I’m sure you can guess by now what type of HTTP request we’ll make and how the method must be called. Here’s the logic:
- Check if a user
IDwas passed in the call. If not, an error message is returned. That’s because we are deleting only a single user at a time - Delete a user from the database and commit the transaction
- Return a message indicating the user was updated
Here’s the code:
@staticmethod
def delete():
    try: id = request.args['id']
    except Exception as _: id = None

    if not id:
        returnjsonify({ 'Message': 'Must provide the user ID' })

    user = User.query.get(id)
    db.session.delete(user)
    db.session.commit()

    return jsonify({
        'Message': f'User {str(id)} deleted.'
    })
And that’s it for the entire UserManager class. Let’s finish the file next and begin with the testing.
Finishing touches
To finish with the app.py file, we need to attach the UserManager class to some actual endpoint. I’ve decided to name mine /api/users, but the naming decision is up to you.
Also, we need to run the Flask app once the file is executed from the Terminal. Here’s the code for both:
api.add_resource(UserManager, '/api/users')

if __name__ == '__main__':
    app.run(debug=True)
And that’s it — we can begin with the testing.
Testing
To start our application, open a new Terminal window in the root folder and run the following command:
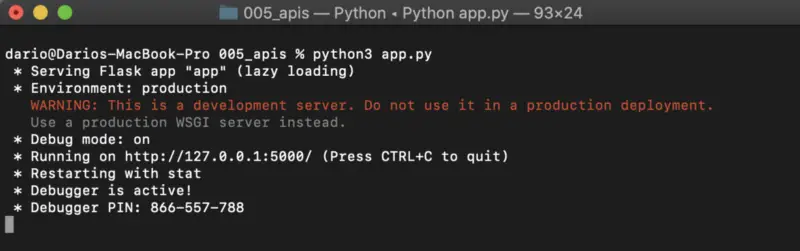
Image by author
Awesome! The API is now running at http://127.0.0.1:5000/api/users, and we can begin testing. To make the process smooth and straightforward, I’ve decided to use the application. You don’t have to do so, as you can do everything straight from the Python or even from the Terminal. We’ll start with the insertions, as that makes the most sense for an empty database.
If you’re following along, open Postman and follow the instructions below.
Create new users
Image by author
Get all users
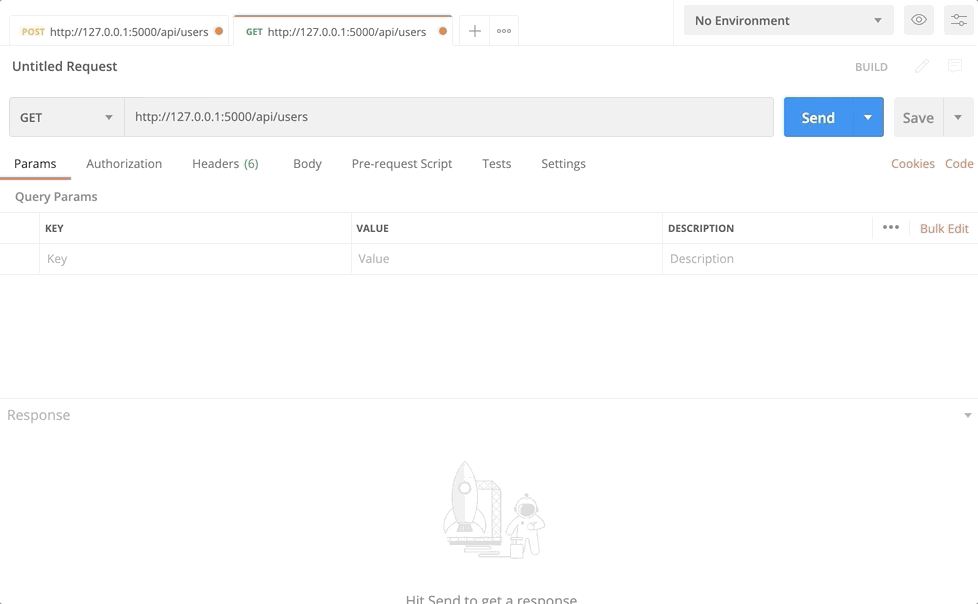
Image by author
Get a single user
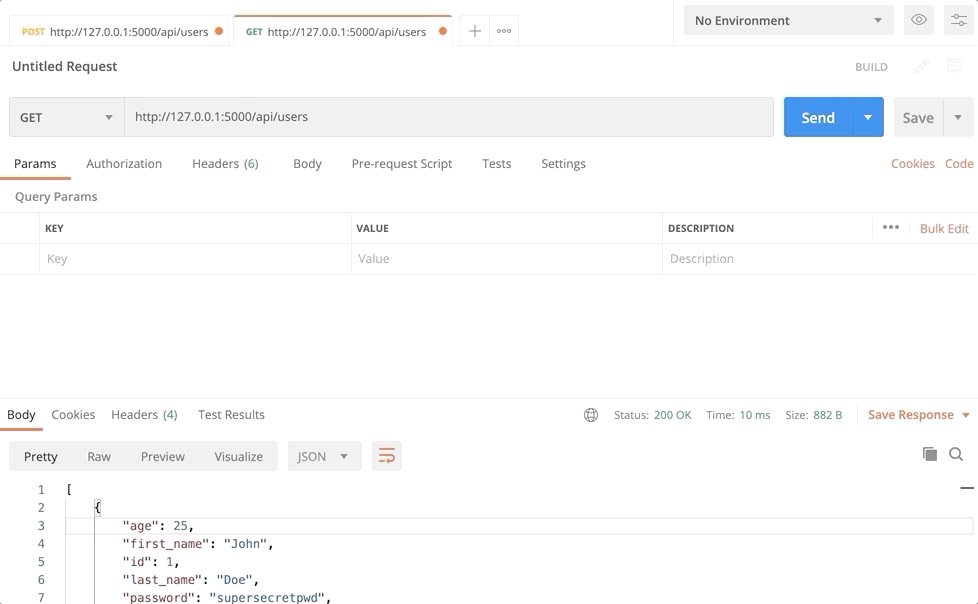
Image by author
Update a user
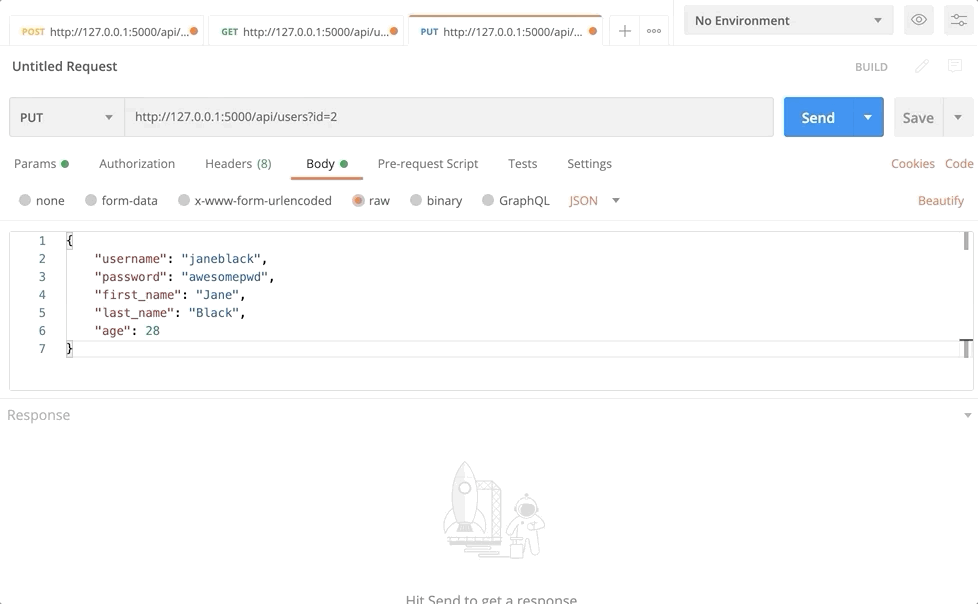
Image by author
Delete a user
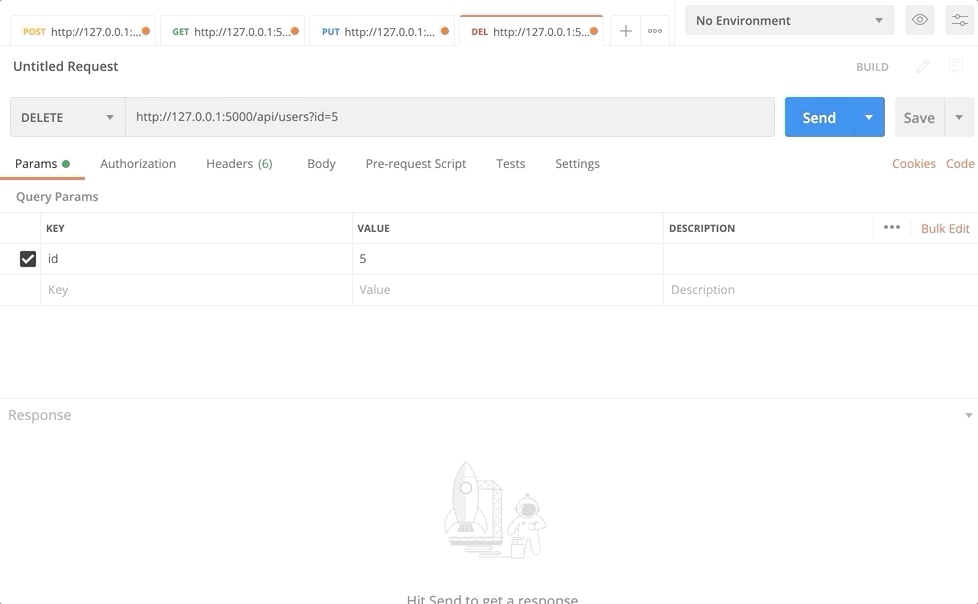
Image by author
And that’s pretty much it! Everything works as advertised, so let’s wrap things up in the next section.
Conclusion
It was quite a lengthy article to read — I’ll admit you that one. Still, I hope you’ve managed to follow along, and if not, please reference the source code .
Knowing how to work with APIs and how to design them is an essential skill for any data scientist, and Python provides a surprisingly simple way to get started. It’s up to you now to expand this in whatever direction you see fit. Feel free to leave your thoughts in the comment section below.
Thanks for reading.