
Traditional computer vision methods are outdated. Use this instead.
Computer vision is everywhere — from facial recognition, manufacturing, agriculture, to self-driving vehicles. Today you’ll enter the world of modern computer vision with a hands-on example. You will learn how to detect license plates with the YOLO algorithm.
Why do you need YOLO? What’s wrong with traditional computer vision approaches? Well, my friend, I have three words for you:
They all suck.
Most articles use old-school computer vision methods to detect the plate. Thresholding and contour detection isn’t enough in late 2020. Their algorithms work on images within the article due to hardcoded values, but fail to generalize. The result is an unusable garbage model.
You are not here to build garbage. After reading this article, you will have a robust model for detecting license plates. It will work every time and in every weather condition.
The article is structured as follows:
- Data gathering and preparation
- Model training
- Model evaluation
- Conclusion
Before we get started, I would like to take a moment to give a shoutout to all YOLO object detection tutorials, especially this one. Some of the solutions you’ll see throughout the articles are based on them.
Data gathering and preparation
There’s one gotcha to this article. You’ll have to put in the work. I have a solid database of a few hundred car images, but sharing it online wouldn’t be ethical. For that reason, you’ll have to collect the car images by yourself.
We’ll use a creative commons licensed image of a beautiful Mercedes Benz. It is excellent for demonstration and validation:

Image 1 — Photo by mali maeder from Pexels
You should collect images in various lighting conditions and taken from different angles.
Dataset collected? Great, let’s label it. We’ll use a free tool called LabelIMG for the job. Please download it from GitHub, and follow instructions in the Readme to start it. Here’s how to run the app on Mac:
cd labelImg-master
brew install qt
brew install libxml2
make qt5py3
python labelImg.py
Executing these from Terminal opens this window:
Image 2 — Starting LabelIMG (image by author)
Next, click on the Open Dir icon on the left menu. Locate the folder where car images are stored. It should automatically open the first image:
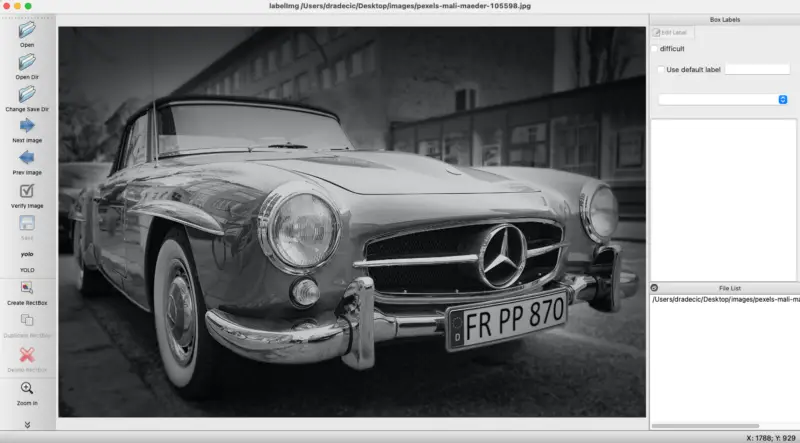
Image 3 — Opening images with LabelIMG (image by author)
Make sure that the tag in the left panel says YOLO. Next, press the _W_key on the keyboard to open the RectBox tool. Draw a rectangle around the license plate, enter the tag, and click on OK:

Image 4 — Drawing rectangle around the plate (image by author)
Neat. Make sure to hit CTRL + S to save the plate coordinates to a text file. A single file should look like this:

Image 5 — Text file generated by LabelIMG (image by author)
I know what you are thinking now, and you are correct —you have to do this process for every image. It’s a tedious and time-consuming task, but there’s no way around it.
The LabelIMG software will save a file with coordinates of the rectangle boxes for every image, alongside the class. It also saves a list of all classes to a file called classes.txt. If you open it, many of them are listed that are of no interest to you. Delete every except the license-plate:

Image 6 — List of classes (image by author)
There’s still one issue. We have a single class (license-plate), but the coordinate files say the class index is 15, which makes no sense. Just take a look at Image 5 and verify for yourself.
We will load every coordinate file with Python to address this issue by changing the class index to 1. Here’s the code snippet:
import glob

# Contains all .txt files except our list of classes
txt_files = [file for file in glob.glob('images/*.txt') if file != 'images/classes.txt']

# Read every .txt file and store it's content into variable curr
for file in txt_files:
    with open(file, 'r') as f:
        curr = f.read()

# Replace class index 15 with 1 and store it in a variable new
new = curr.replace('15 ', '1 ')

# Once again open every .txt file and make the replacement
for file in txt_files:
    with open(file, 'w') as f:
        f.write(new)
Congratulations! You’ve made it through the dataset gathering and preparation phase. You should now zip the files and continue to the next step.
Model training
By now, you should have several hundreds of labeled car images. It is enough to train a good YOLO model, and that’s what you will do next. You will train the model on Google Colab with a GPU backend.
In Colab, it took around 2 hours to train the model in my case, but the time can change, depending on the GPU and the dataset size.
You will train the model in the next seven steps.
Step 1 — Configure a GPU environment
In a new Colab notebook, go to Runtime — Change runtime type, and select GPU in the dropdown:
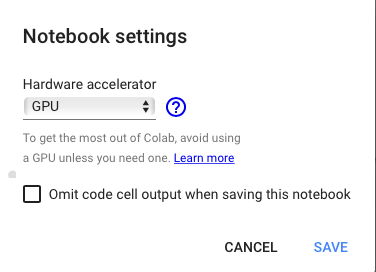
Image 7 — Switching to GPU runtime (image by author)
Click on Save, and you are good to go.
Step 2 — Mount Google Drive
In Google Drive, create a backup folder. I’ve named mine yolo-license-plates. That’s where model weights and configuration will get stored.
In the first cell, execute the following code to mount Google Drive:
from google.colab import drive
drive.mount('/content/gdrive')

!ln -s /content/gdrive/My\ Drive/ /mydrive
Step 3 — Download and configure Darknet
Darknet is an open-source neural network framework that features a YOLO object detection system. To download it, execute this line from a code cell:
!git clone https://github.com/AlexeyAB/darknet
Under darknet/Makefileyou’ll have to configure a couple of things. Change values on the following lines:
- Line 1 — From
GPU=0toGPU=1 - Line 2 — From
CUDNN=0toCUDNN=1 - Line 4 — From
OPENCV=0toOPENCV=1
And save the file. These changes enable you to use GPU while training. You can now compile Darknet:
%cd darknet
!make
It will take a couple of minutes, and you can proceed to the next step once done.
Step 4 — Configure settings files
To know how to set up the YOLO configuration file, you need to know how many classes there are. We only have one —license-plate, but this can change depending on the type of problem you are working on.
Next, you need to calculate the number of batches and the number of filters. Here are the formulas:
- Batches = number of classes * 2000
- Filters = (number of classes + 5) * 3
In our case, the values are 2000 and 18, respectively.
For safety reasons copy the YOLO configuration file:
!cp cfg/yolov3.cfg cfg/yolov3-train.cfg
And make the following changes in cfg/yolov3-train.cfg:
- Line 3 — From
batch=1tobatch=64 - Line 4 — From
subdivisions=1tosubdivisions=16 - Line 20 — From
max_batches=500200tomax_batches=2000 - Lines 603, 689, and 776 — From
filters=255tofilters=18 - Lines 610, 696, and 783 — From
classes=80toclasses=1
And save the file.
Next, we have to create two files —data/obj.names and data/obj.data. These files contain information on your class names and backup folders:
!echo -e 'license-plate' > data/obj.names
!echo -e 'classes = 1\ntrain = data/train.txt\nvalid = data/test.txt\nnames = data/obj.names\nbackup = /mydrive/yolo-license-plates' > data/obj.data
Awesome! That’s it configuration-wise. Let’s now upload and prepare the images.
Step 5 — Upload and unpack images
Remember how I said you should have the images and their respective text file zipped? Well, now you’ll understand why.
Just drag and drop the zip file into a Files sidebar menu. It should look like this when done:
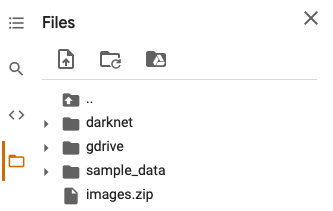
Image 8 — Colab Files menu after zip file upload (image by author)
The next step is to make a folder for images and unpack them:
!mkdir data/obj !unzip ../images.zip -d data/obj
If everything went well, the data/obj folder should now contain the images and their respective text files.
Step 6 — Preparation for training
We are almost done here. What we have to do next is to create a data/train.txt file. It will contain paths to all training images:
import glob

images_list = glob.glob('data/obj/*.jpg')
with open('data/train.txt', 'w') as f:
    f.write('\n'.join(images_list))
And finally, we have to download the pretrained Darknet convolutional network:
!wget https://pjreddie.com/media/files/darknet53.conv.74
It will take a couple of seconds to download, but once done, you have everything needed to begin training!
Step 7 — Train the model
Starting the training process now boils down to a single line of shell code:
!./darknet detector train data/obj.data cfg/yolov3-train.cfg darknet53.conv.74 -dont_show
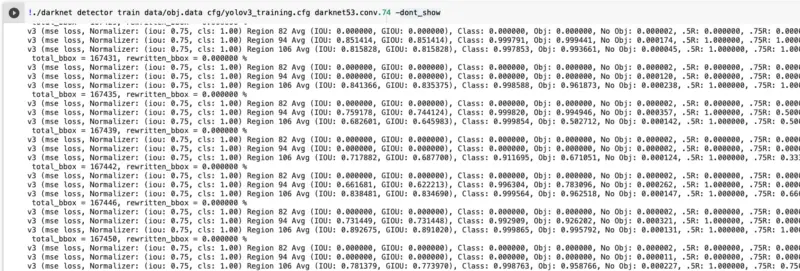
Image 9 — YOLO Model training in Colab (image by author)
And now you wait. The training process could take hours, depending on the number of images. The weights are automatically saved to your Google Drive backup folder every 10–15 minutes.
In the next section, we will create a script for finding and labeling license plates on images.
Model evaluation
This is the moment you’ve been waiting for. The article is getting longer than I planned, so let’s cut to the chase.
In your Google Drive backup folder, you should have three files after the model is trained:
- Weights file —
yolov3_training_final.weights - Configuration file —
yolov3_testing.cfg - Classes file —
classes.txt
Download them to a single folder on your machine and open JupyterLab. You can now copy the LicensePlateDetector class from the snippet below:
import cv2
import numpy as np
import matplotlib.pyplot as plt


class LicensePlateDetector:
    def __init__(self, pth_weights: str, pth_cfg: str, pth_classes: str):
        self.net = cv2.dnn.readNet(pth_weights, pth_cfg)
        self.classes = []
        with open(pth_classes, 'r') as f:
            self.classes = f.read().splitlines()
        self.font = cv2.FONT_HERSHEY_PLAIN
        self.color = (255, 0, 0)
        self.coordinates = None
        self.img = None
        self.fig_image = None
        self.roi_image = None


    def detect(self, img_path: str):
        orig = cv2.imread(img_path)
        self.img = orig
        img = orig.copy()
        height, width, _ = img.shape
        blob = cv2.dnn.blobFromImage(img, 1 / 255, (416, 416), (0, 0, 0), swapRB=True, crop=False)
        self.net.setInput(blob)
        output_layer_names = self.net.getUnconnectedOutLayersNames()
        layer_outputs = self.net.forward(output_layer_names)
        boxes = []
        confidences = []
        class_ids = []

        for output in layer_outputs:
            for detection in output:
                scores = detection[5:]
                class_id = np.argmax(scores)
                confidence = scores[class_id]
                if confidence > 0.2:
                    center_x = int(detection[0] * width)
                    center_y = int(detection[1] * height)
                    w = int(detection[2] * width)
                    h = int(detection[3] * height)
                    x = int(center_x - w / 2)
                    y = int(center_y - h / 2)

                    boxes.append([x, y, w, h])
                    confidences.append((float(confidence)))
                    class_ids.append(class_id)

        indexes = cv2.dnn.NMSBoxes(boxes, confidences, 0.2, 0.4)

        if len(indexes) > 0:
            for i in indexes.flatten():
                x, y, w, h = boxes[i]
                label = str(self.classes[class_ids[i]])
                confidence = str(round(confidences[i],2))
                cv2.rectangle(img, (x,y), (x + w, y + h), self.color, 15)
                cv2.putText(img, label + ' ' + confidence, (x, y + 20), self.font, 3, (255, 255, 255), 3)
        self.fig_image = img
        self.coordinates = (x, y, w, h)
        return


    def crop_plate(self):
        x, y, w, h = self.coordinates
        roi = self.img[y:y + h, x:x + w]
        self.roi_image = roi
        return
This class has two methods:
detect(img_path)– used to detect a license plate from the input image and draw a rectangle around itcrop_plate()– used to crop the detected license plate from an image. This method is here just in case you want to apply some OCR to extract the text
Let’s see the damn thing in action, finally:
lpd = LicensePlateDetector(
    pth_weights='yolov3_training_final.weights',
    pth_cfg='yolov3_testing.cfg',
    pth_classes='classes.txt'
)

# Detect license plate
lpd.detect('001.jpg')

# Plot original image with rectangle around the plate
plt.figure(figsize=(24, 24))
plt.imshow(cv2.cvtColor(lpd.fig_image, cv2.COLOR_BGR2RGB))
plt.savefig('detected.jpg')
plt.show()

# Crop plate and show cropped plate
lpd.crop_plate()
plt.figure(figsize=(10, 4))
plt.imshow(cv2.cvtColor(lpd.roi_image, cv2.COLOR_BGR2RGB))
The above snippet makes an instance of the LicensePlateDetector class, detects the license plate, and crops it. Here’s the visualization output:
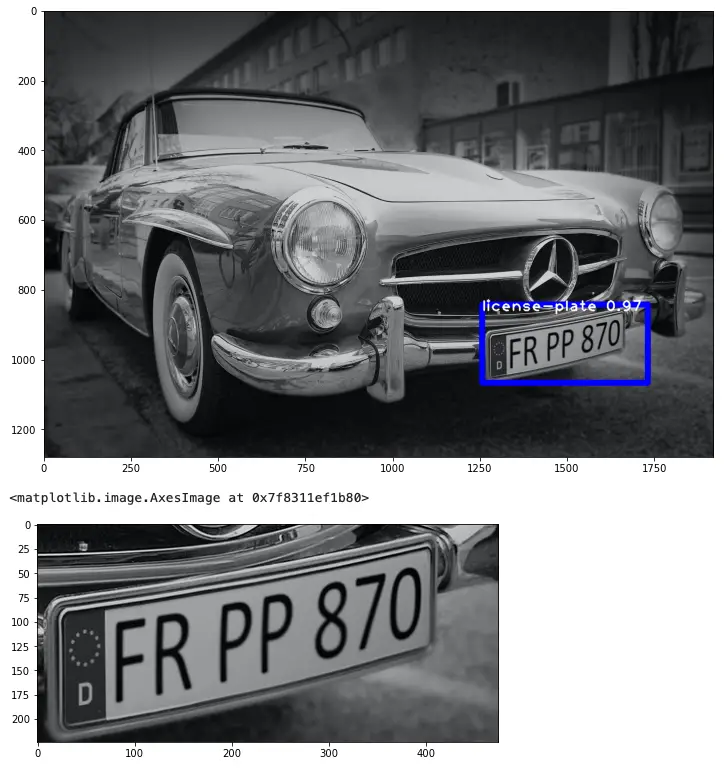
Image 10 — Evaluation of the YOLO model and LicensePlateDetector class (image by author)
And there you have it — everything you worked for the last couple of hours (or days). The YOLO model is working flawlessly and is ready to be used for whatever use case you have.
Conclusion
This was a long article. Congratulations to you if you managed to work through it in a single sitting. I know it took me days to understand how YOLO works and how to make a custom object detector.
With the same logic, you can build any type of object detector. For instance, I’ve reused the same images with different text labels to detect car color and car brand. There’s no reason you couldn’t do the same.
Many people used YOLO to detect if people are wearing masks during this COVID-19 crisis. That sounds like an interesting project idea, so why don’t you give it a try?
For what did you use YOLO professionally? Please let me know in the comment section.