
Stream chat data by writing Kafka Producer and Consumer from scratch.
In a world of big data, a reliable streaming platform is a must. Apache Kafka is the way to go.
Today’s article will show you how to work with Kafka Producers and Consumers in Python. You should have Zookeeper and Kafka configured through Docker. If that’s not the case, read this article or watch this video before proceeding.
Don’t feel like reading? Sit back and watch:
The article covers the following topics:
- Environment setup
- Creating fake data with Python
- Writing a Kafka Producer in Python
- Writing a Kafka Consumer in Python
- Testing
You can find the source code on GitHub.
Environment setup
Start by opening a new Terminal window and connecting to Kafka shell. You should have Zookeeper and Kafka containers running already, so start them if that’s not the case:
docker exec -it kafka /bin/shcd /opt/kafka_<version>/binls
Here’s what you should see:
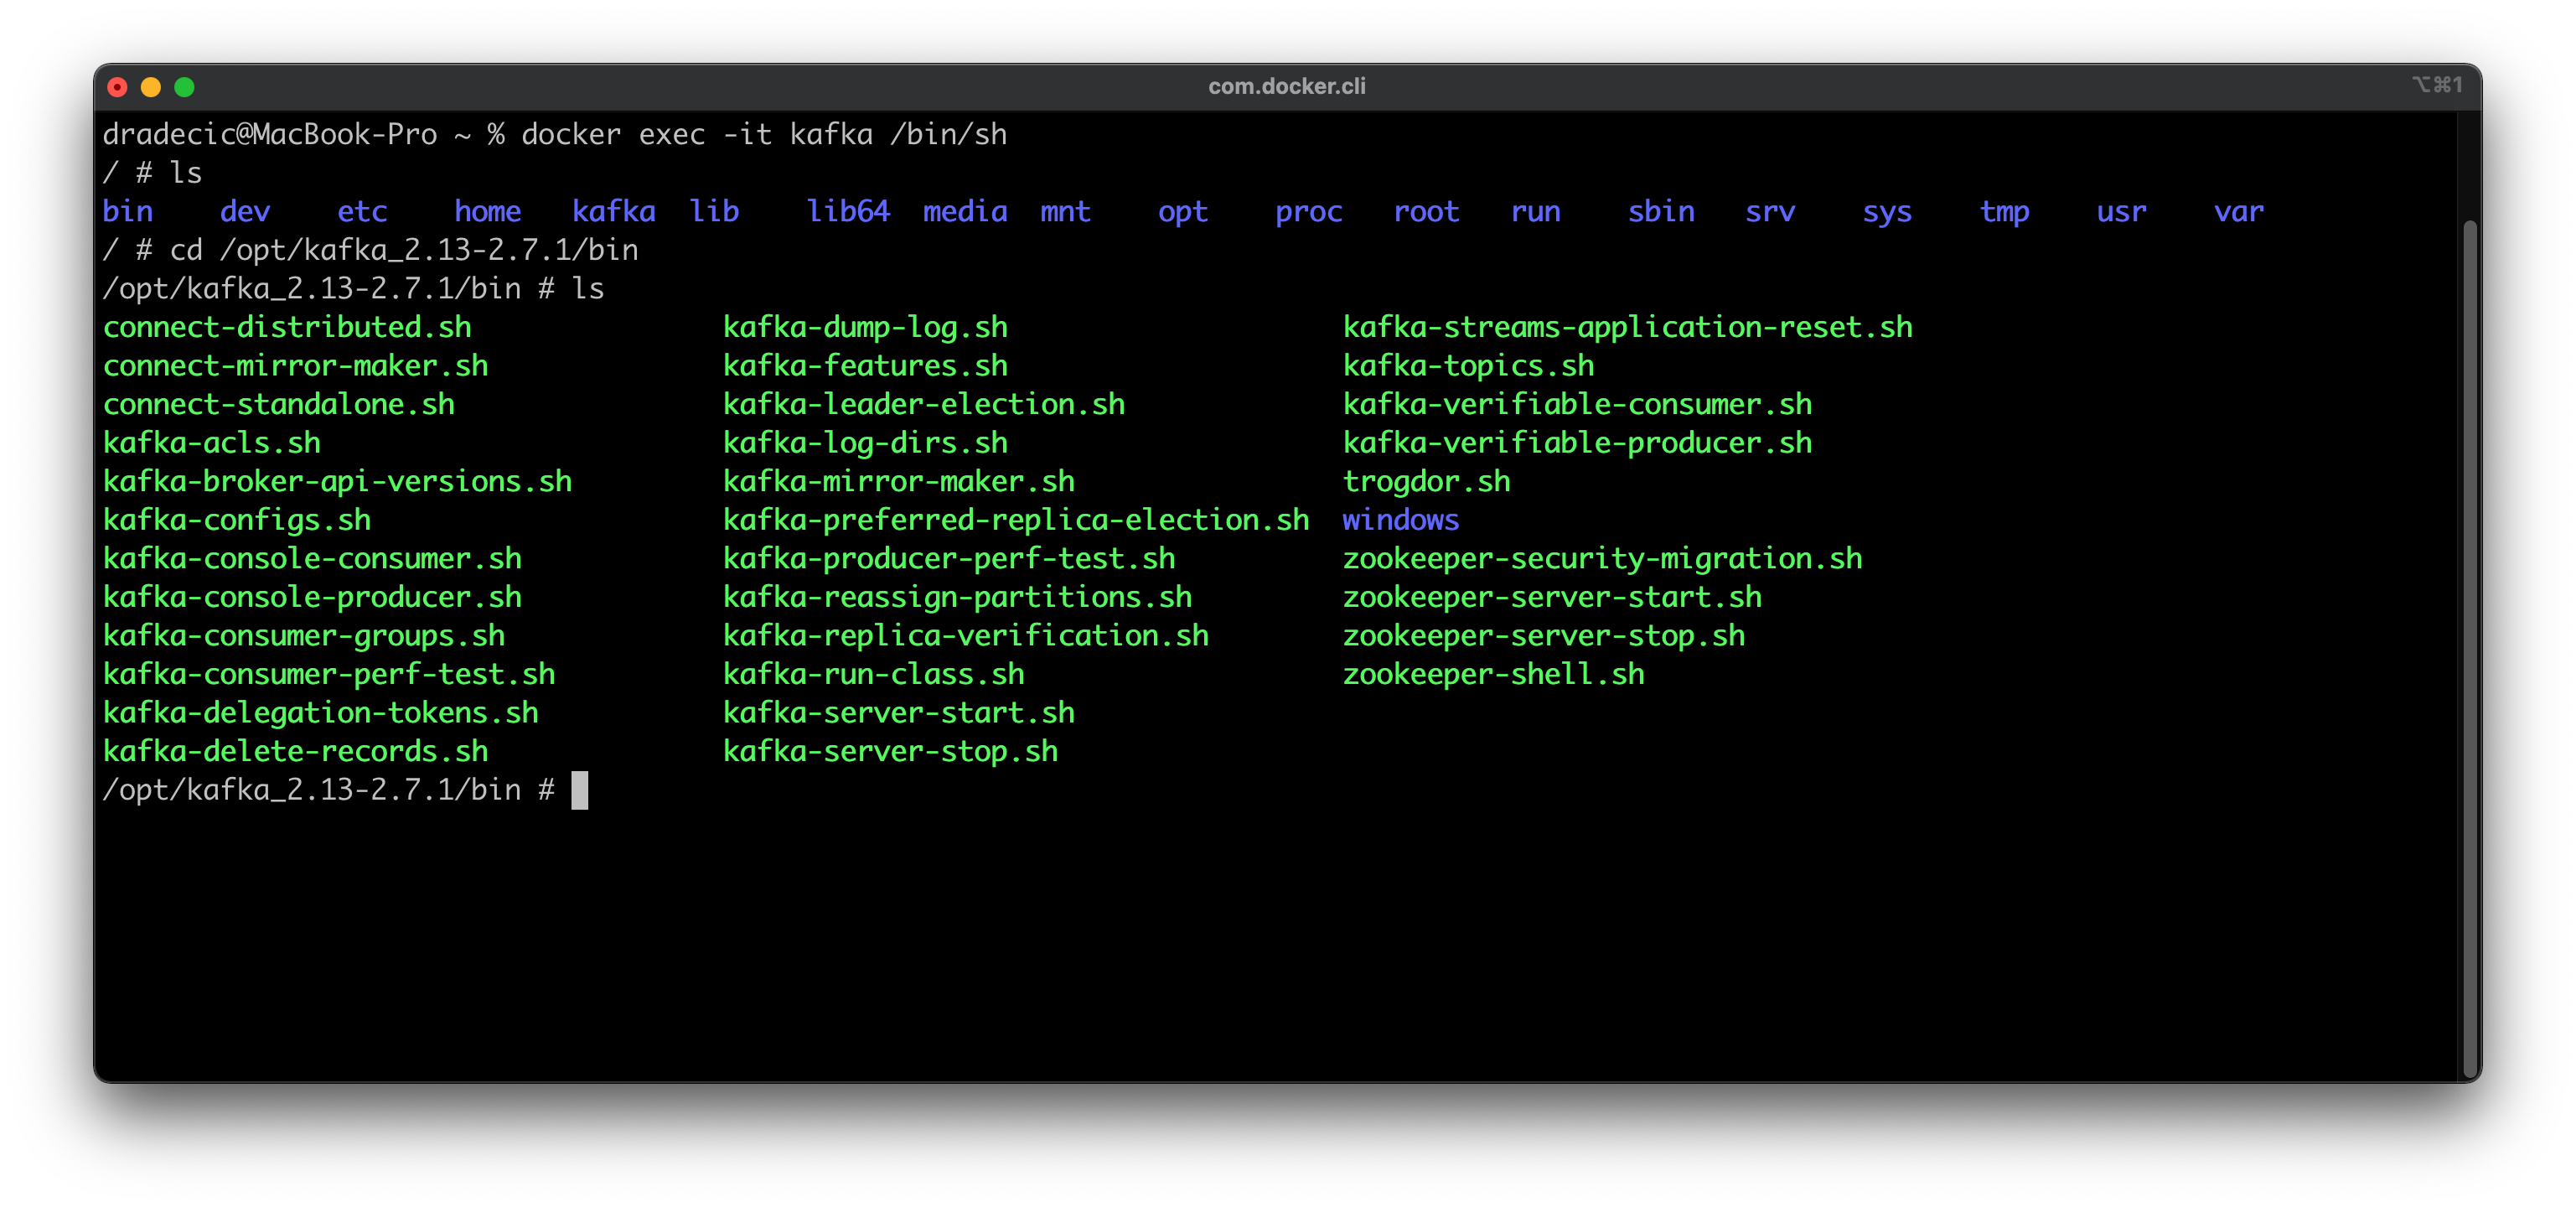
Image 1 — Opening a Kafka shell (image by author)
Next, you should create a topic to store Python-generated messages. Here’s how you can make a topic named messages and then verify it was created by listing all Kafka Topics:
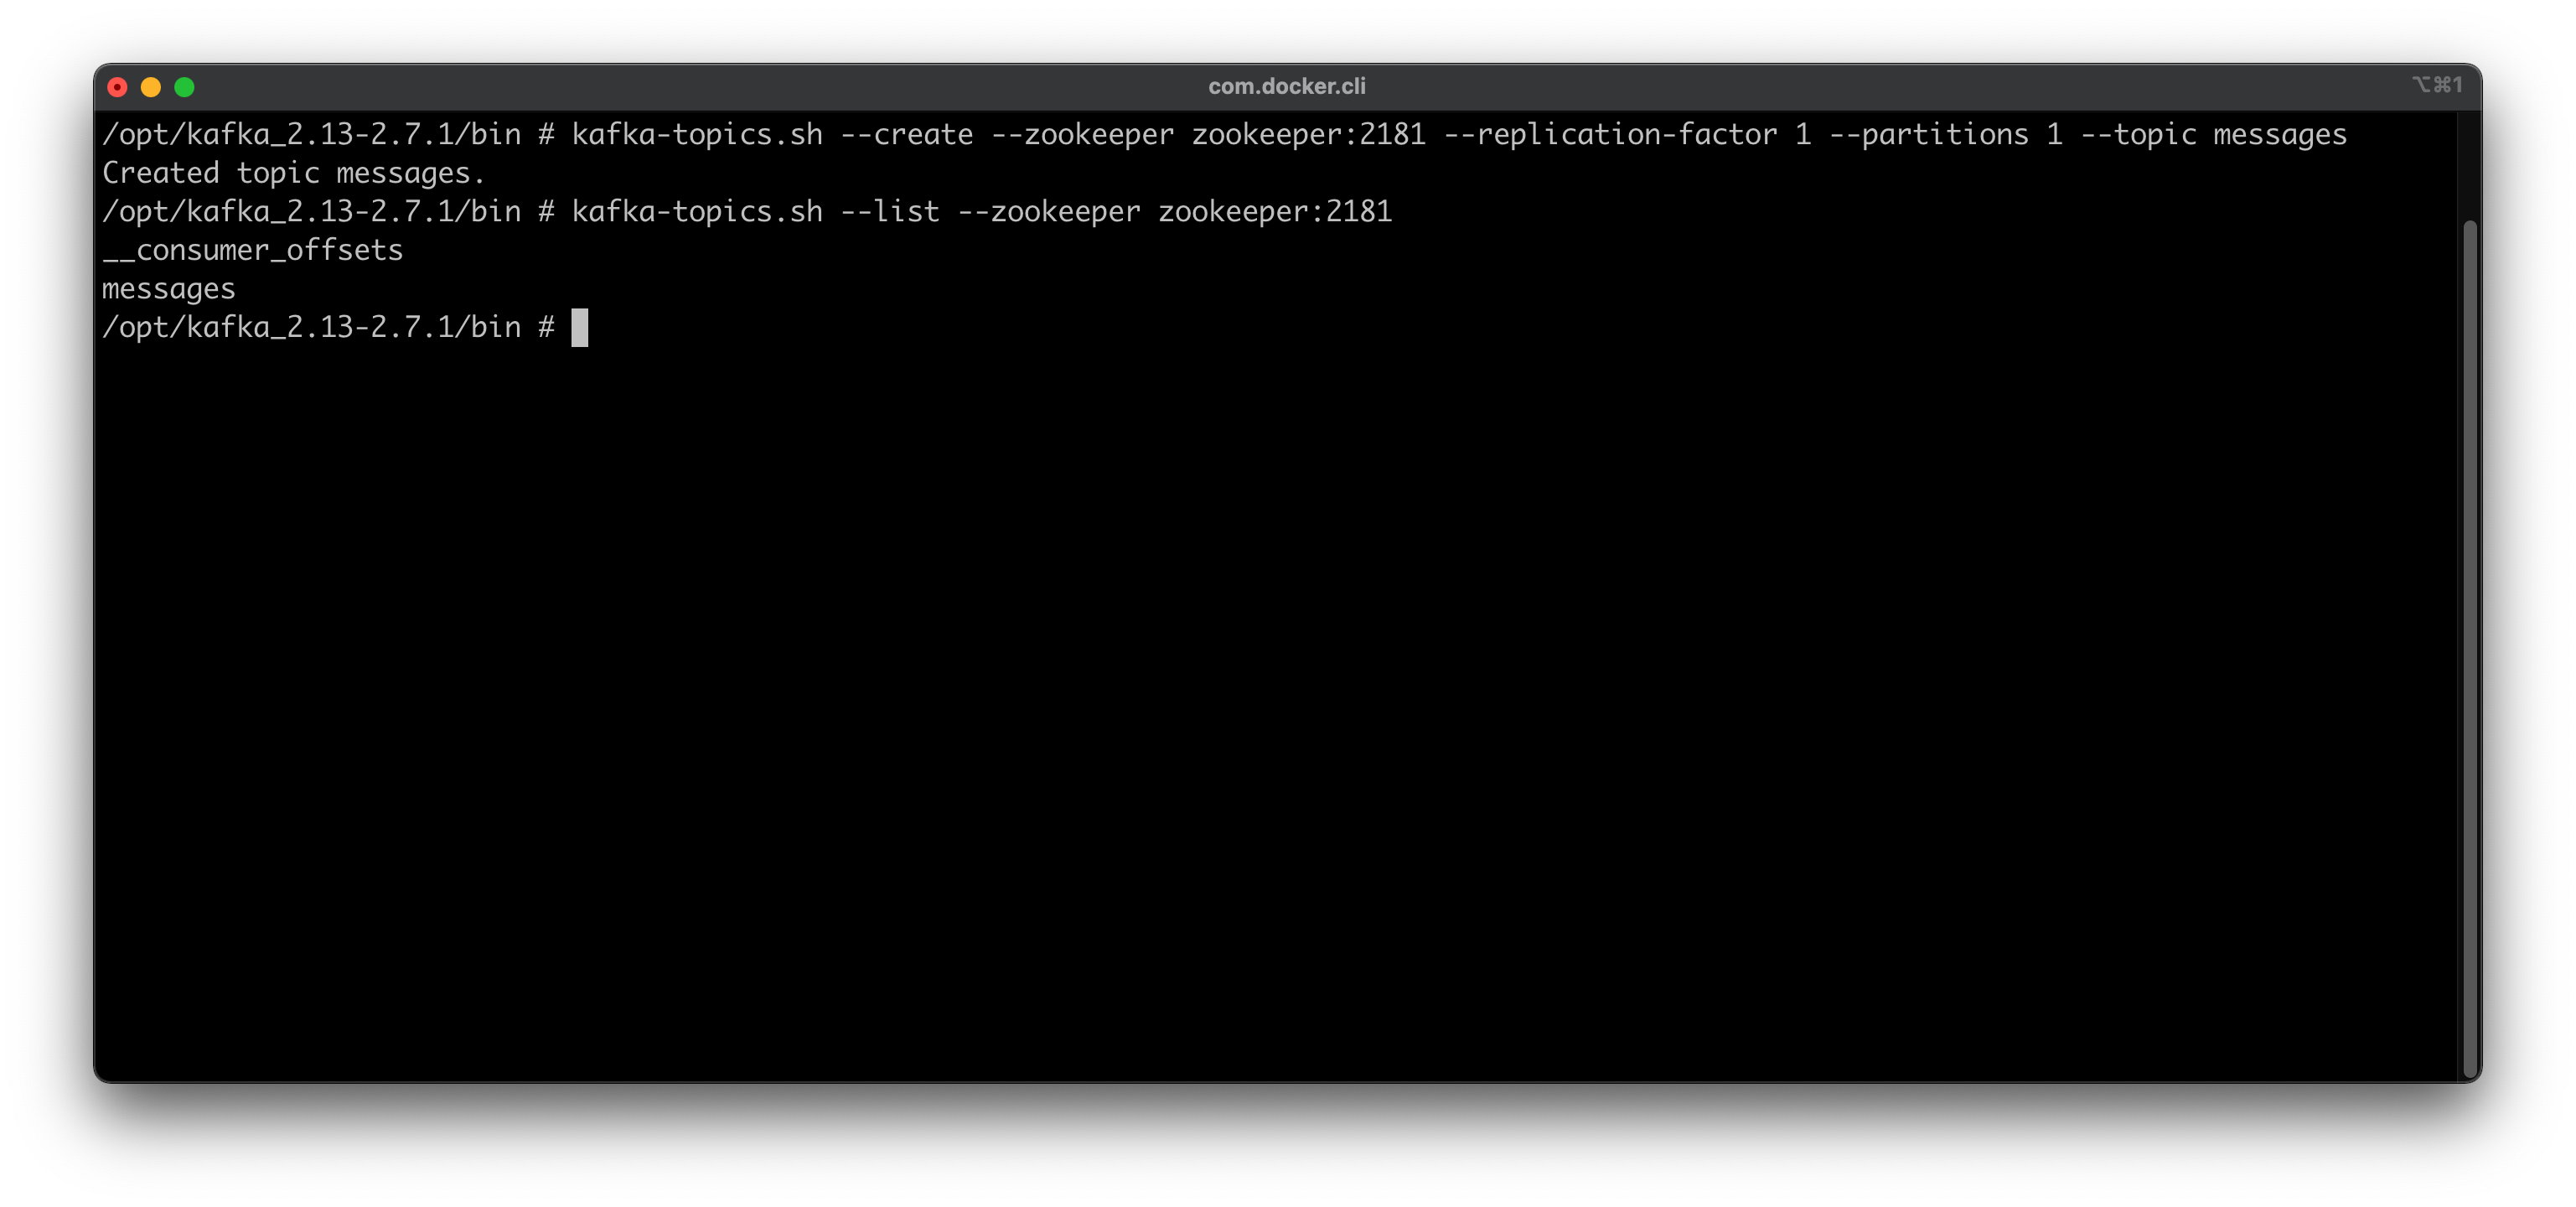
Image 2 — Creating a Kafka topic (image by author)
That’s all you have to do in a Kafka shell. You can leave it now by typing exit into the console. The next step is to install the Python package for working with Kafka. It’s called kafka-python, and you can install it with the following command:
python3 -m pip install kafka-python
Here’s how the installation process should look like:
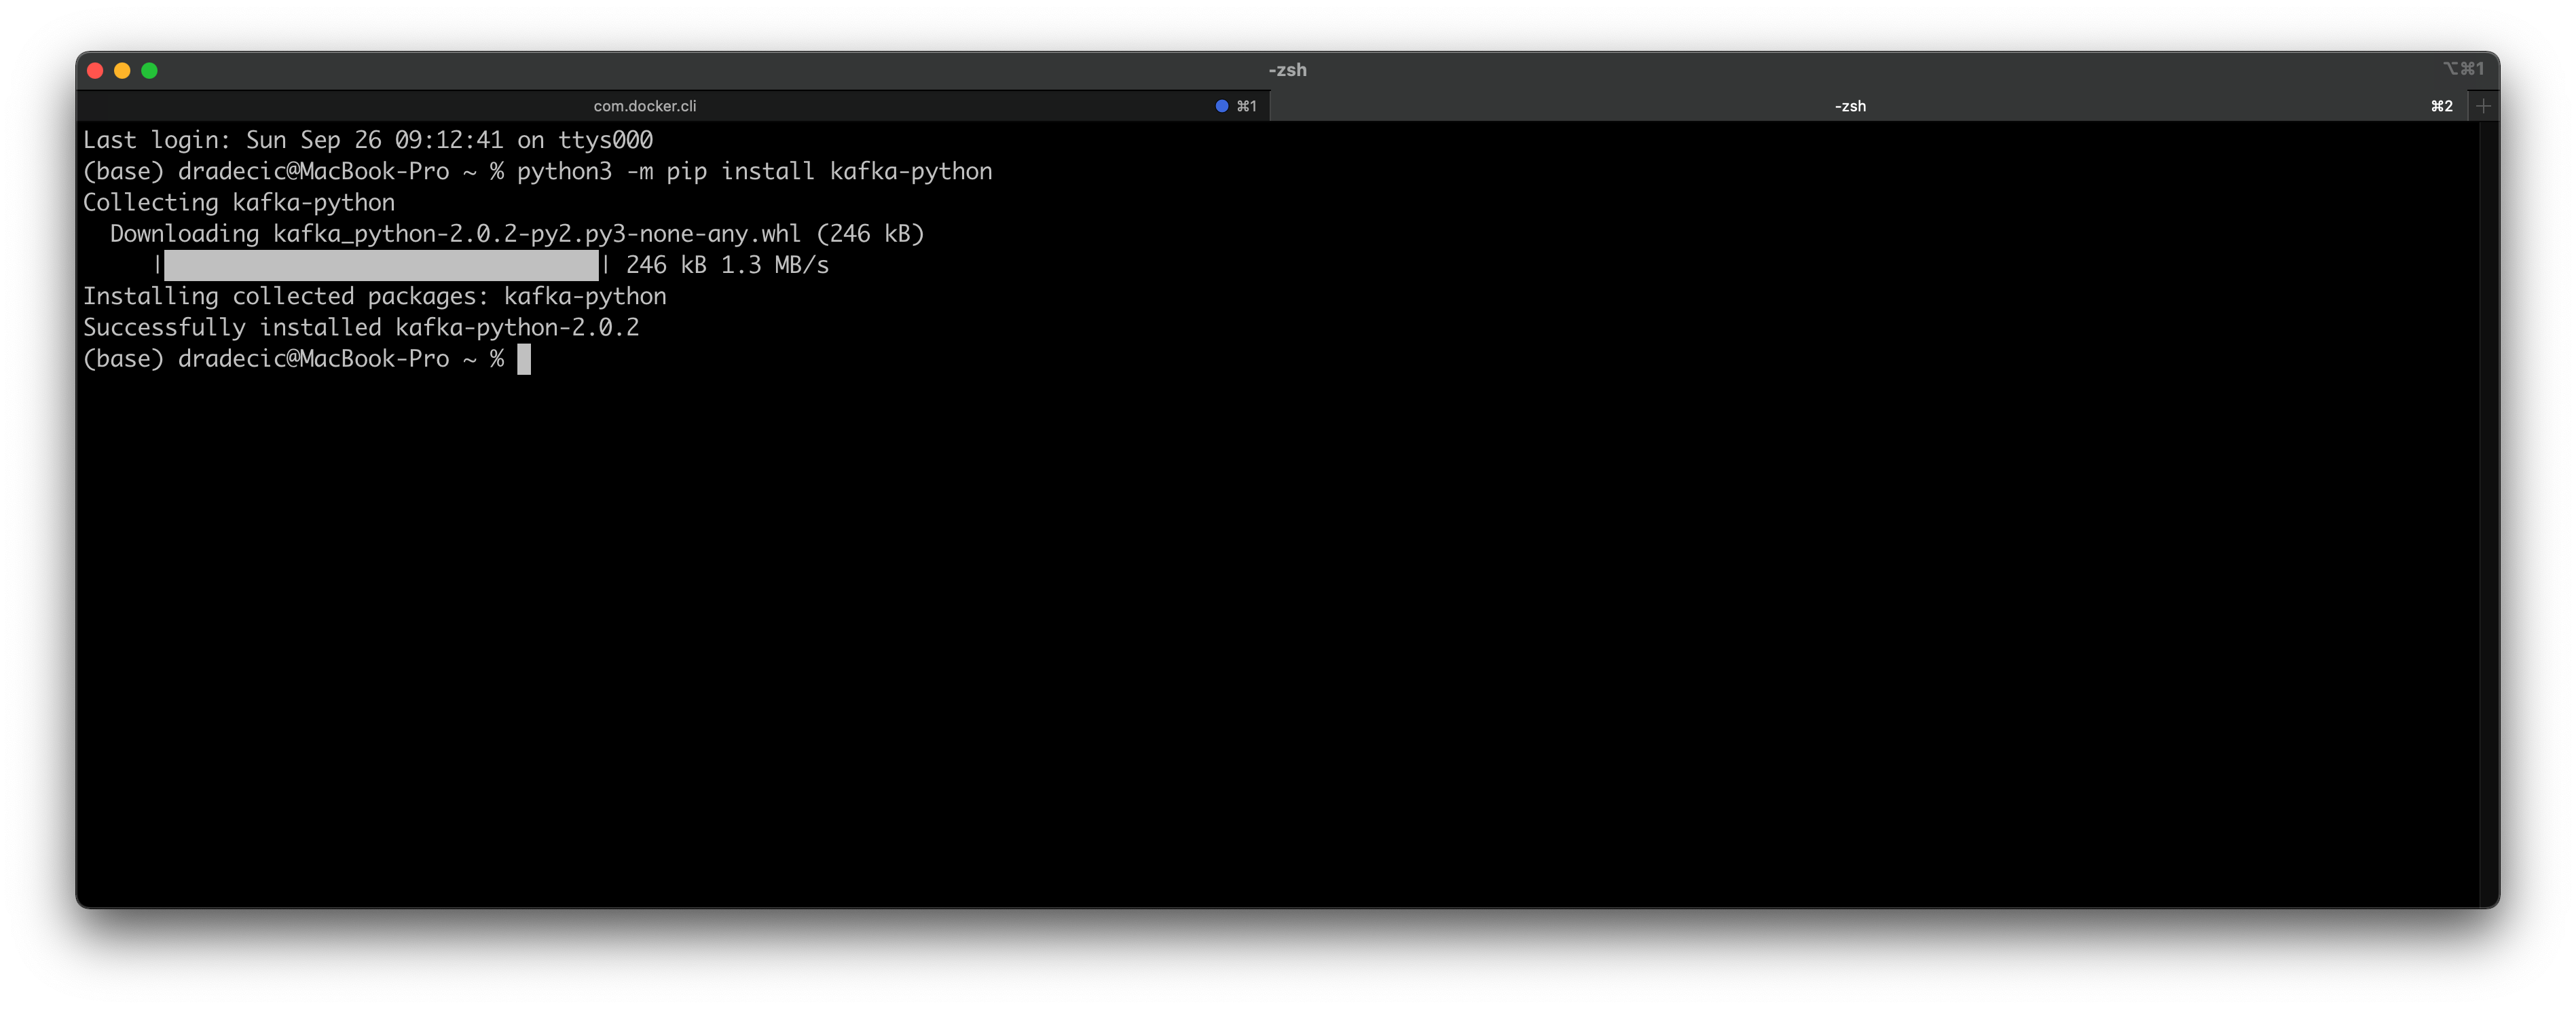
Image 3 — Installing a Python library for Kafka (image by author)
Almost there! The final step is to create a folder for storing Python scripts and the script files themselves. I’ve created a kafka-python-code folder on the Desktop, but you can put yours anywhere:
cd Desktop
mkdir kafka-python-code && cd kafka-python-code
touch data_generator.py
touch producer.py
touch consumer.py
And that’s all you need to get started coding!
Creating fake data with Python
You’ll need a way of ensuring a constant data flow if you want to understand how Kafka works. That’s why you’ll create a file that generates fake user message data.
The generate_message() function of the data_generator.py file will have that task. It will select a random User ID and Recipient ID — just a random number ranging from 1 to 100, making sure these aren’t identical — and create a message as a random string of 32 characters.
All three are then returned as a Python dictionary since we’ll send the messages encoded as JSON.
Here’s the entire code:
import random
import string

user_ids = list(range(1, 101))
recipient_ids = list(range(1, 101))

def generate_message() -> dict:
    random_user_id = random.choice(user_ids)
    # Copy the recipients array
    recipient_ids_copy = recipient_ids.copy()
    # User can't send message to himself
    recipient_ids_copy.remove(random_user_id)
    random_recipient_id = random.choice(recipient_ids_copy)
    # Generate a random message
    message = ''.join(random.choice(string.ascii_letters) for i in range(32))
    return {
        'user_id': random_user_id,
        'recipient_id': random_recipient_id,
        'message': message
    }
The function is simple, but it will do just fine for our needs. Next, let’s write a Kafka Producer using Python.
Writing a Kafka Producer in Python
This is where the fun stuff begins. You’ll now see how to write a Producer code with the kafka-python library. Open up the producer.py file, and you’re ready to roll.
Messages going to Kafka need to be serialized in some way. Since we’re getting them as Python dictionaries, the only logical choice is JSON. You’ll write a helper serializer() function that will turn anything it sees to JSON and encode it as utf-8.
The Kafka producer needs to know where Kafka is running. Yours is probably on localhost:9092if you haven’t changed the port during the configuration phase. In addition, the KafkaProducerclass needs to know how the values will be serialized. You know the answer to both.
And now comes the part in which you’ll generate messages and send them to the messagestopic. You’ll create an infinite loop, so the messages are sent until you stop the Python script. Inside the loop you’ll generate the message, print it with the timestamp, and send it to the Kafka topic.
Just so you don’t get overwhelmed with the number of messages in the console, it’s best to set some sleep time after the message is sent. Python will sleep for a random number of seconds, with a range between 1 and 10 included.
And that’s all for the Kafka producer. Here’s the full source code:
import time
import json
import random
from datetime import datetime
from data_generator import generate_message
from kafka import KafkaProducer

# Messages will be serialized as JSON
def serializer(message):
    return json.dumps(message).encode('utf-8')

# Kafka Producer
producer = KafkaProducer(
    bootstrap_servers=['localhost:9092'],
    value_serializer=serializer
)

if __name__ == '__main__':
    # Infinite loop - runs until you kill the program
    while True:
        # Generate a message
        dummy_message = generate_message()

        # Send it to our 'messages' topic
        print(f'Producing message @ {datetime.now()} | Message = {str(dummy_message)}')
        producer.send('messages', dummy_message)

        # Sleep for a random number of seconds
        time_to_sleep = random.randint(1, 11)
        time.sleep(time_to_sleep)
Easy, right? We still need to write the Consumer code, so let’s do that next.
Writing the Kafka Consumer in Python
Kafka Consumer will be much easier to code out. When the Consumer starts, you’ll get all the messages from the messages topic and print them out. Of course, you’re not limited to printing the messages — you can do whatever you want — but let’s keep things simple.
The auto_offset_reset parameter will ensure the oldest messages are displayed first.
Here’s the full source code:
import json
from kafka import KafkaConsumer

if __name__ == '__main__':
    # Kafka Consumer
    consumer = KafkaConsumer(
        'messages',
        bootstrap_servers='localhost:9092',
        auto_offset_reset='earliest'
    )
    for message in consumer:
        print(json.loads(message.value))
And that’s all you have to do! Let’s test them both next.
Testing
Open up two Terminal windows side by side if you can. It’s easy on Mac, as you can arrange tabs any way you see fit. Open the folder where the Python scripts are located in both tabs:
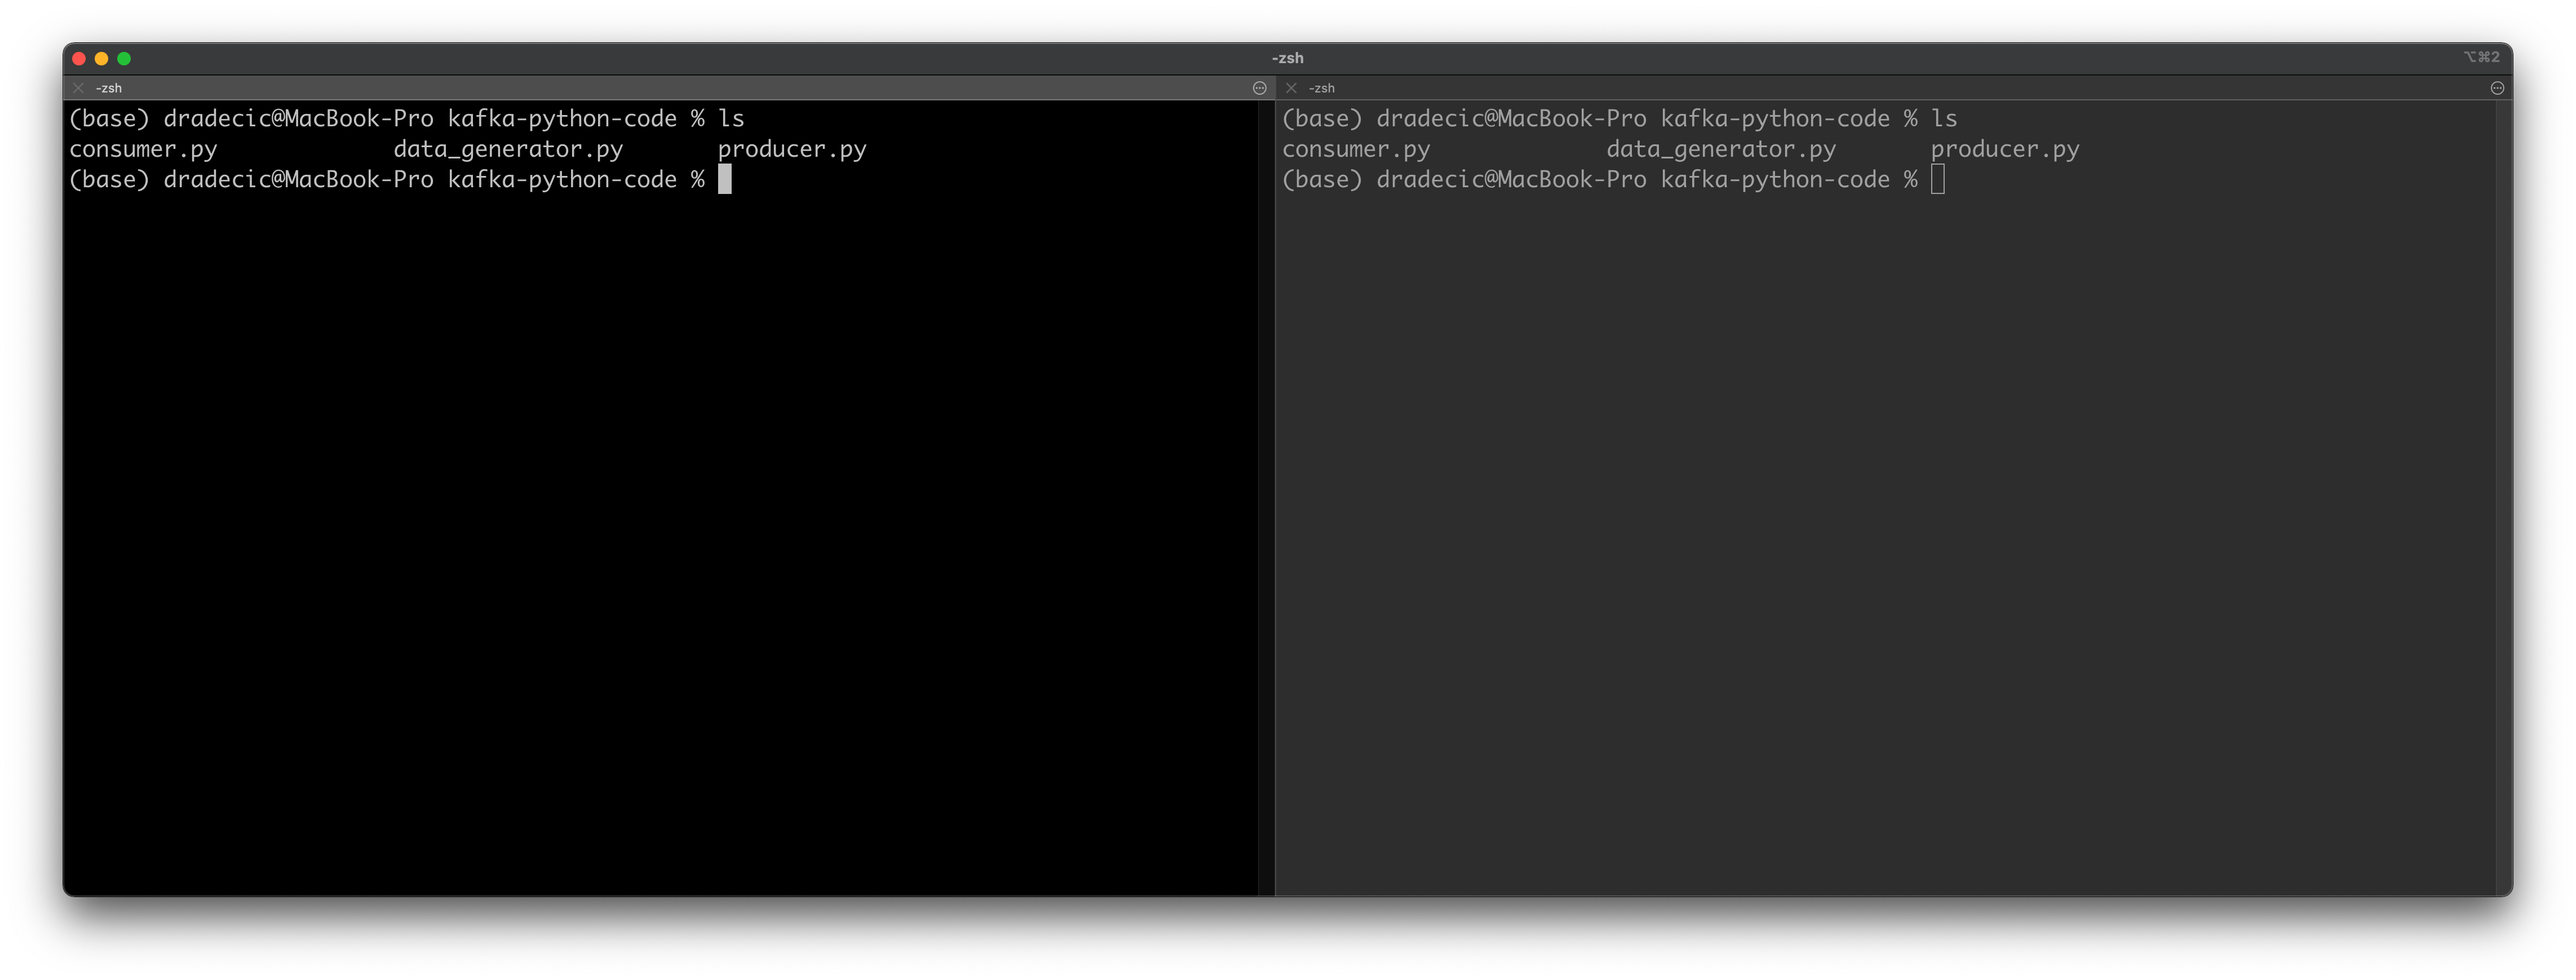
Image 4 — Testing Python Consumers and Producers (1) (image by author)
You’ll want to start the Consumer first, as you don’t want to miss any messages. All old messages will be printed first, and you’ll see the new ones printed as they are produced. Use the following command to start the Consumer:
python3 consumer.py
And now use the following command in the other tab to start the Producer:
python3 producer.py
You’ll immediately see a message printed out:
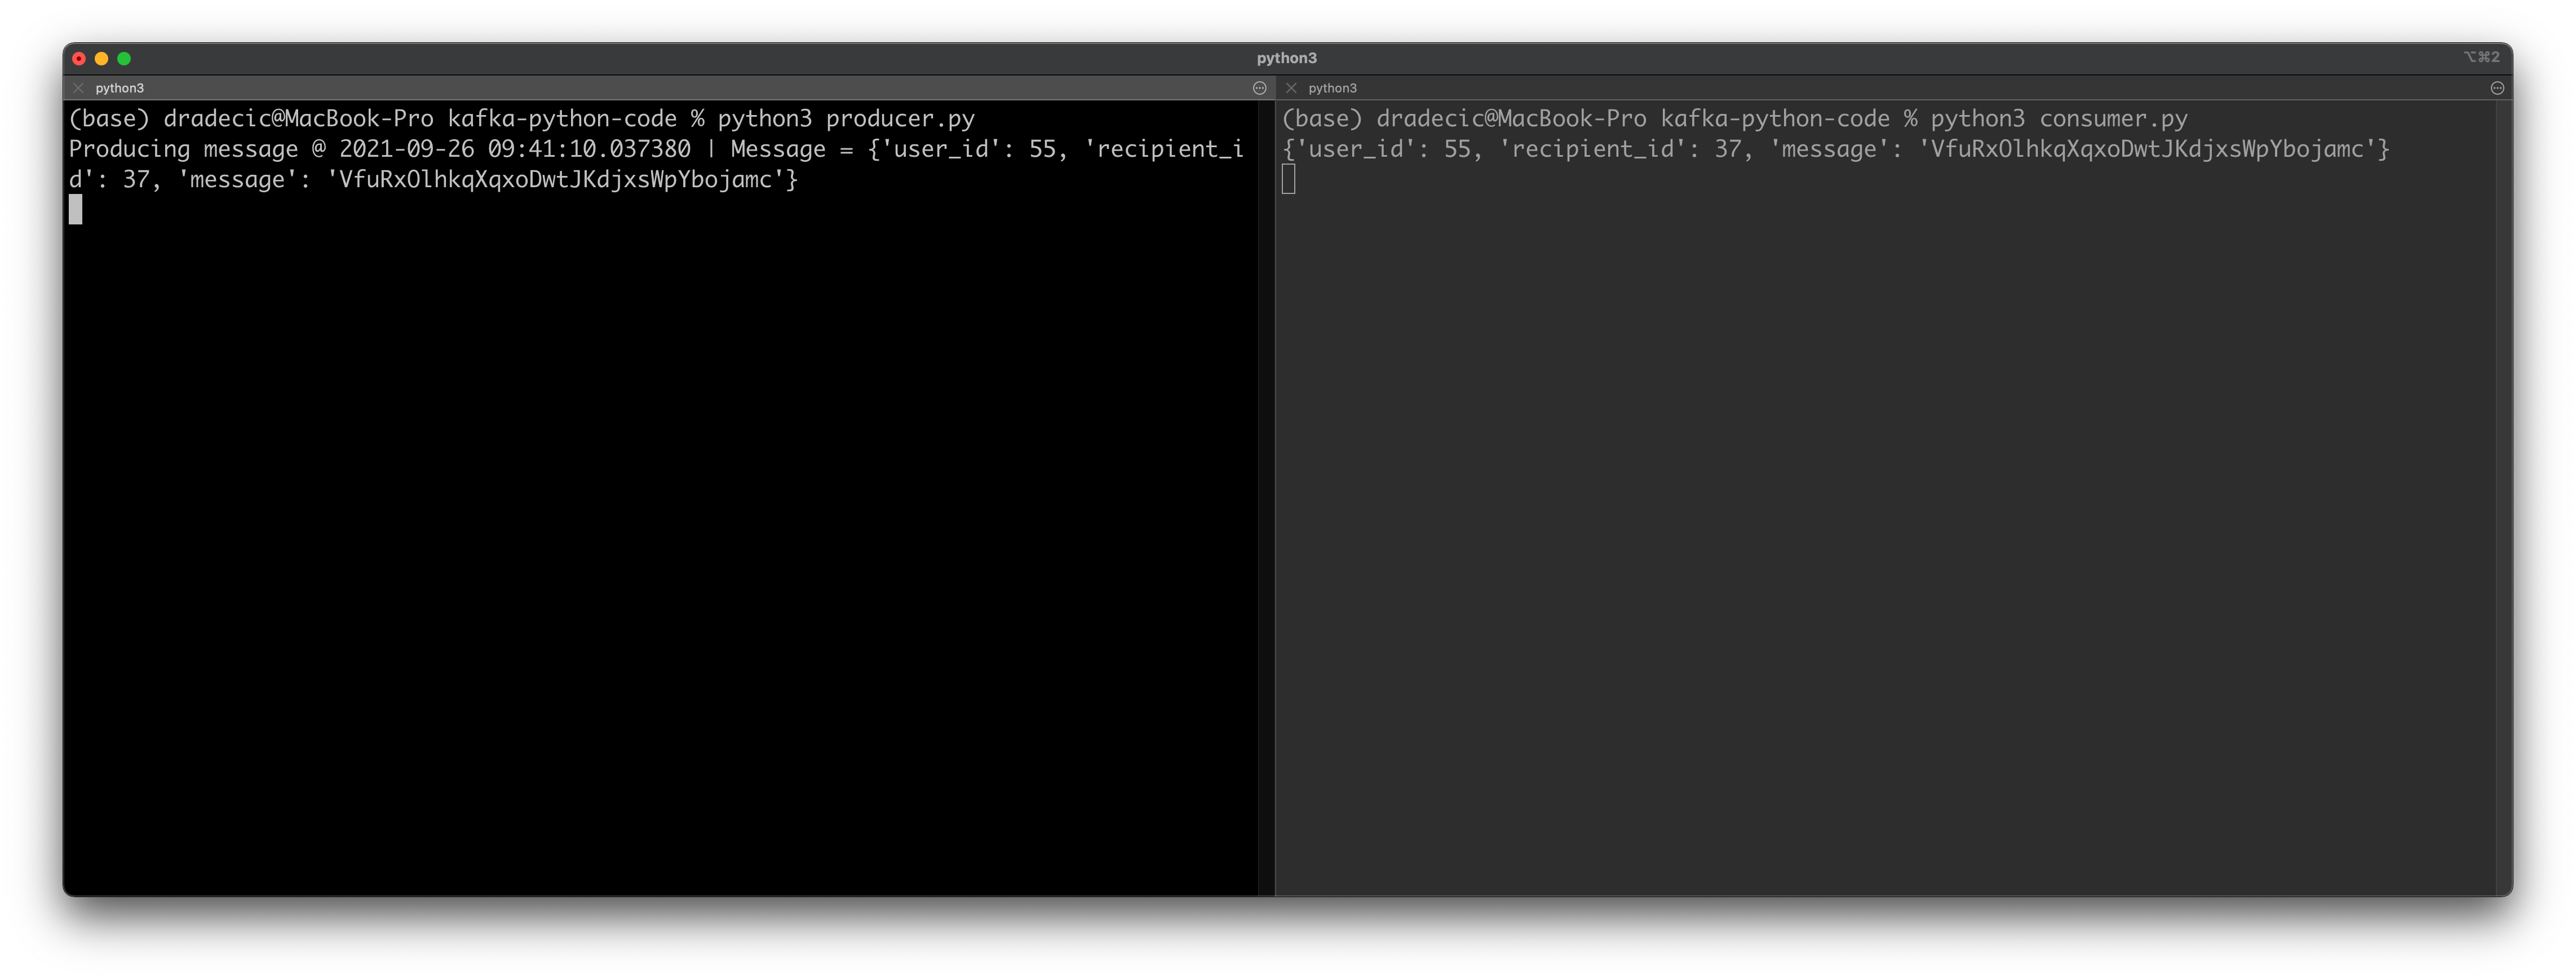
Image 5 — Testing Python Consumers and Producers (2) (image by author)
Remember that the Producer sleeps for a random number of seconds before sending the next message. It’s best to leave both windows running for a minute or so, just to verify everything is working properly.
Here are the results on my machine:
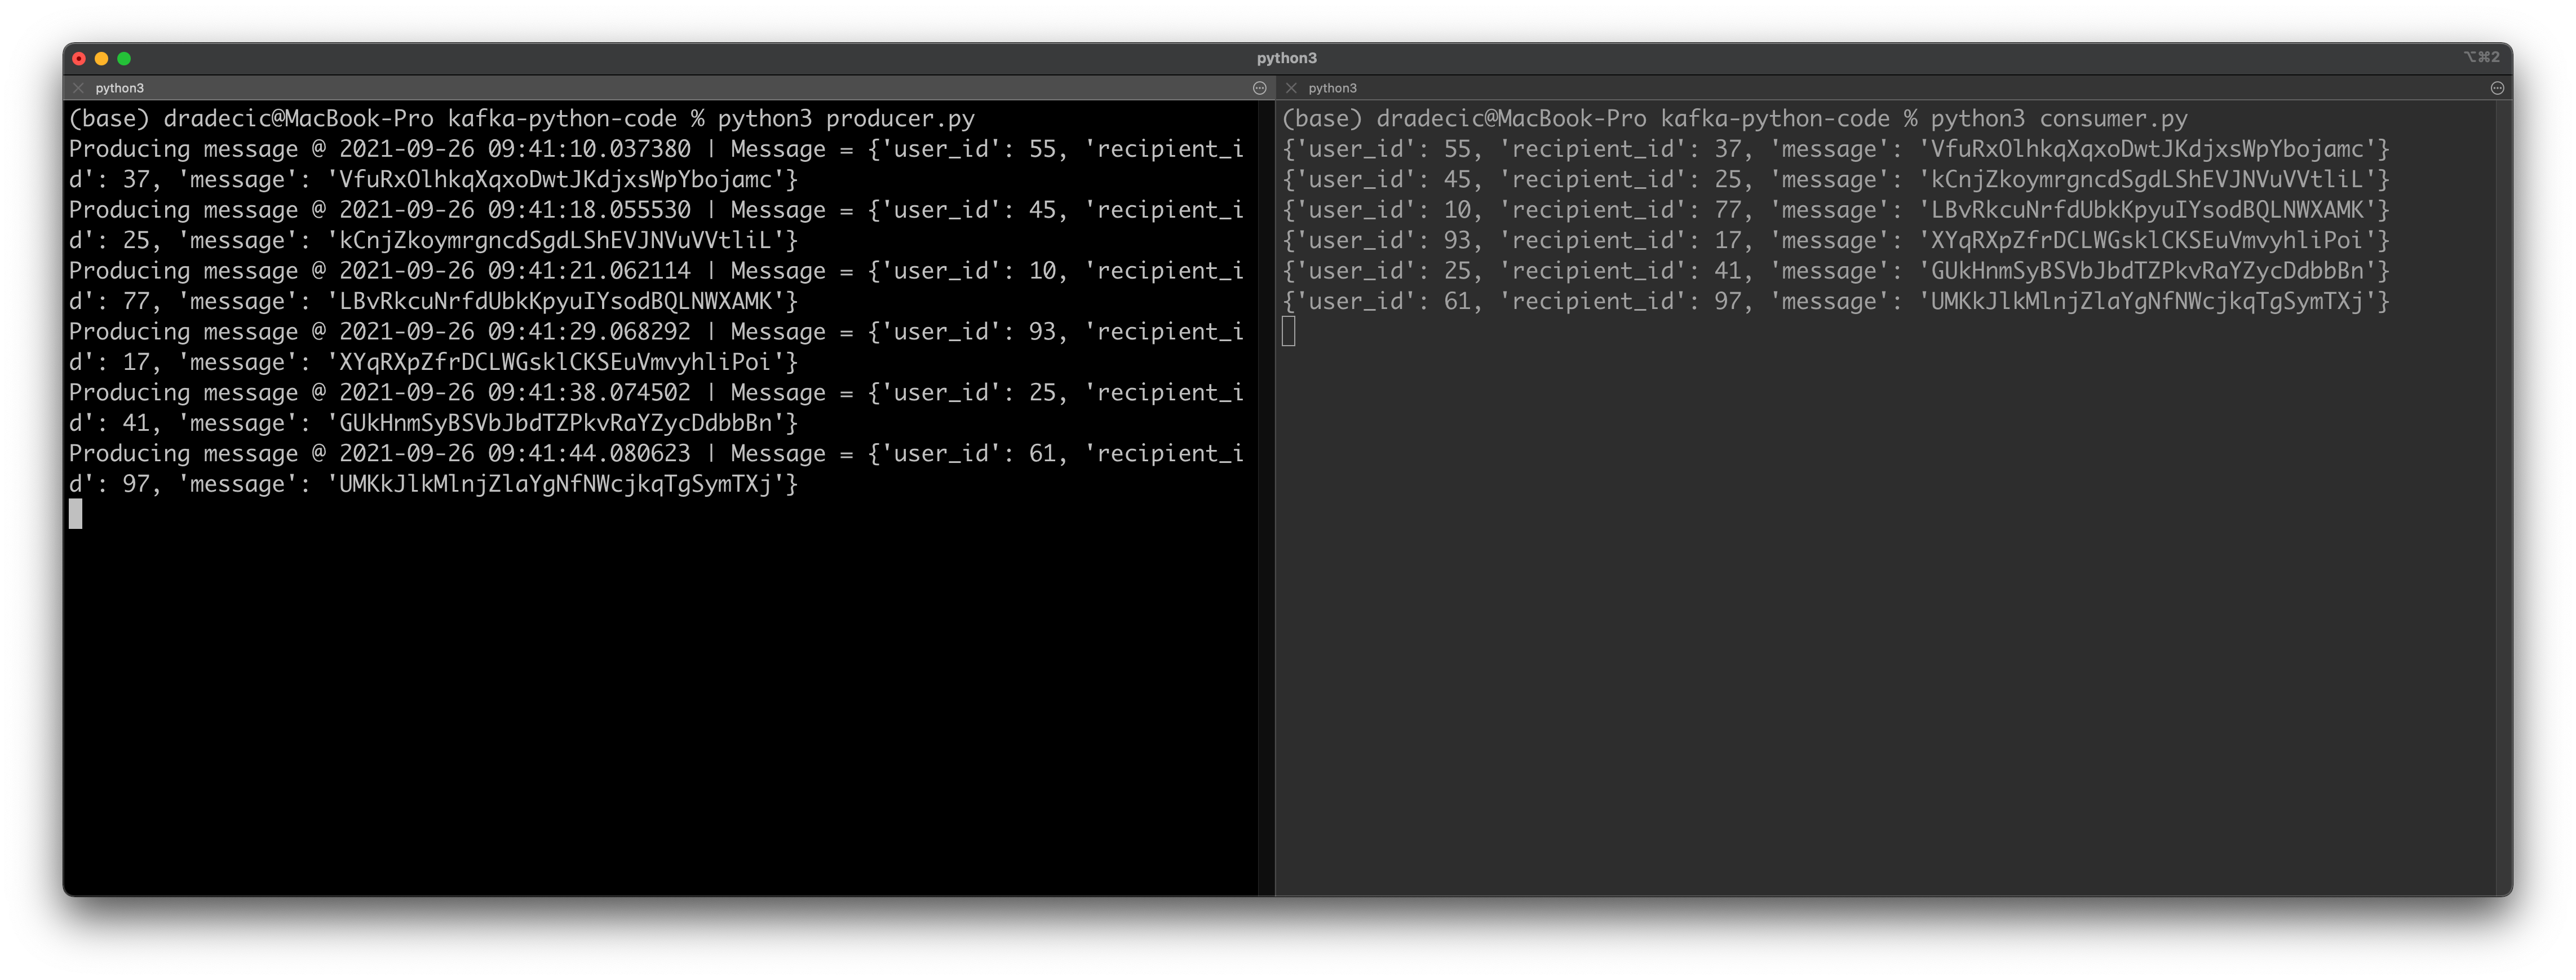
Image 6 — Testing Python Consumers and Producers (3) (image by author)
Everything works as advertised! Let’s wrap things up next.
Parting words
And there you have it — your first Python-based Consumer and Producer code for Apache Kafka. It was a dummy example, sure, but the principles remain the same regardless of the code changes you’ll make.
Refer to the video if something’s not working for you, as it’s a bit easier to follow along.
And that does it for the entire Apache Kafka mini article/video series — I hope it was easy enough to follow and that you’ve learned something useful in the process. Thanks for reading.
Stay connected
- Follow me on Medium for more stories like this
- Sign up for my newsletter
- Connect on LinkedIn