
In the previous article, you’ve seen how to install Apache Airflow locally in a new Python virtual environment and how to do the initial setup. Today you’ll write your first data pipeline (DAG) in Airflow, and it won’t take you more than 10 minutes.
The data pipeline will get the current datetime from the Terminal, process it, and save it to a CSV file. Pretty simple, but you’ll learn how Airflow’s Bash and Python operators work, and also how to communicate between tasks using Xcoms, and how to schedule your data pipelines. Let’s dive straight in!
Don’t feel like reading? Watch my video instead:
What You’ll Do Today
As the title suggests, you’ll write your first DAG that implements the following data pipeline:
- Gets the current datetime information from the Terminal
- Processes the returned datetime string
- Saves the datetime information to a CSV file
You can get the current datetime information through the Terminal by running the following command:
date
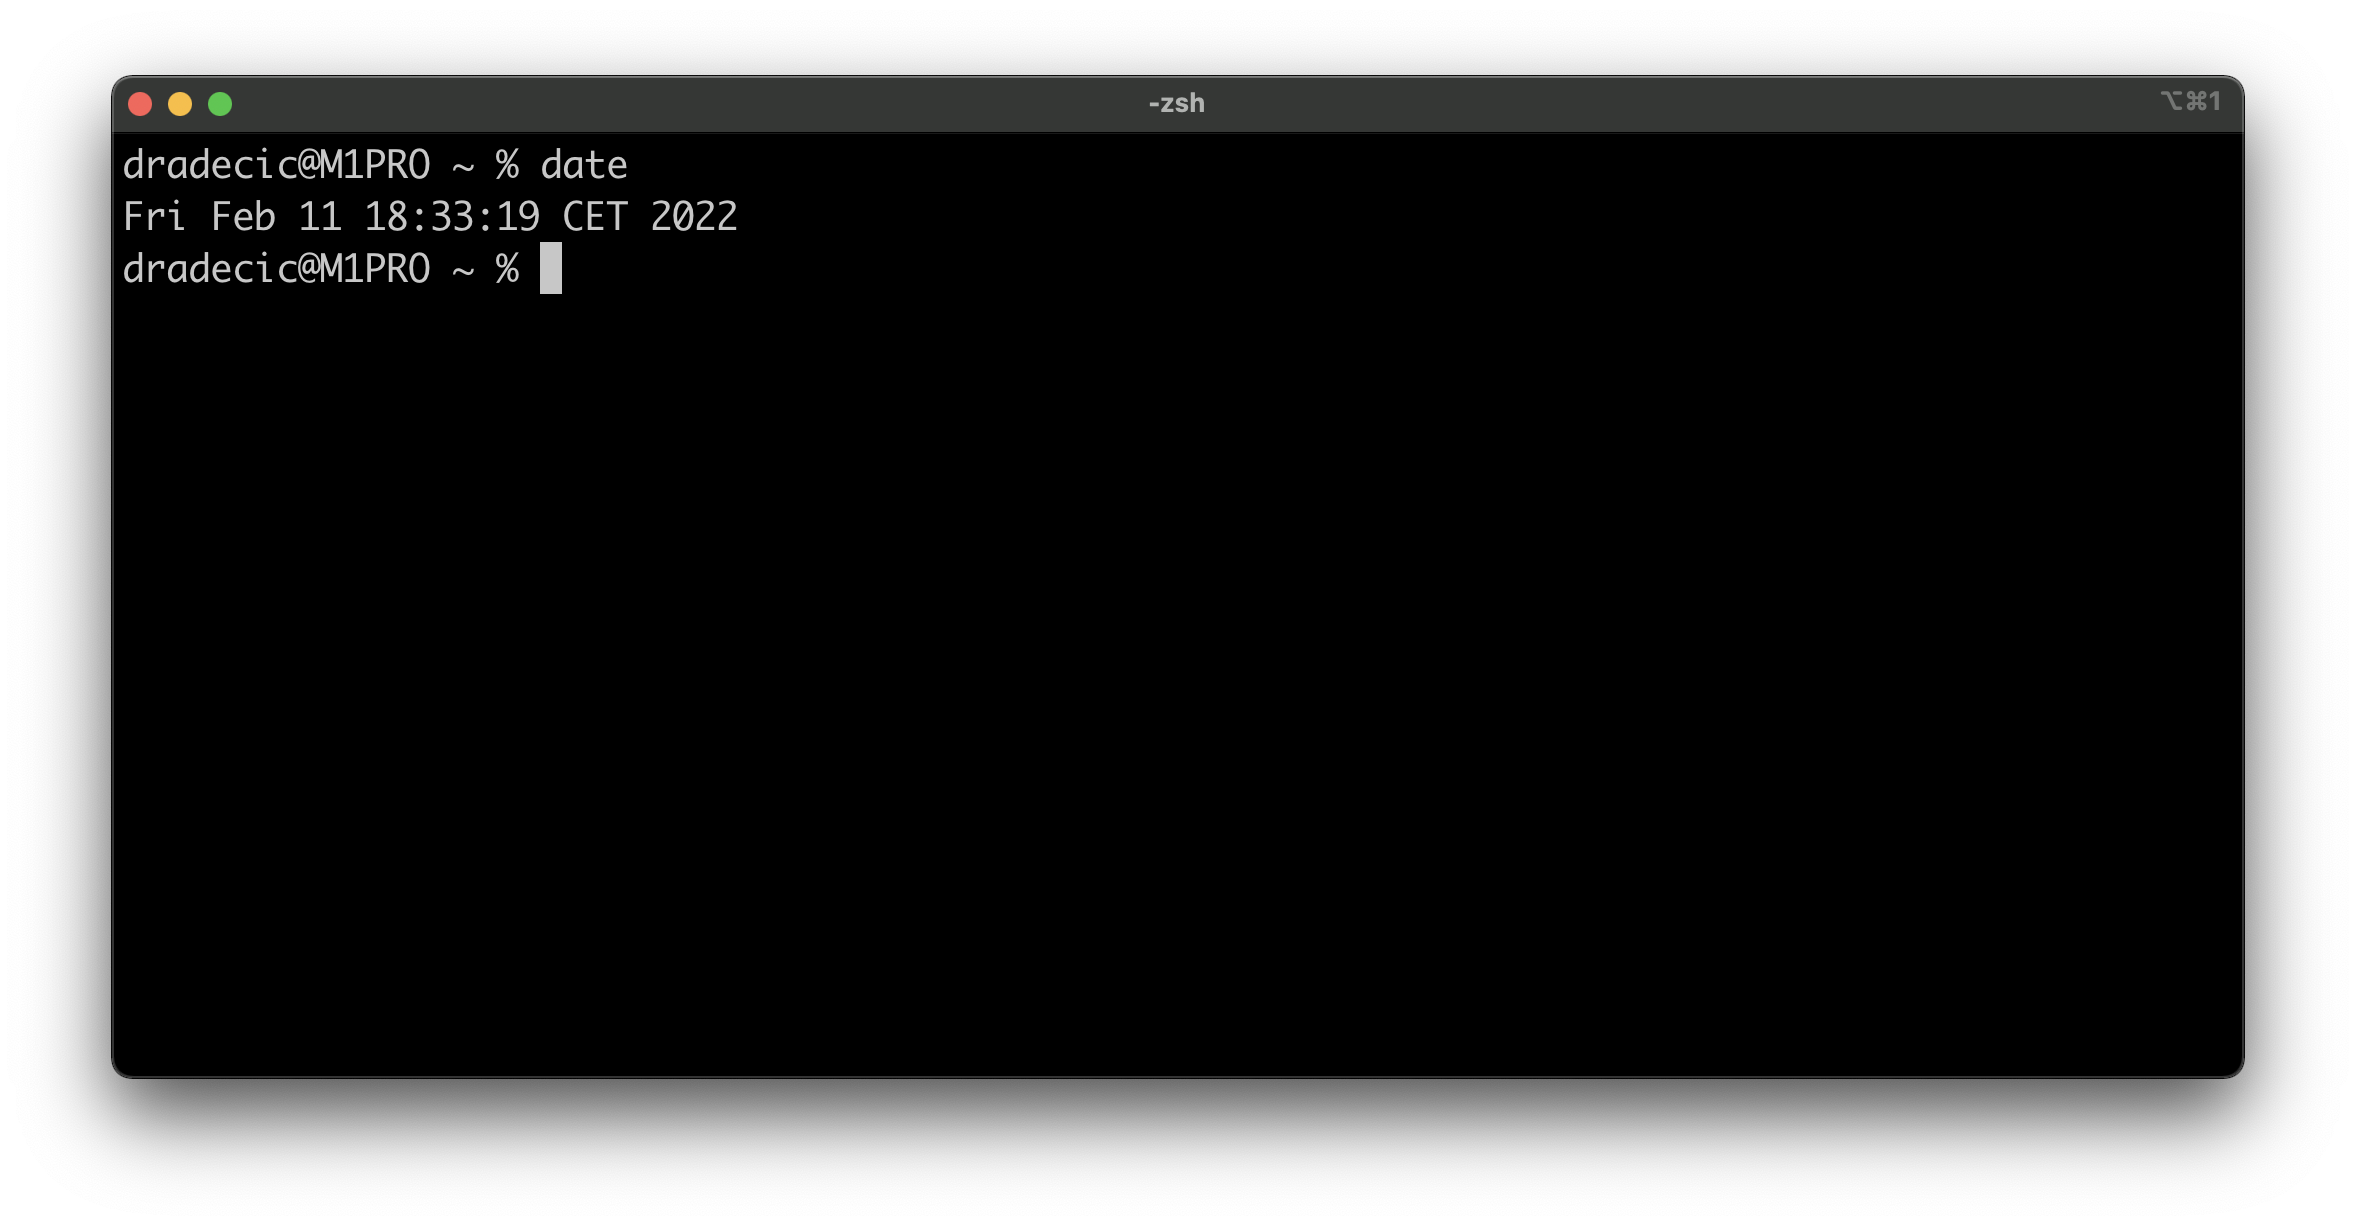
Image 1 - How to get the current datetime information through Terminal (image by author)
We’ll start by creating a new file in ~/airflow/dags. Create the dags folder before starting and open it in any code editor. I’m using PyCharm, but you’re free to use anything else. Inside the dags folder create a new Python file called first_dag.py.
You’re ready to get started - let’s begin with the boilerplate.
Write Your First Airflow DAG - The Boilerplate
Copy the following code to first_dag.py:
import os
import pandas as pd
from datetime import datetime
from airflow.models import DAG
from airflow.operators.bash import BashOperator
from airflow.operators.python import PythonOperator
from airflow.models import Variable


with DAG(
    dag_id='first_airflow_dag',
    schedule_interval='* * * * *',
    start_date=datetime(year=2022, month=2, day=1),
    catchup=False
) as dag:
    pass
We’ve made a lot of imports, and these are the modules and operators we’ll use throughout the file.
Every Airflow DAG is defined with Python’s context manager syntax (with). Here’s a description for each parameter:
dag_id- A unique ID that will represent the DAG inside the Airflow web application.schedule_interval- Specifies the interval at which your DAG should run. You can pass the strings@once,@hourly,@daily,@weekly,@monthly,@yearly, or a cron-like expression. For example,* * * * *means the DAG will run every minute. Learn more.start_date- The date at which your DAG will first run, I’ve set it in the past.catchup- Boolean, whether or not Airflow should catch up for every scheduled interval betweenstart_dateand now.
And with that out of the way, we can proceed with writing our first task.
Airflow Task #1 - Get Current Datetime
We’ll use Airflow’s BashOperator to execute a shell command. Each task in Airflow needs an ID, which must be unique across the DAG level. The bash_command argument allows you to specify the shell command that’ll be executed:
import os
import pandas as pd
from datetime import datetime
from airflow.models import DAG
from airflow.operators.bash import BashOperator
from airflow.operators.python import PythonOperator
from airflow.models import Variable


with DAG(
    dag_id='first_airflow_dag',
    schedule_interval='* * * * *',
    start_date=datetime(year=2022, month=2, day=1),
    catchup=False
) as dag:

    # 1. Get current datetime
    task_get_datetime = BashOperator(
        task_id='get_datetime',
        bash_command='date'
    )
The returned value gets saved internally and you can retrieve it through Airflow’s xcoms, but that’s something we’ll explore later. Right now, we can test if our first task works through Terminal. This is the command template you can use:
airflow tasks test <dag_name> <task_name> <date_in_the_past>
Our DAG is named first_airflow_dag and we’re running a task with the ID of get_datetime, so the command boils down to this:
airflow tasks test first_airflow_dag get_datetime 2022-2-1
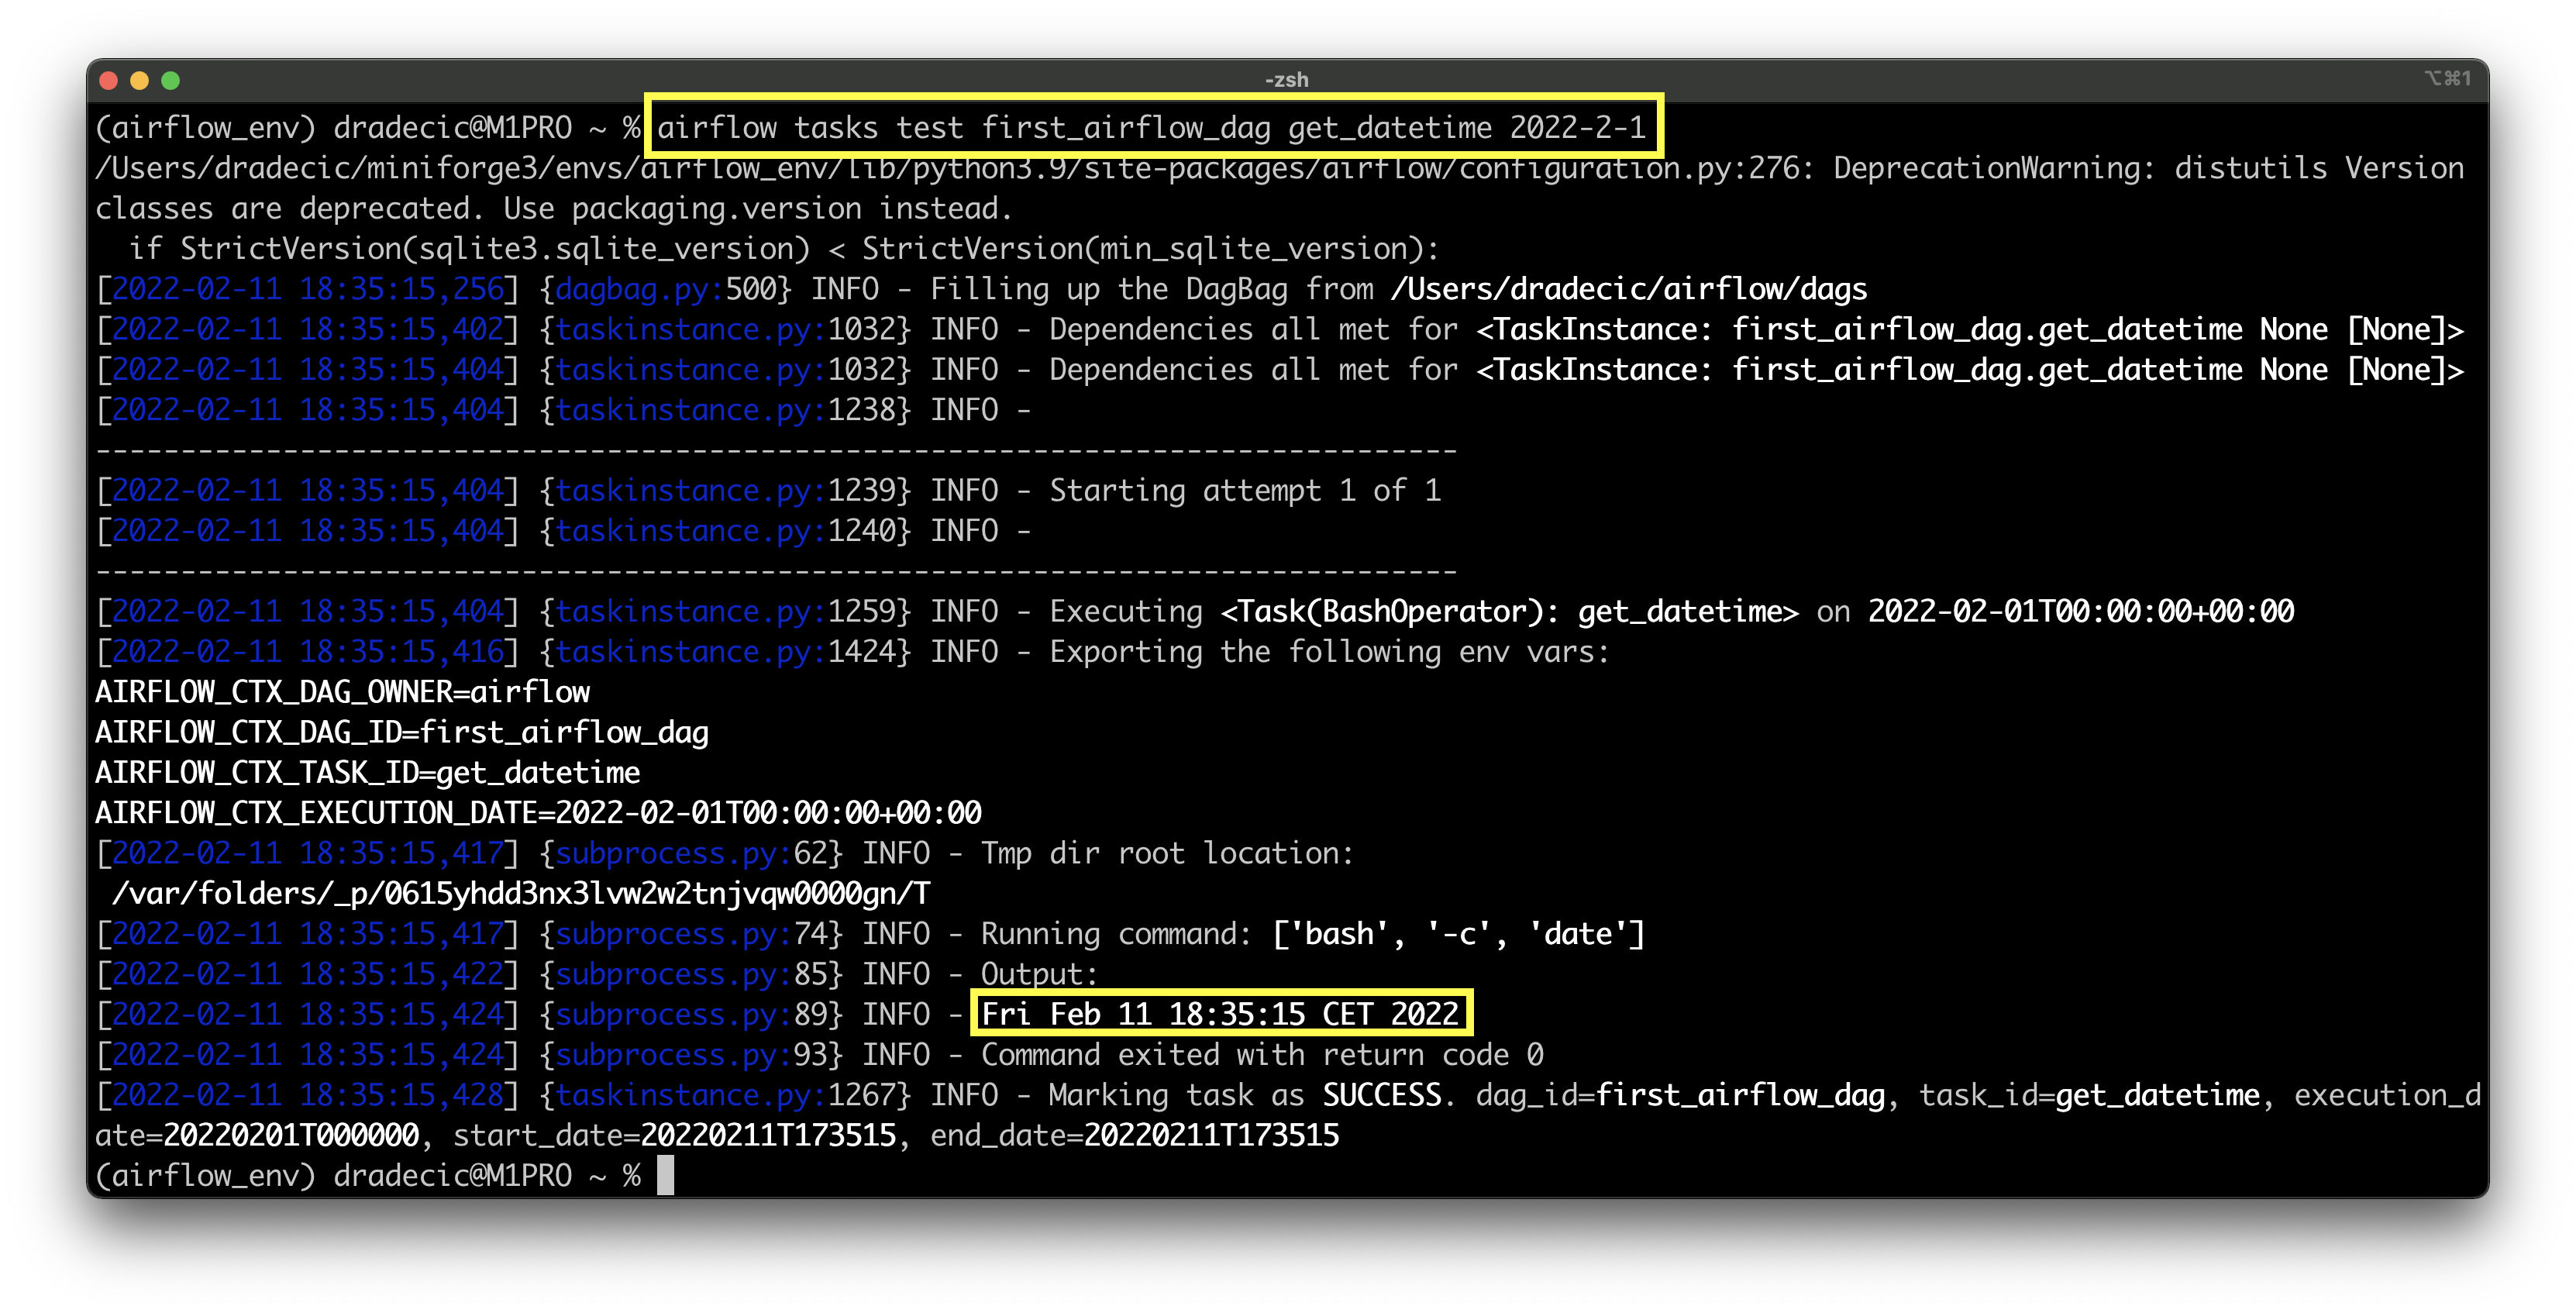
Image 2 - Testing the first Airflow task (image by author)
You can see that Fri Feb 11 18:35:15 CET 2022 is returned, and the task has finished successfully. That’s all we need to get started processing the datetime, so let’s do that next.
Airflow Task #2 - Process Current Datetime
For our second task, we’ll use a PythonOperator that will call the process_datetime() function. The ti argument allows us to access the xcom_pull() method, which retrieves the return value from the previous task(s), specified by the task_ids parameter.
Don’t worry too much about xcoms, as we’ll cover them extensively in the following articles.
We’ll convert the datetime to a string and then split it into a list on blank spaces. The goal is to extract the year, month, day, time, and day of week information from it. Refer to Image 2 to see what a single datetime string looks like:
import os
import pandas as pd
from datetime import datetime
from airflow.models import DAG
from airflow.operators.bash import BashOperator
from airflow.operators.python import PythonOperator
from airflow.models import Variable


def process_datetime(ti):
    dt = ti.xcom_pull(task_ids=['get_datetime'])
    if not dt:
        raise Exception('No datetime value.')

    dt = str(dt[0]).split()
    return {
        'year': int(dt[-1]),
        'month': dt[1],
        'day': int(dt[2]),
        'time': dt[3],
        'day_of_week': dt[0]
    }


with DAG(
    dag_id='first_airflow_dag',
    schedule_interval='* * * * *',
    start_date=datetime(year=2022, month=2, day=1),
    catchup=False
) as dag:

    # 1. Get current datetime
    task_get_datetime = BashOperator(
        task_id='get_datetime',
        bash_command='date'
    )

    # 2. Process current datetime
    task_process_datetime = PythonOperator(
        task_id='process_datetime',
        python_callable=process_datetime
    )
Let’s test the thing:
airflow tasks test first_airflow_dag process_datetime 2022-2-1
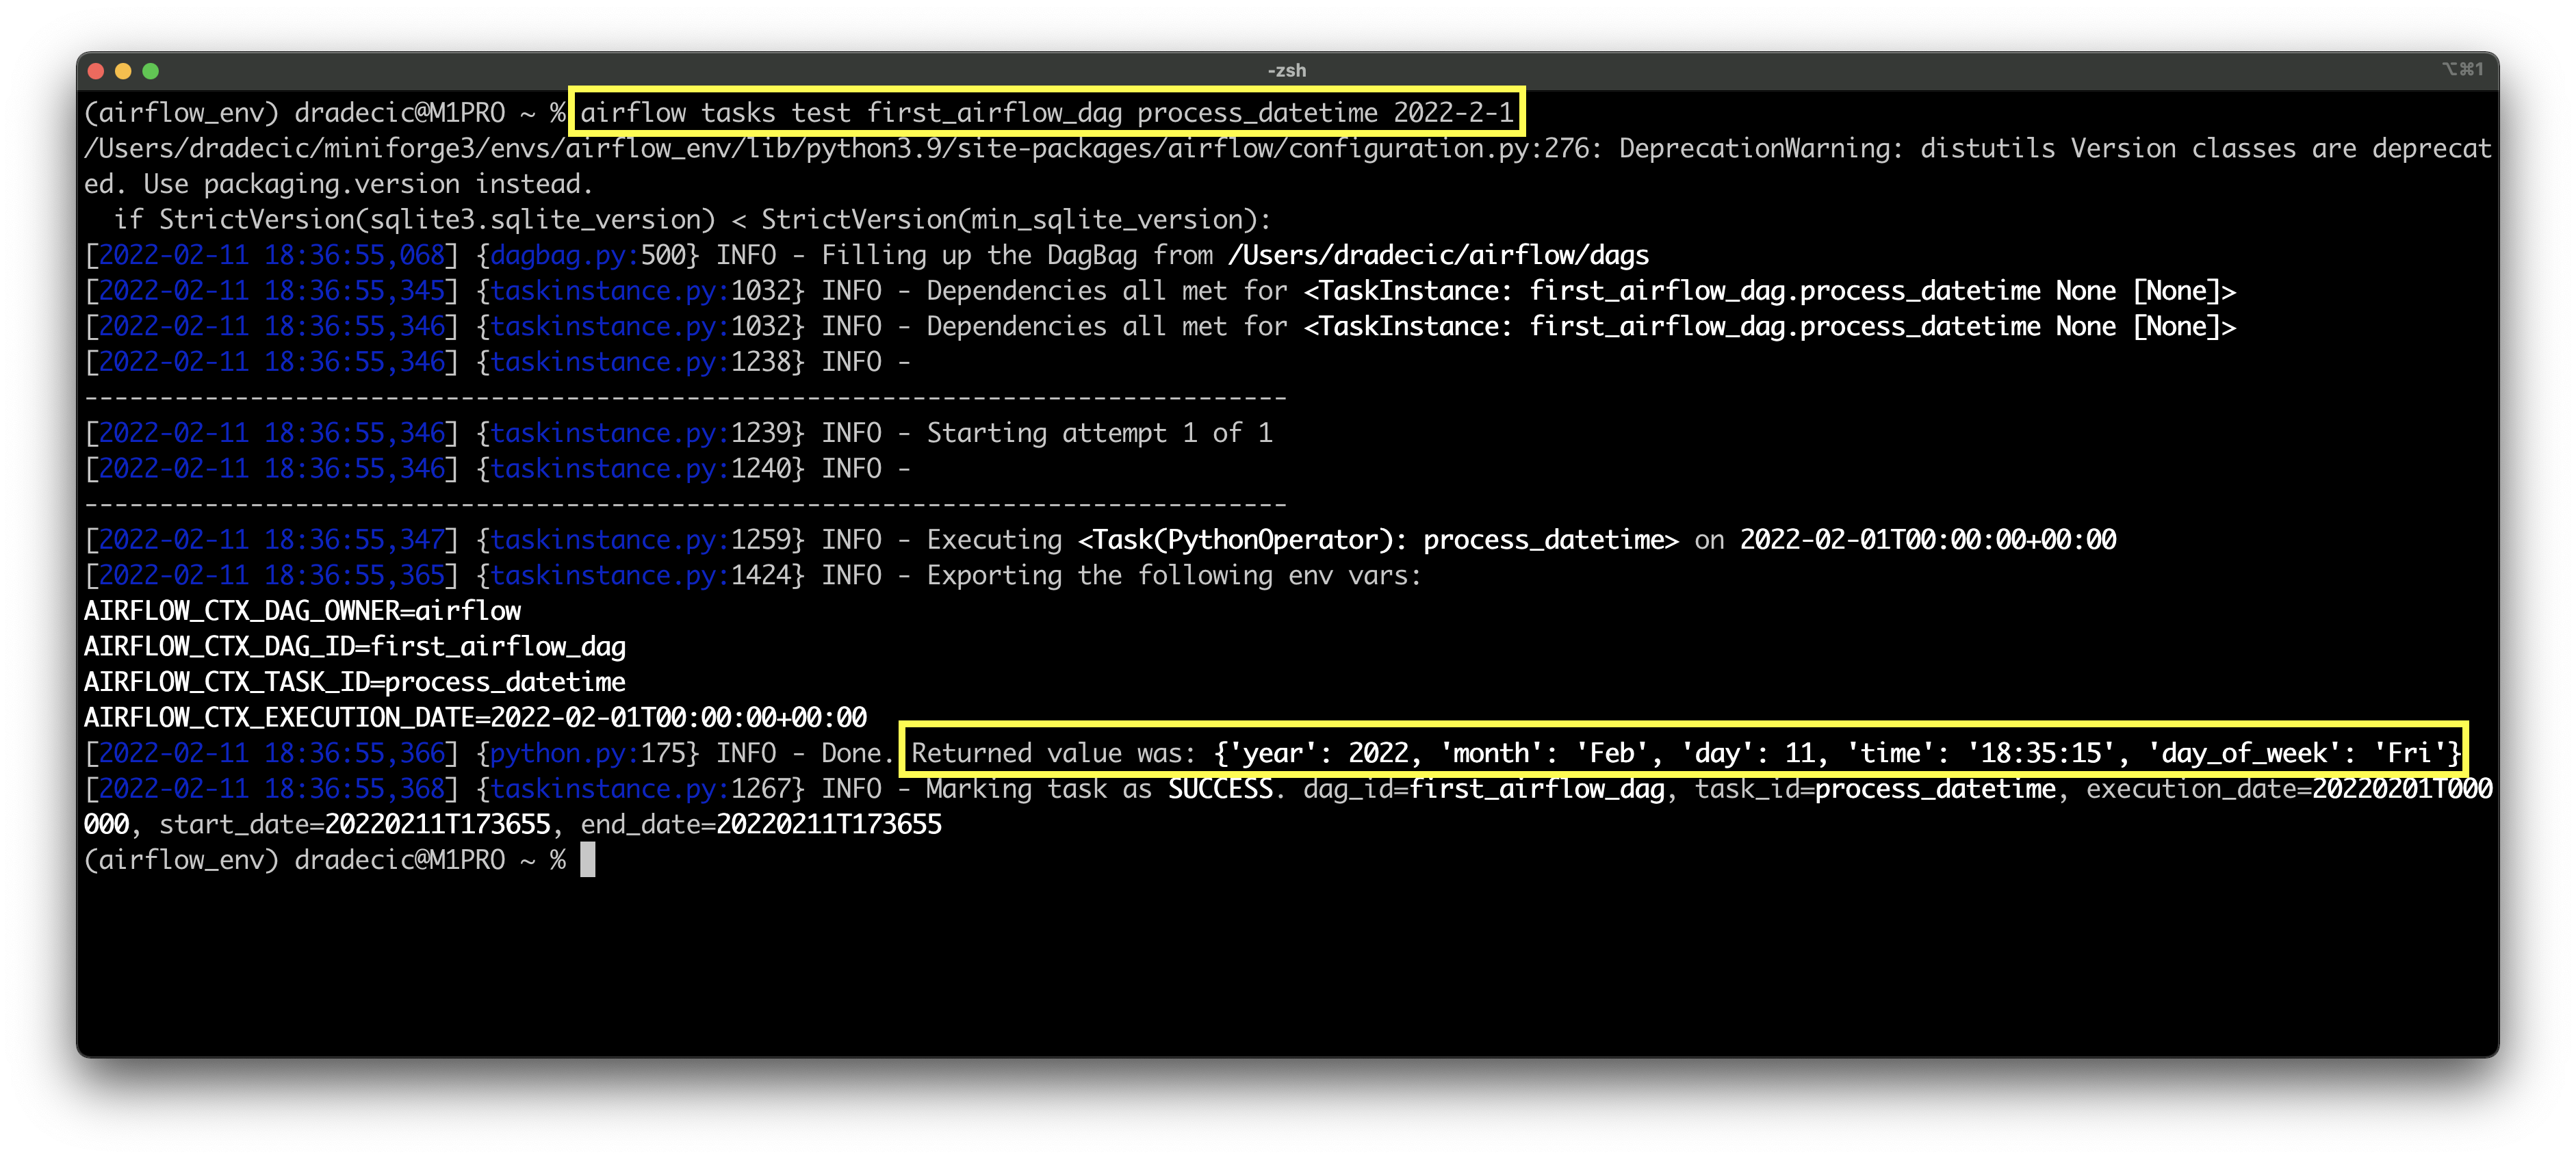
Image 3 - Testing the second Airflow task (image by author)
We’ll take a short break from the code. Open Airflow home page - http://localhost:8080/home - and see if your DAG appears in the list:
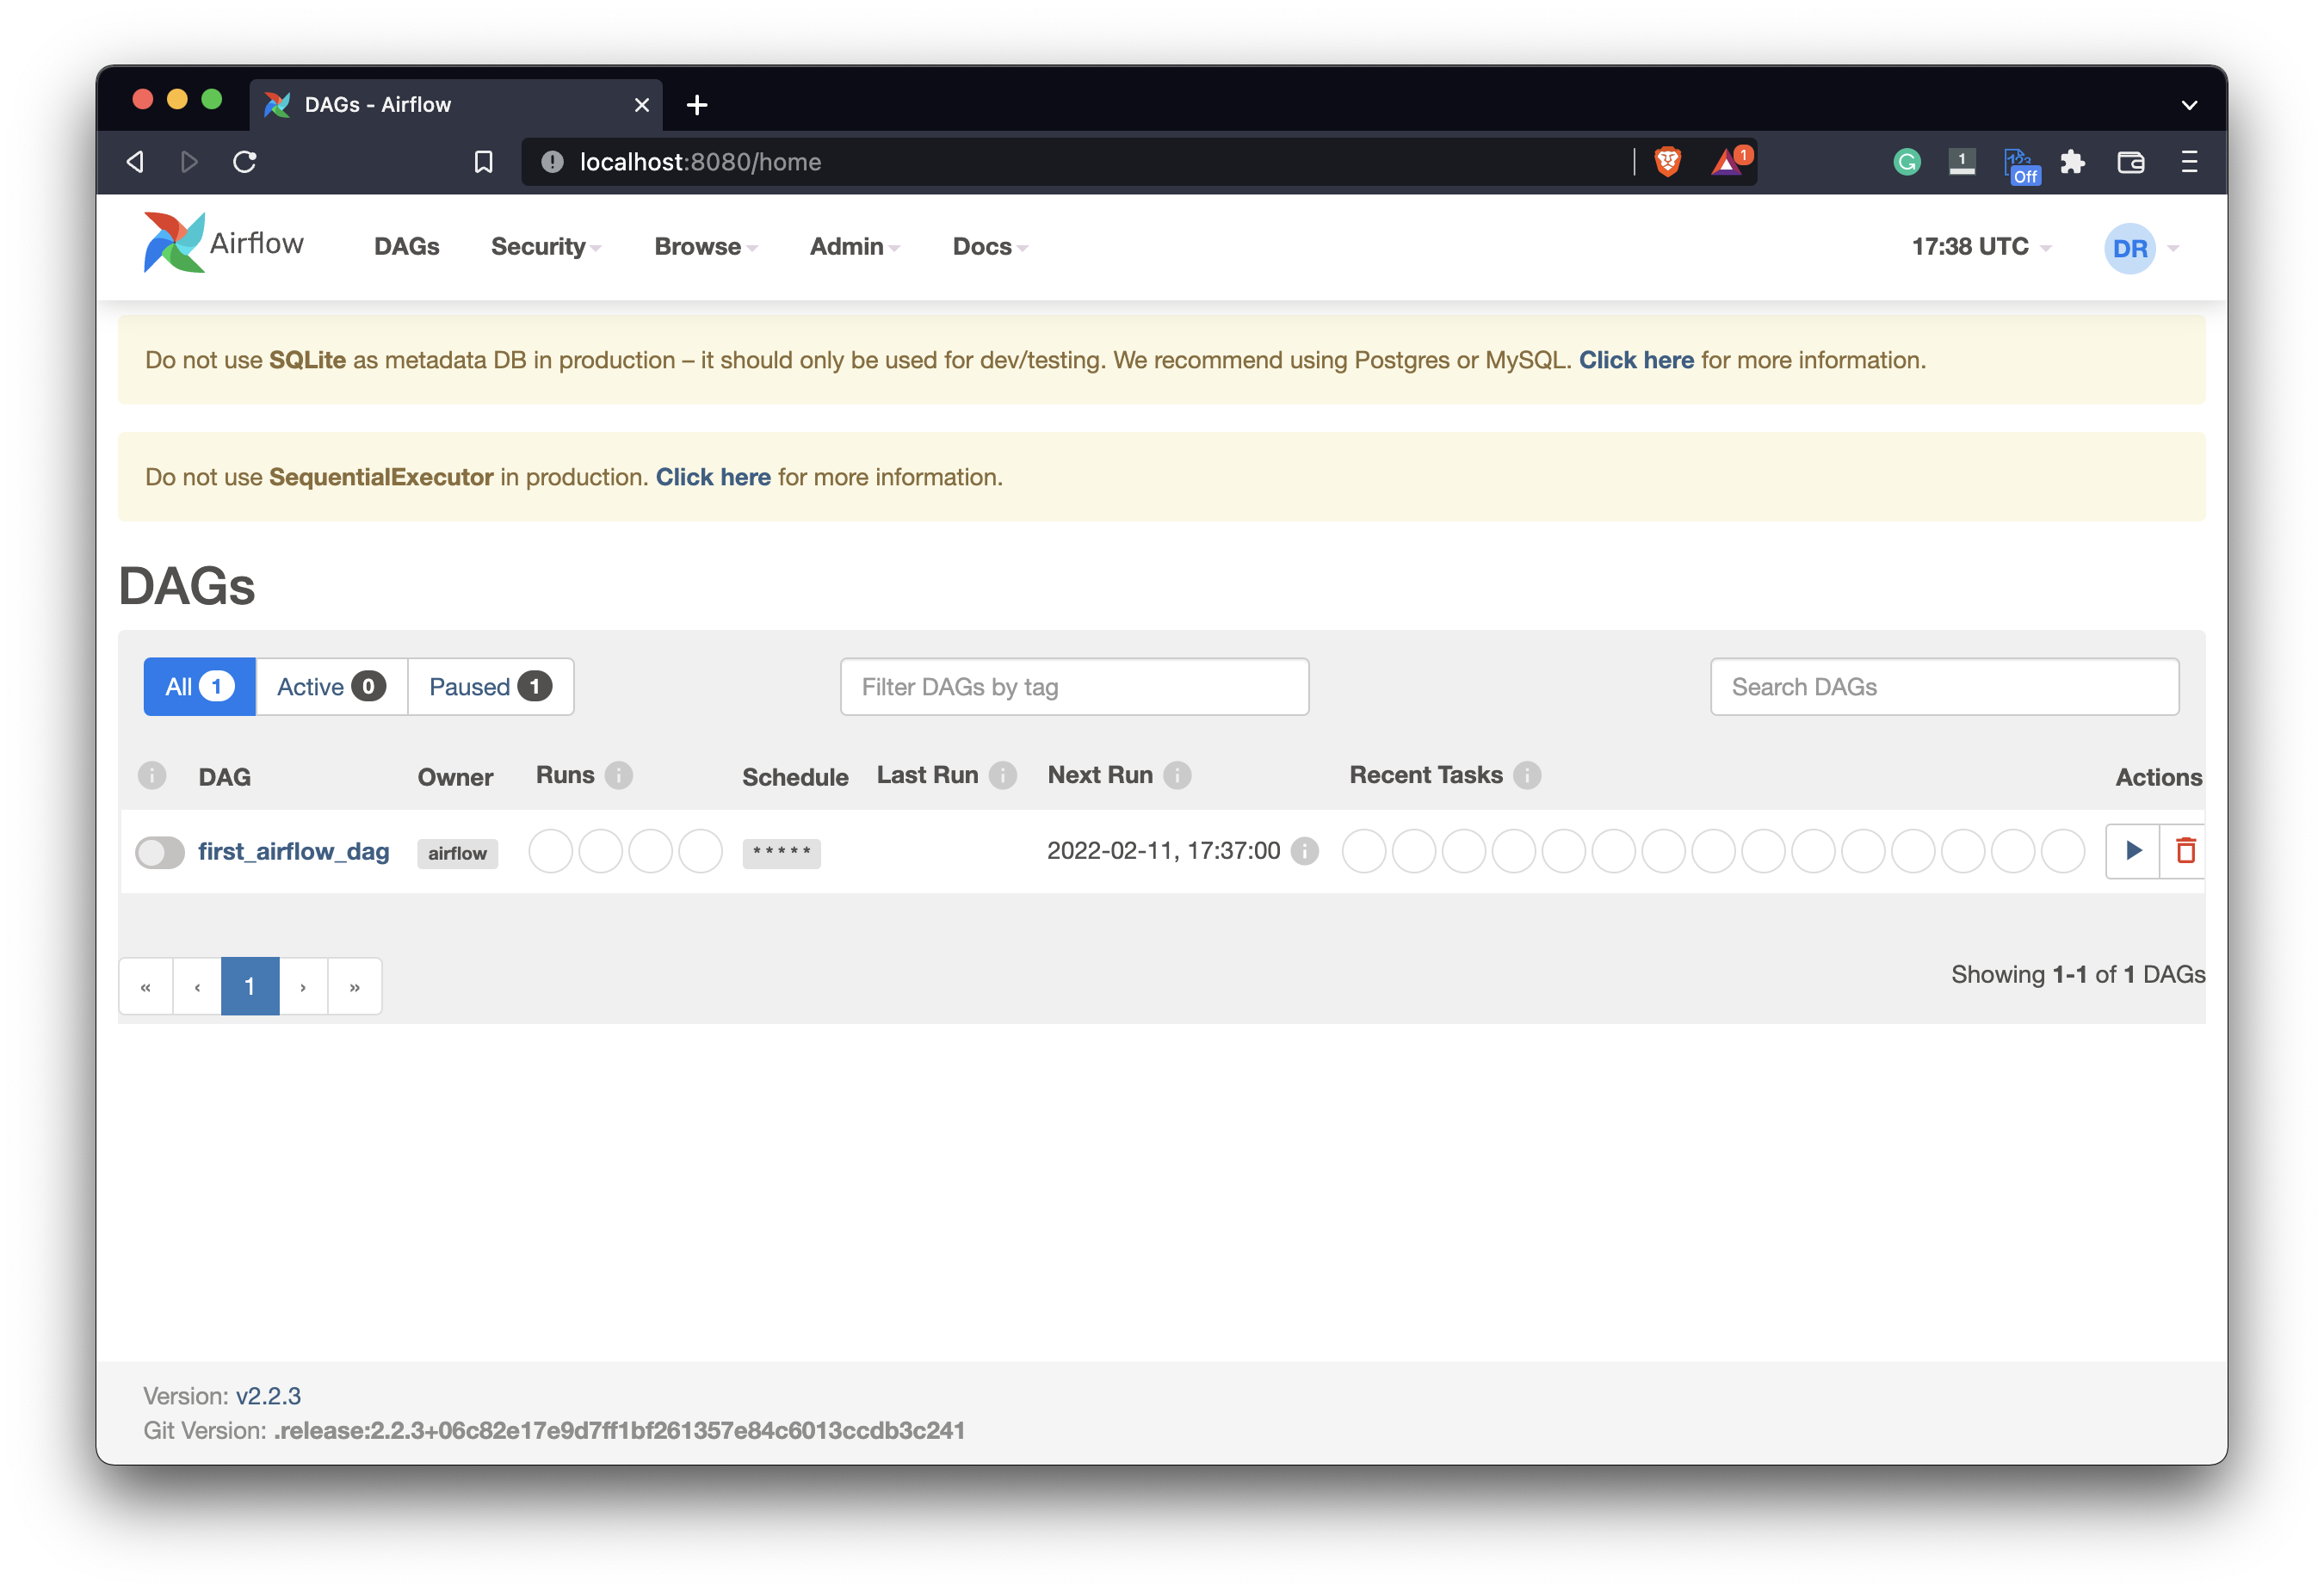
Image 4 - Airflow web application home page (image by author)
Click on it and go to the Graph view - you’ll see our two tasks listed:

Image 5 - Airflow DAG graph view (image by author)
The tasks are listed here but aren’t connected in any way. You’ll see how connections and dependencies work later, but first, let’s write the code for the third task.
Airflow Task #3 - Save Processed Datetime
While on the Airflow home page, go under Admin - Variables. You should see a blank list like the one below:
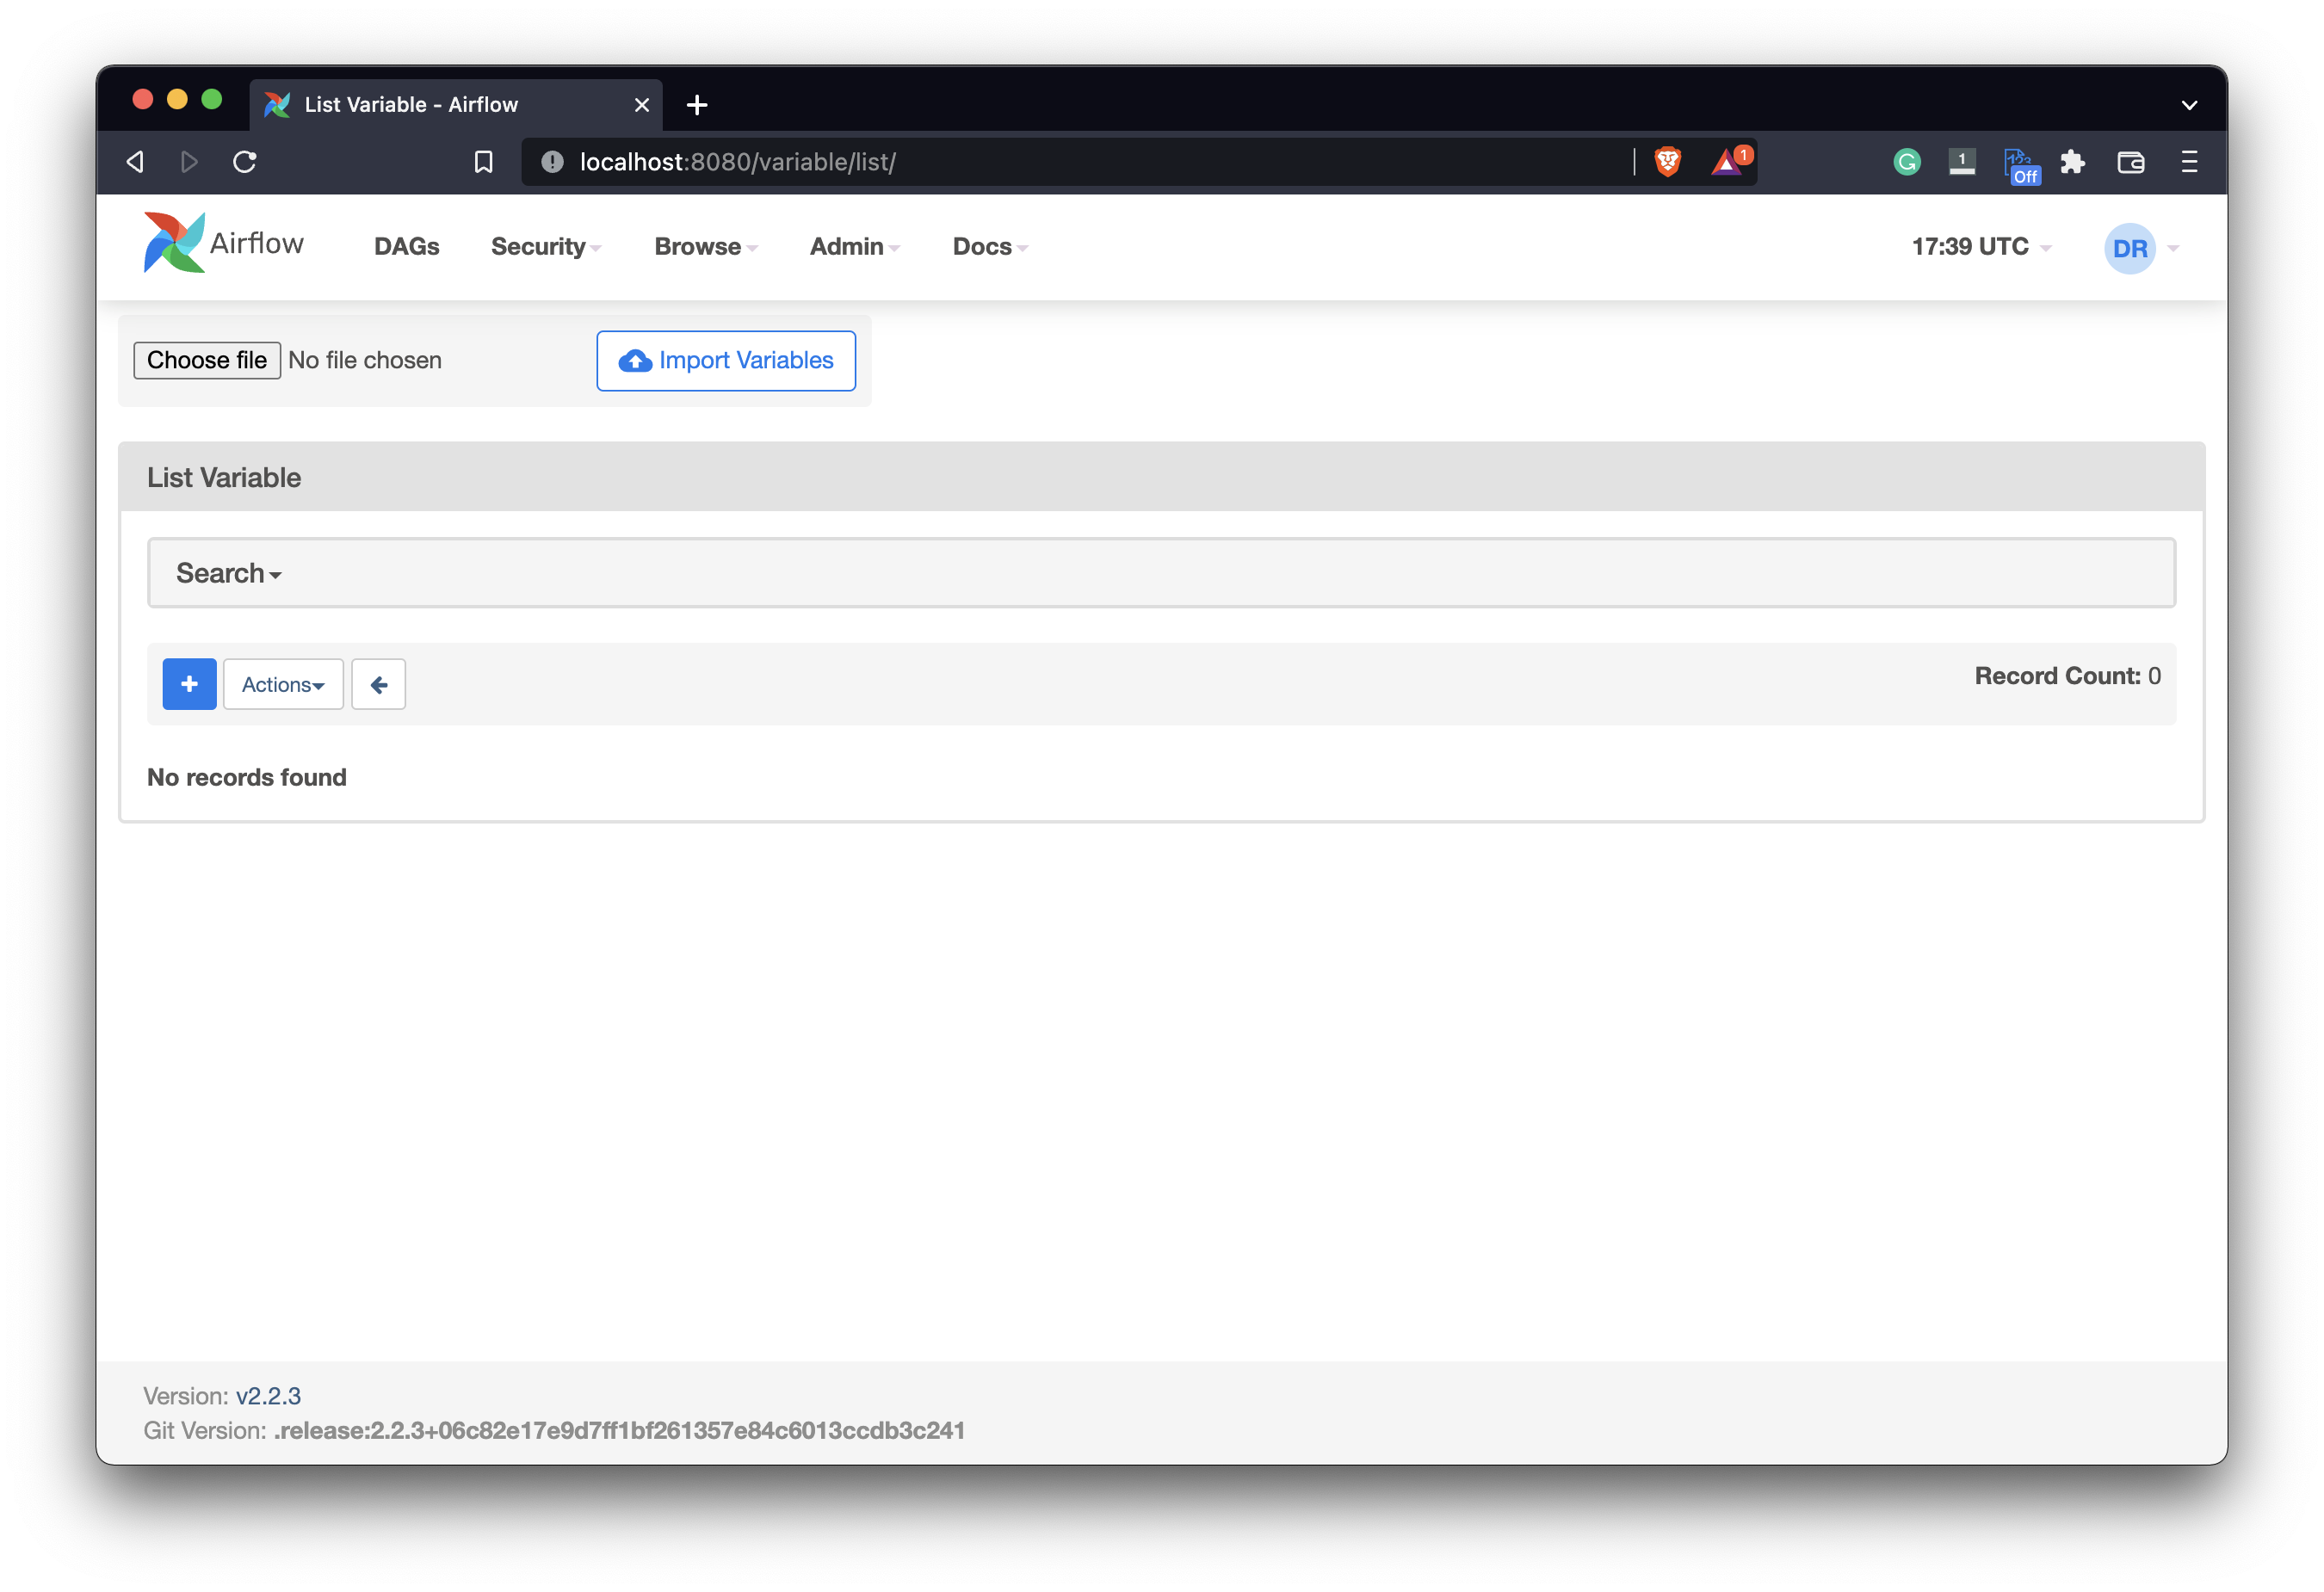
Image 6 - Airflow variable list (image by author)
Click on the plus sign to add a new variable. We’re declaring it to hold a path to a location where we’ll save the CSV file. I’ve named mine first_dag_csv_path and entered /Users/dradecic/Desktop/datetimes.csv as the value:
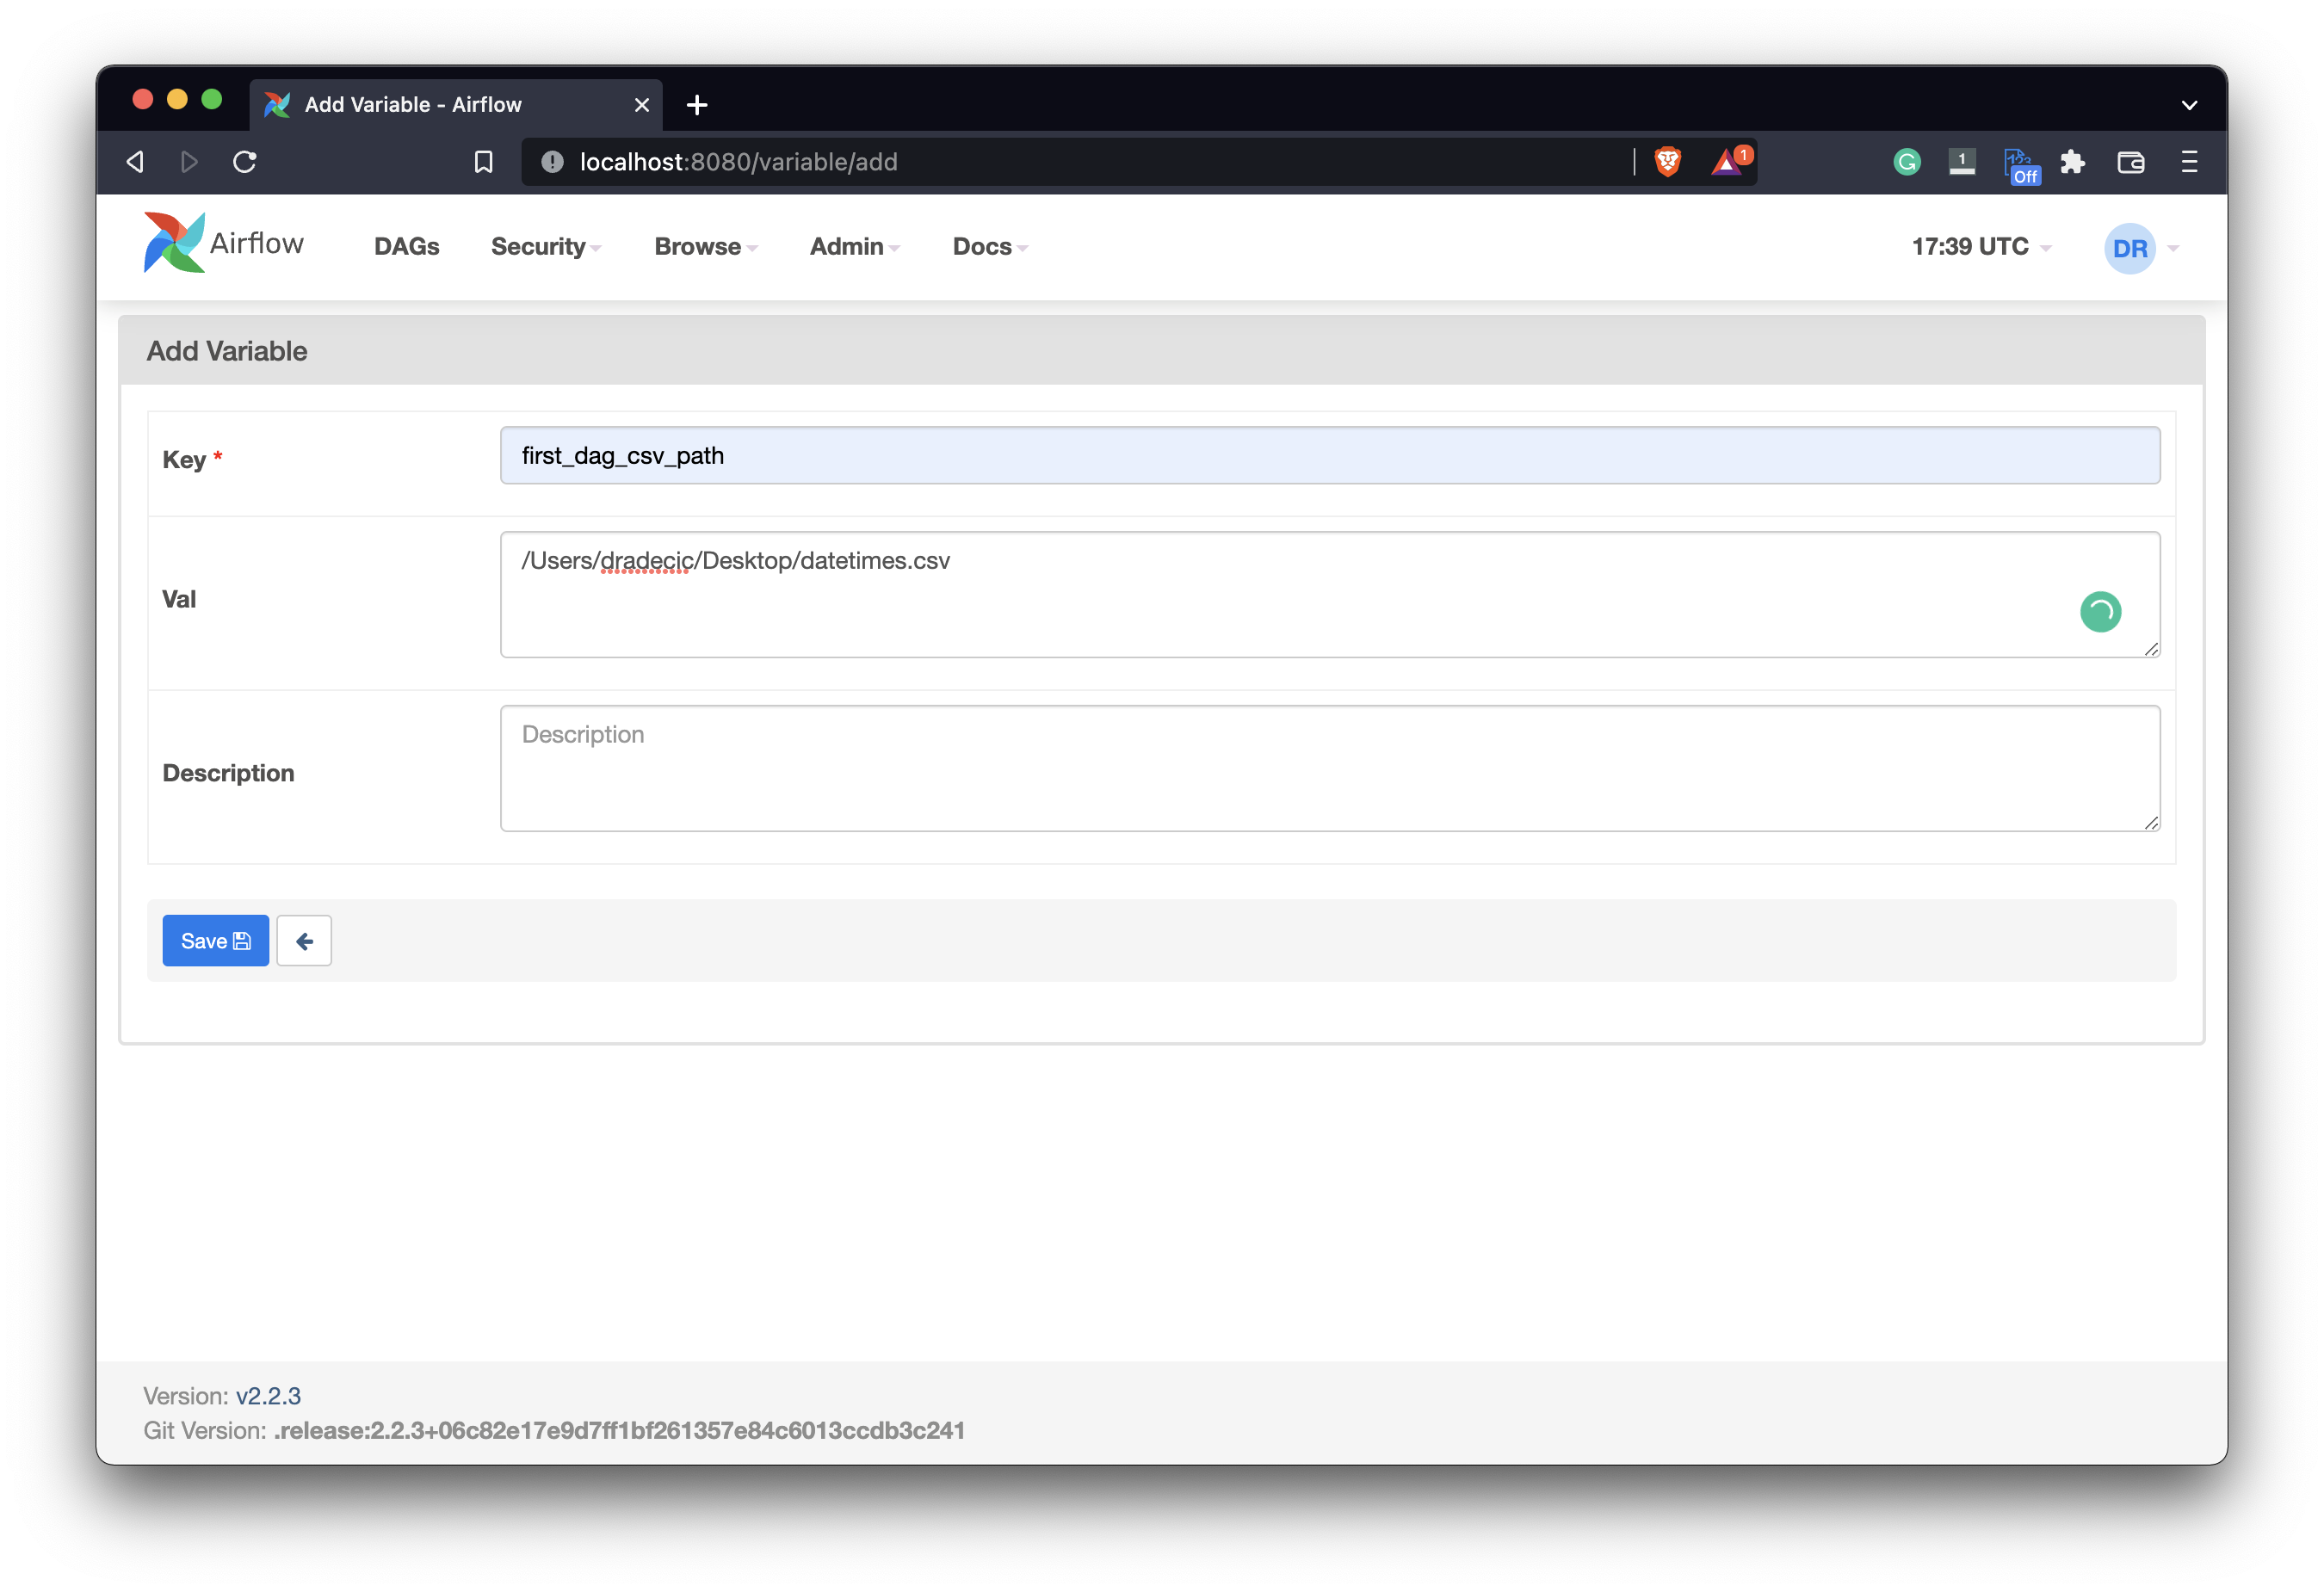
Image 7 - Creating a new Airflow variable (image by author)
Of course, you should specify the path on your machine, but that goes without saying. Click on the Save button when done. You’ll see our variable added to the list:
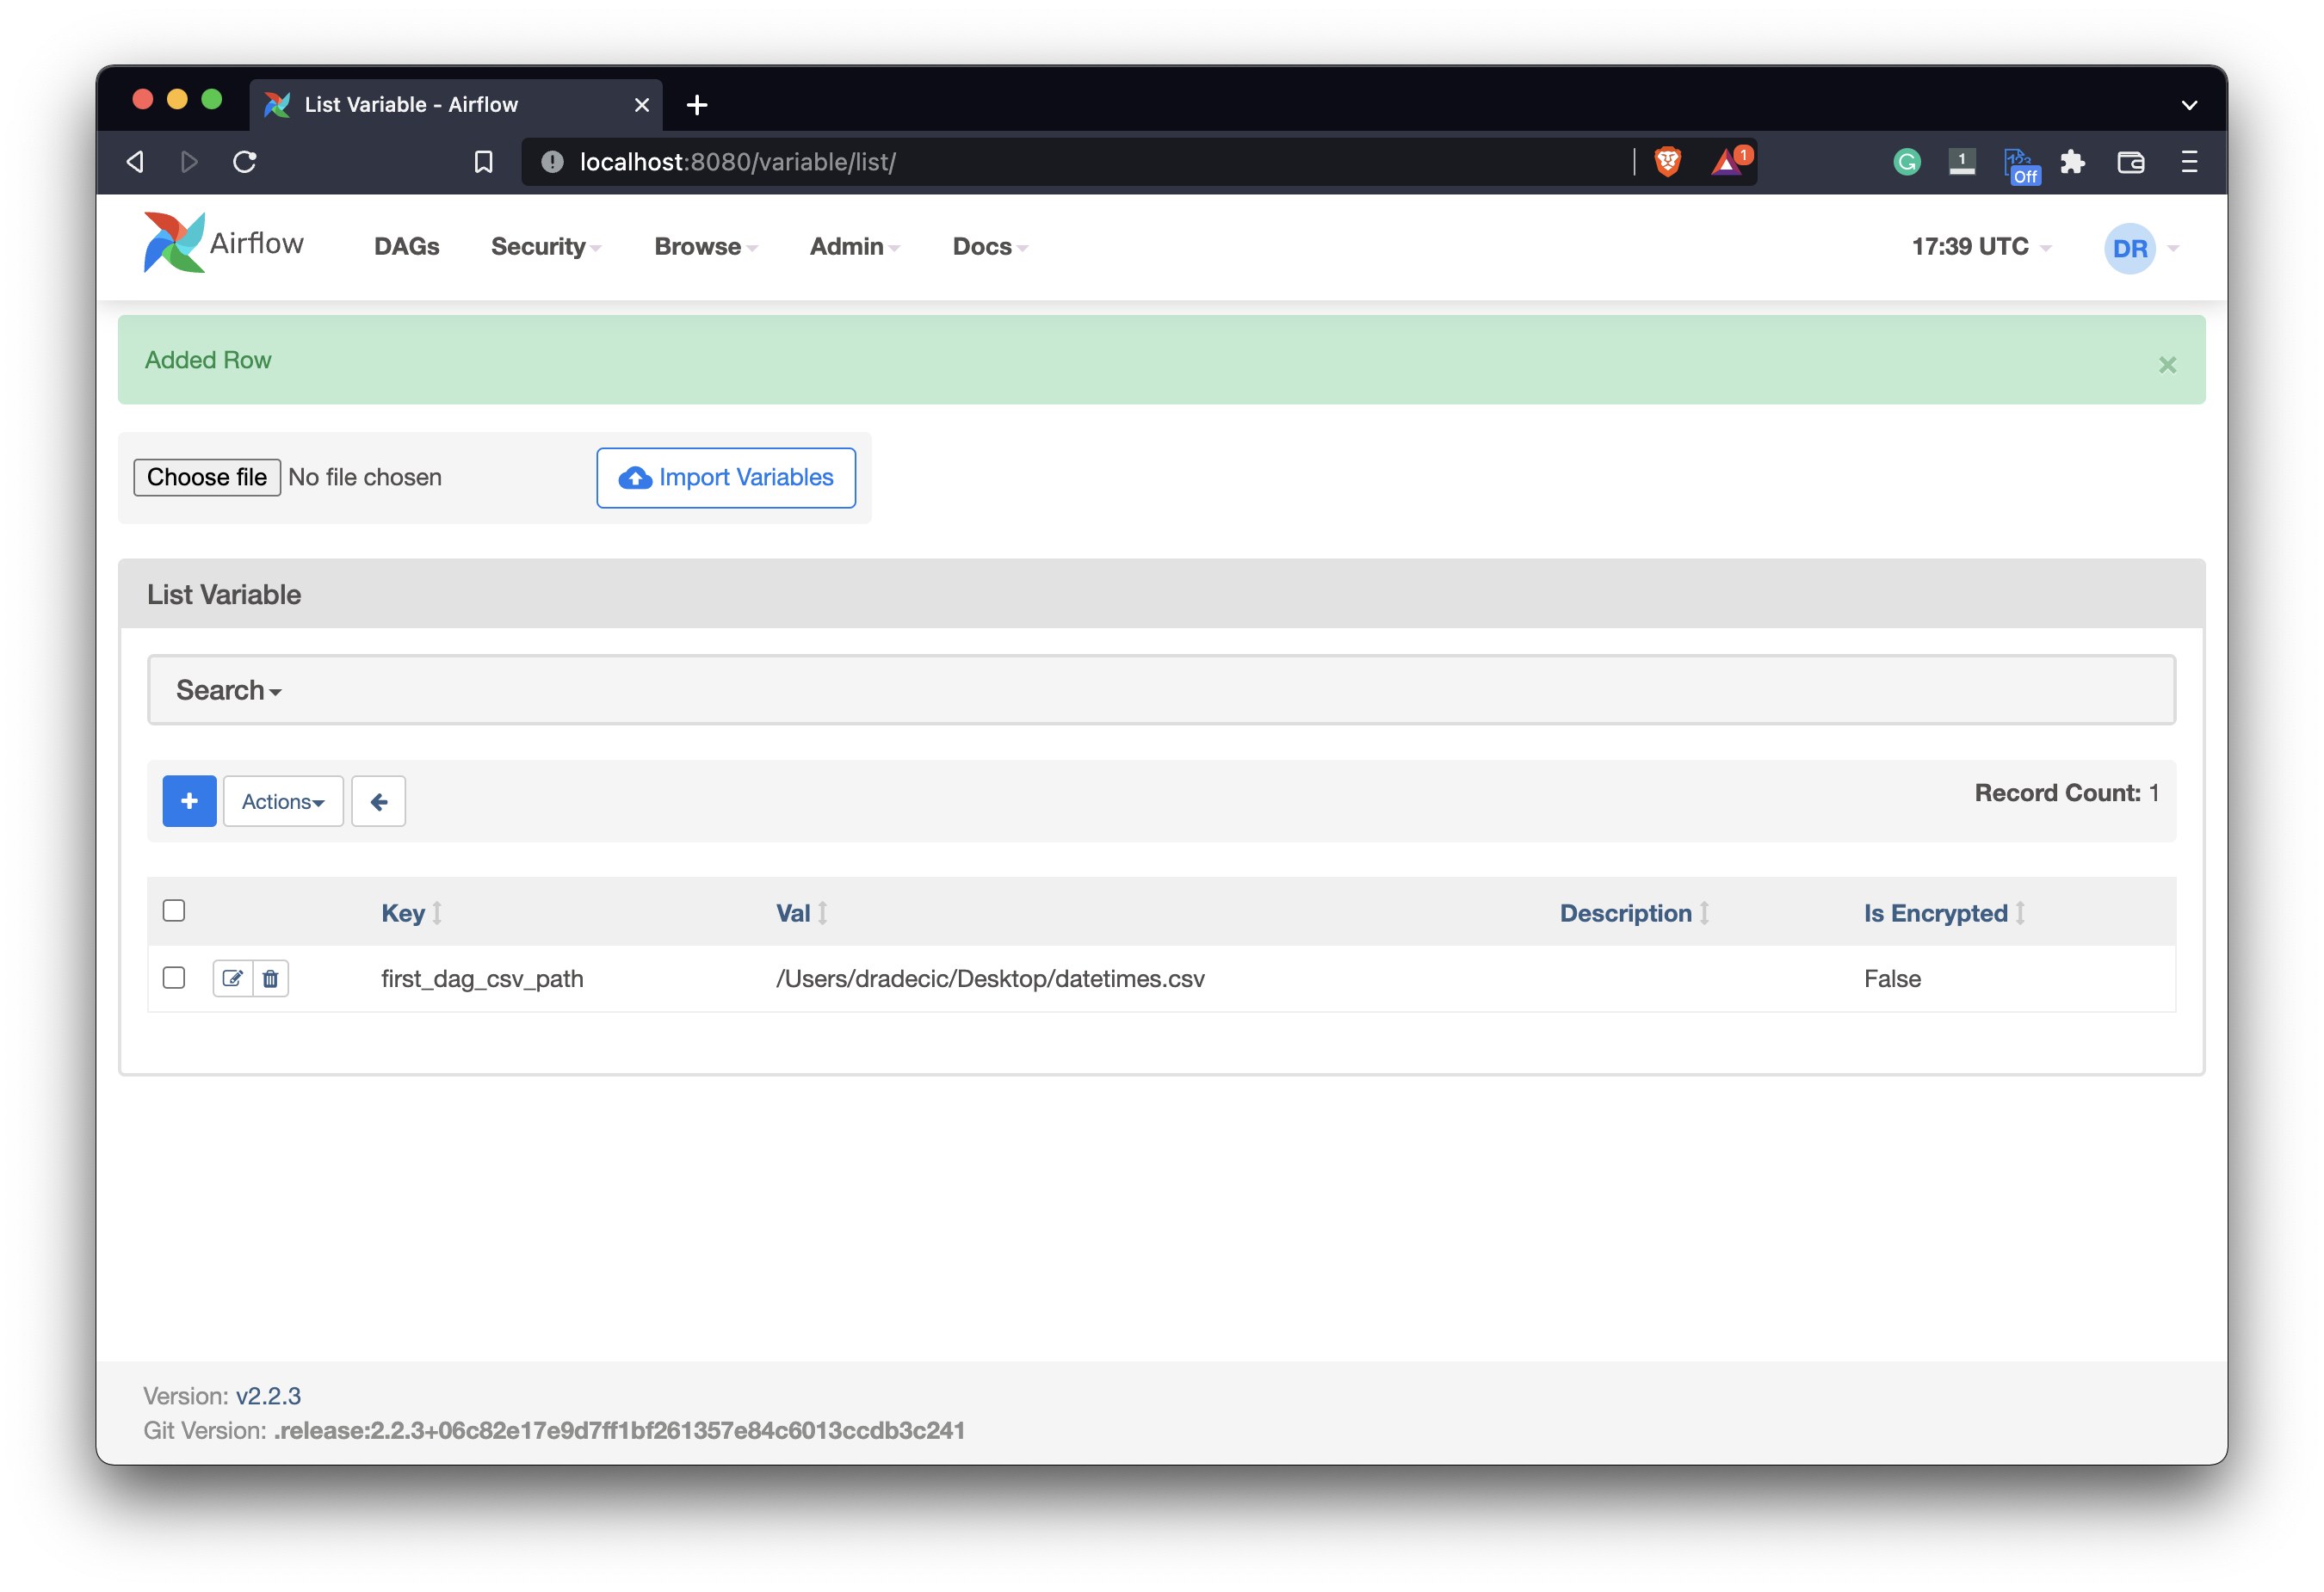
Image 8 - Creating a new Airflow variable (2) (image by author)
Onto the code now. The third task will run a Python function called save_datetime(). It uses xcoms to pull the processed datetime from the previous task, and then creates a Pandas DataFrame based on it.
We can then use Variable class from Airflow to get the path for the CSV file. If that file exists, we’ll set the parameters df_header and df_mode to False and 'a', respectively. In plain English, the file exists so we want to append new rows to it without adding the header row every time.
If the file doesn’t exist, we’ll create it using the write mode and we’ll also include the header:
import os
import pandas as pd
from datetime import datetime
from airflow.models import DAG
from airflow.operators.bash import BashOperator
from airflow.operators.python import PythonOperator
from airflow.models import Variable


def process_datetime(ti):
    dt = ti.xcom_pull(task_ids=['get_datetime'])
    if not dt:
        raise Exception('No datetime value.')

    dt = str(dt[0]).split()
    return {
        'year': int(dt[-1]),
        'month': dt[1],
        'day': int(dt[2]),
        'time': dt[3],
        'day_of_week': dt[0]
    }


def save_datetime(ti):
    dt_processed = ti.xcom_pull(task_ids=['process_datetime'])
    if not dt_processed:
        raise Exception('No processed datetime value.')

    df = pd.DataFrame(dt_processed)

    csv_path = Variable.get('first_dag_csv_path')
    if os.path.exists(csv_path):
        df_header = False
        df_mode = 'a'
    else:
        df_header = True
        df_mode = 'w'

    df.to_csv(csv_path, index=False, mode=df_mode, header=df_header)


with DAG(
    dag_id='first_airflow_dag',
    schedule_interval='* * * * *',
    start_date=datetime(year=2022, month=2, day=1),
    catchup=False
) as dag:

    # 1. Get current datetime
    task_get_datetime = BashOperator(
        task_id='get_datetime',
        bash_command='date'
    )

    # 2. Process current datetime
    task_process_datetime = PythonOperator(
        task_id='process_datetime',
        python_callable=process_datetime
    )

    # 3. Save processed datetime
    task_save_datetime = PythonOperator(
        task_id='save_datetime',
        python_callable=save_datetime
    )
Let’s test it:
airflow tasks test first_airflow_dag save_datetime 2022-2-1
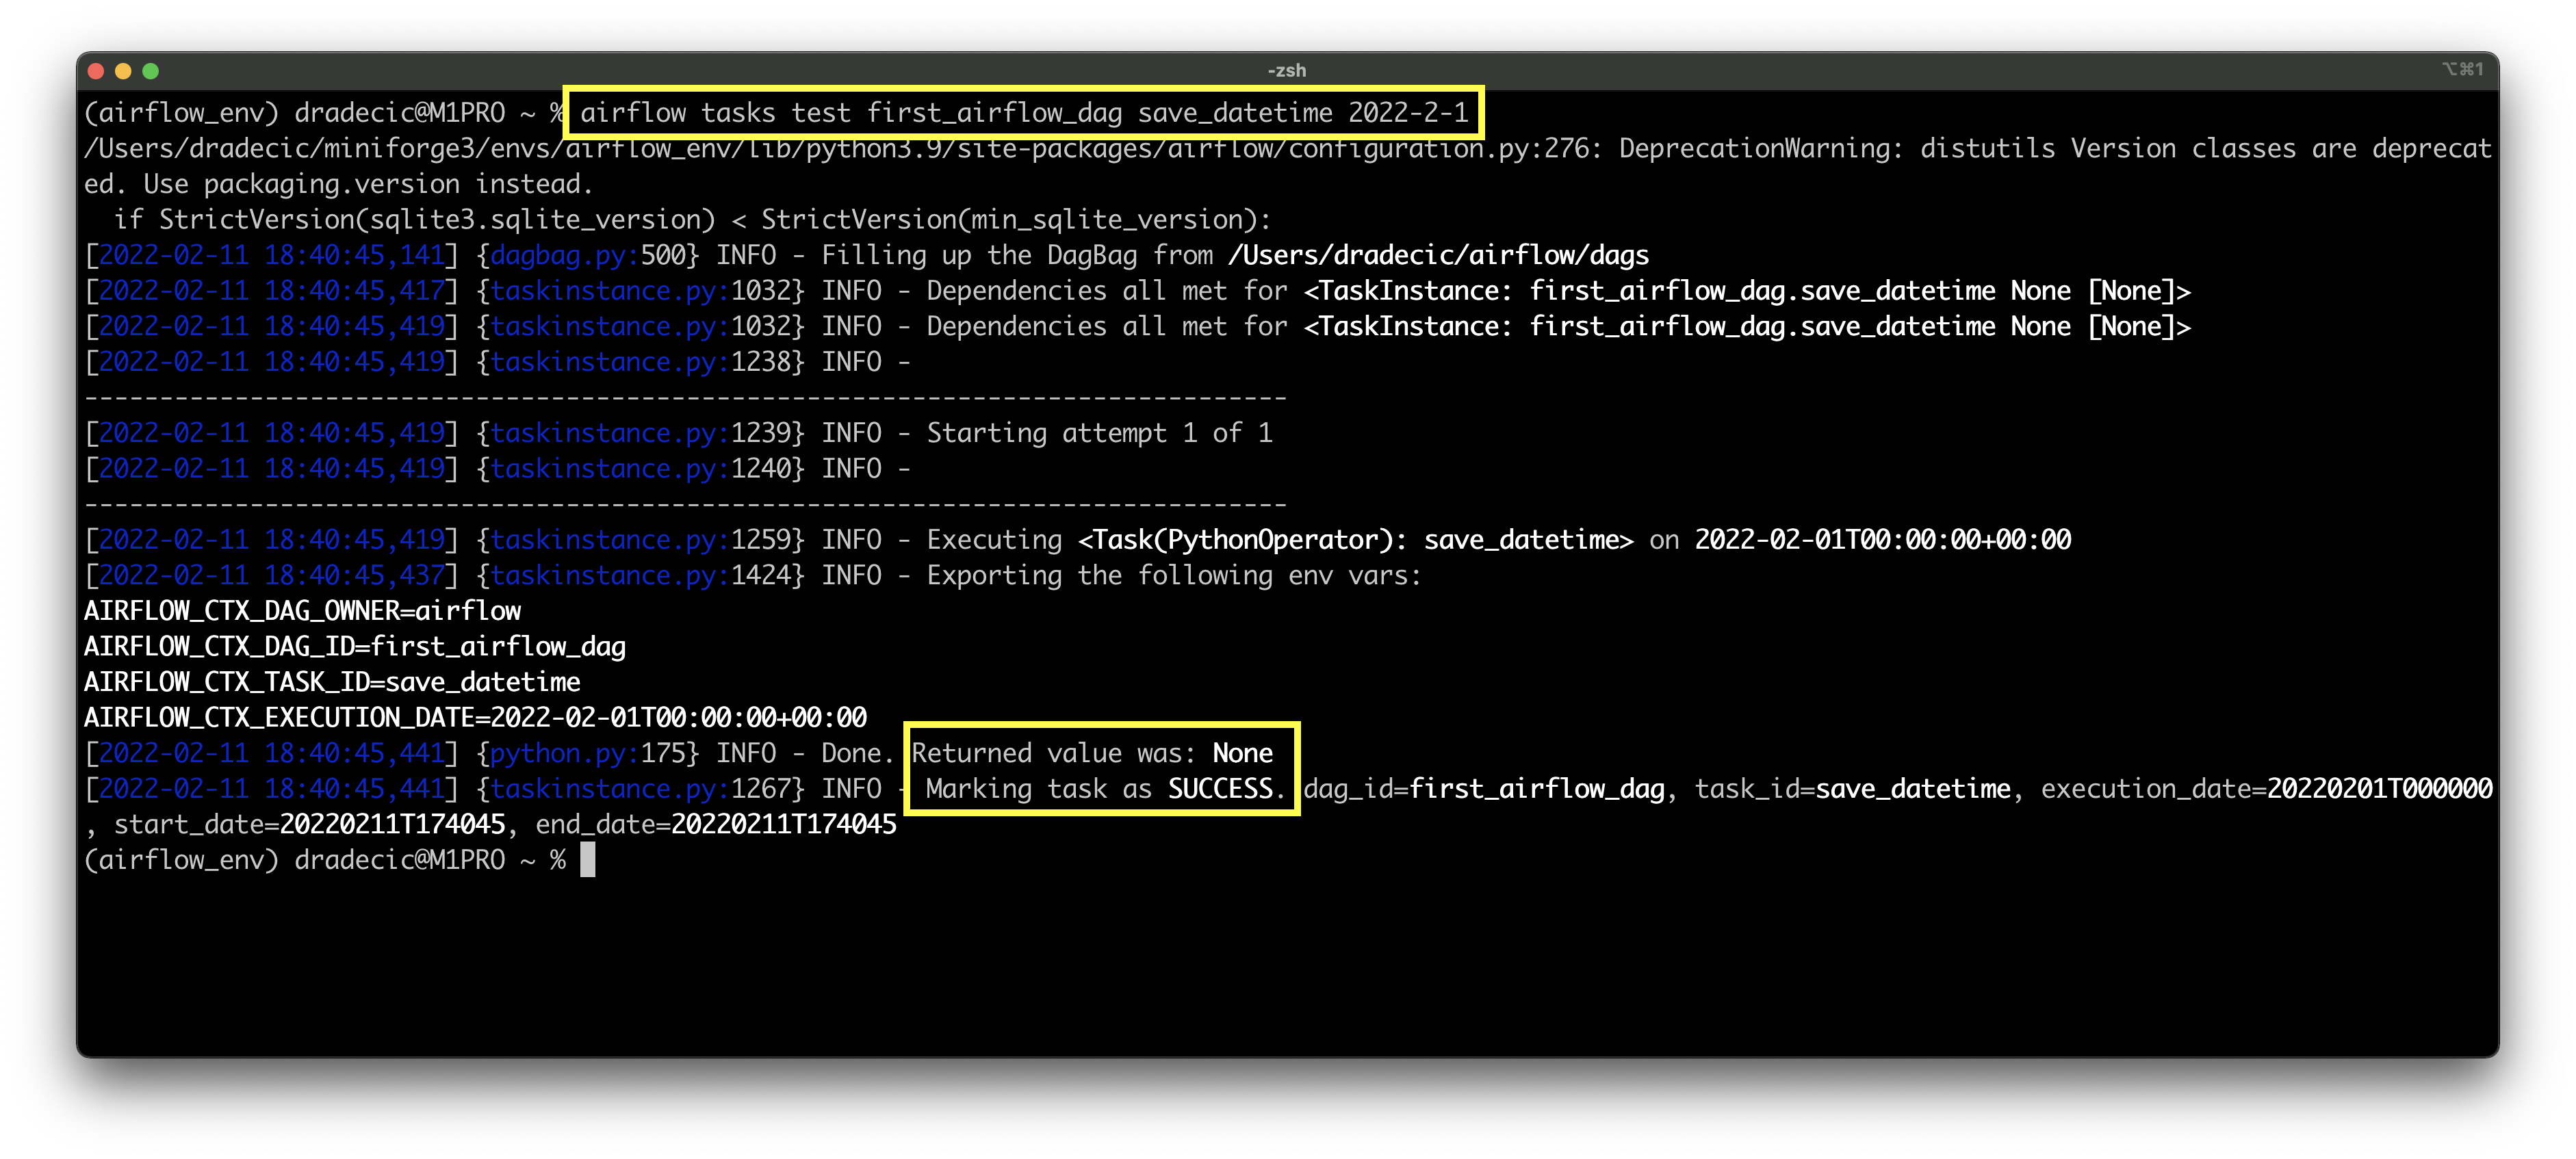
Image 9 - Testing the third Airflow task (image by author)
The task run was successful, and the CSV file was created on Desktop, as per the variable value:
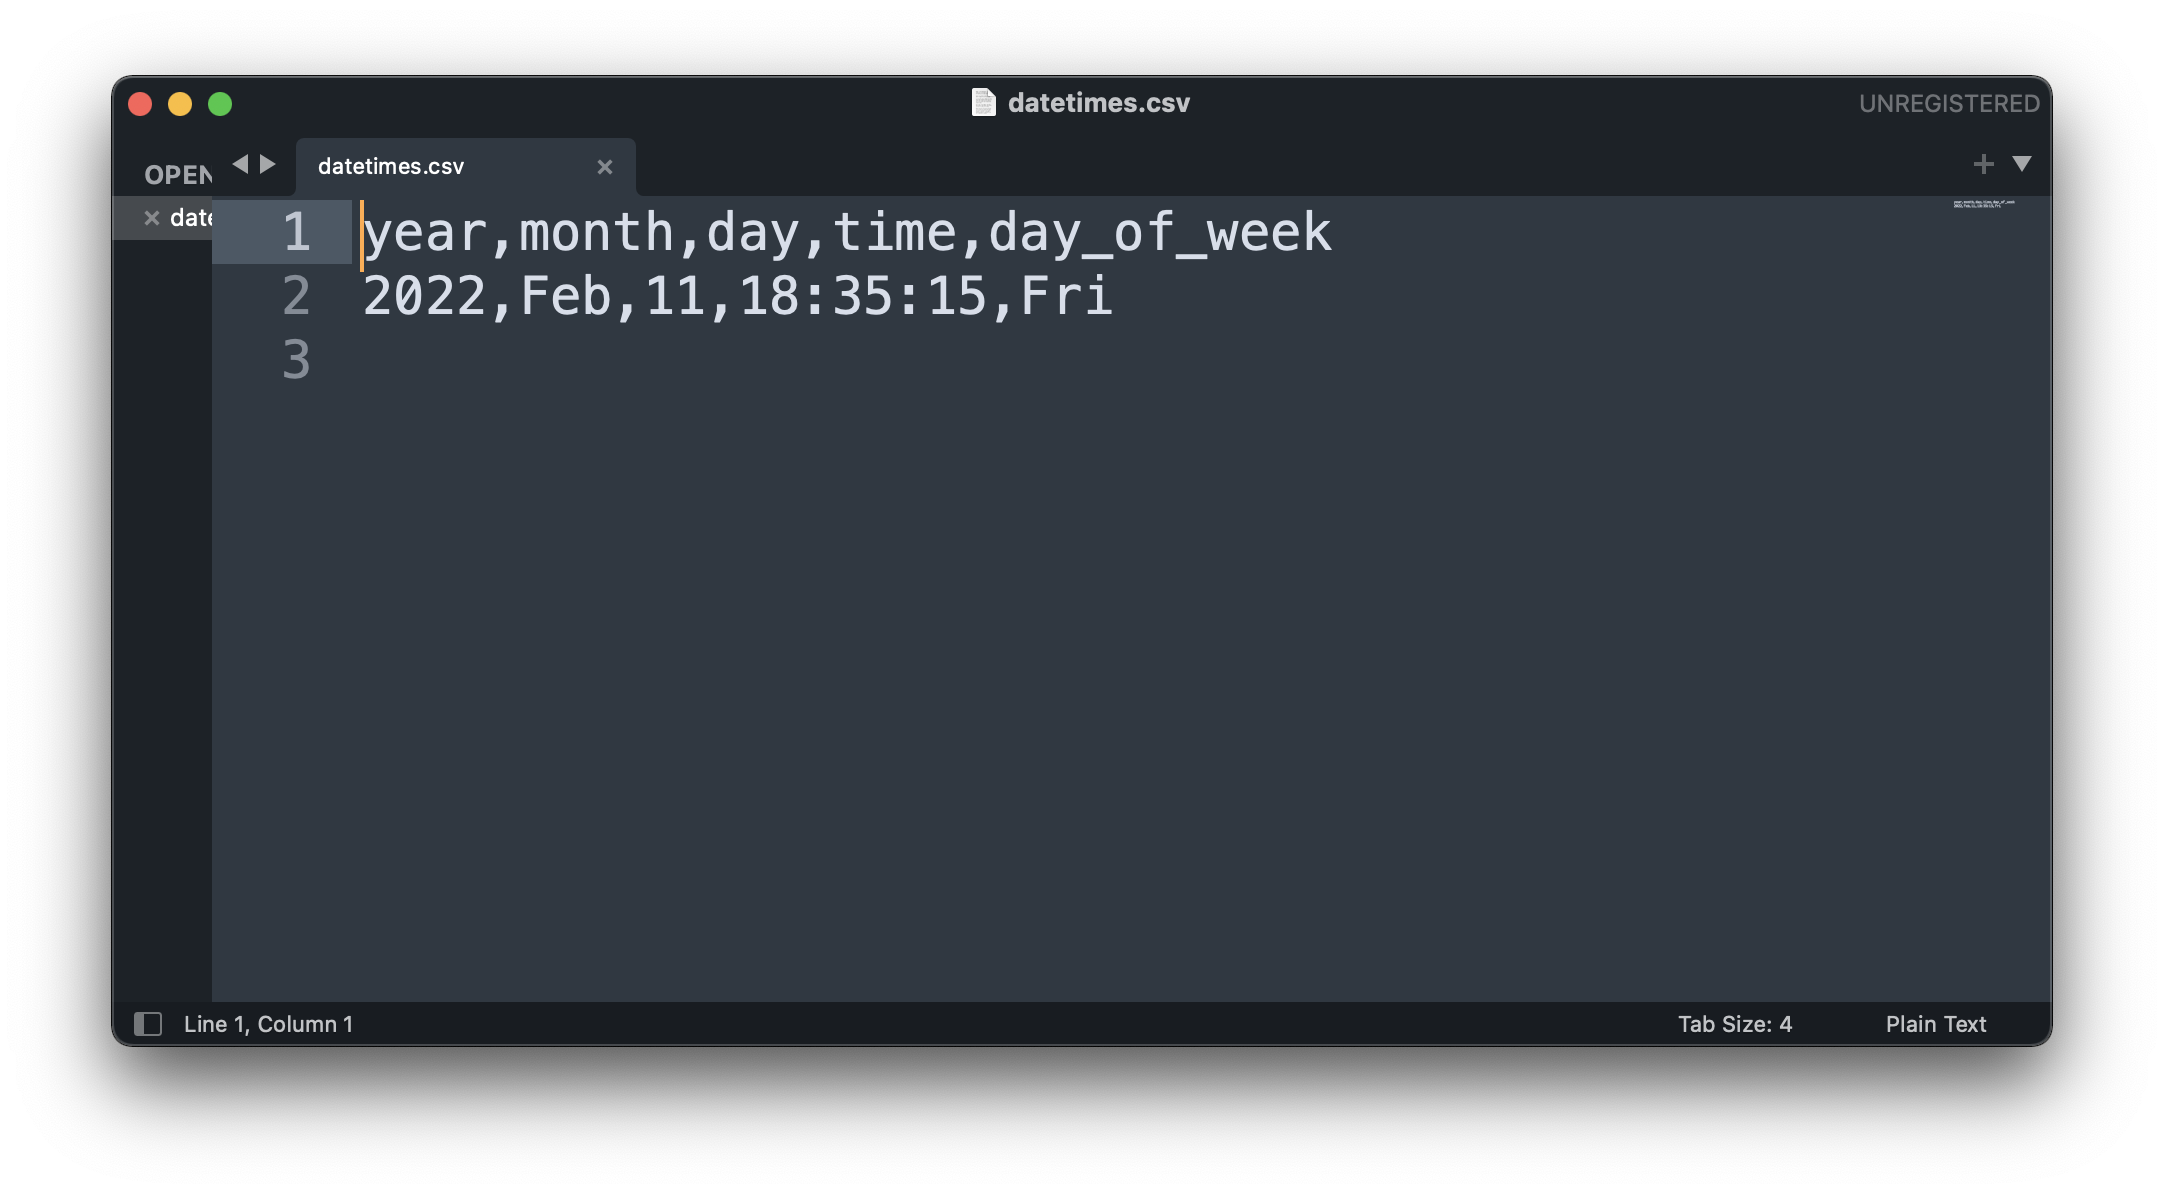
Image 10 - Saved datetime information in CSV format (image by author)
We have all the little pieces implemented individually, and now it’s time to connect them and run the DAG.
How to Connect the Airflow DAG
Right now the Graph view of your DAG looks something like this:
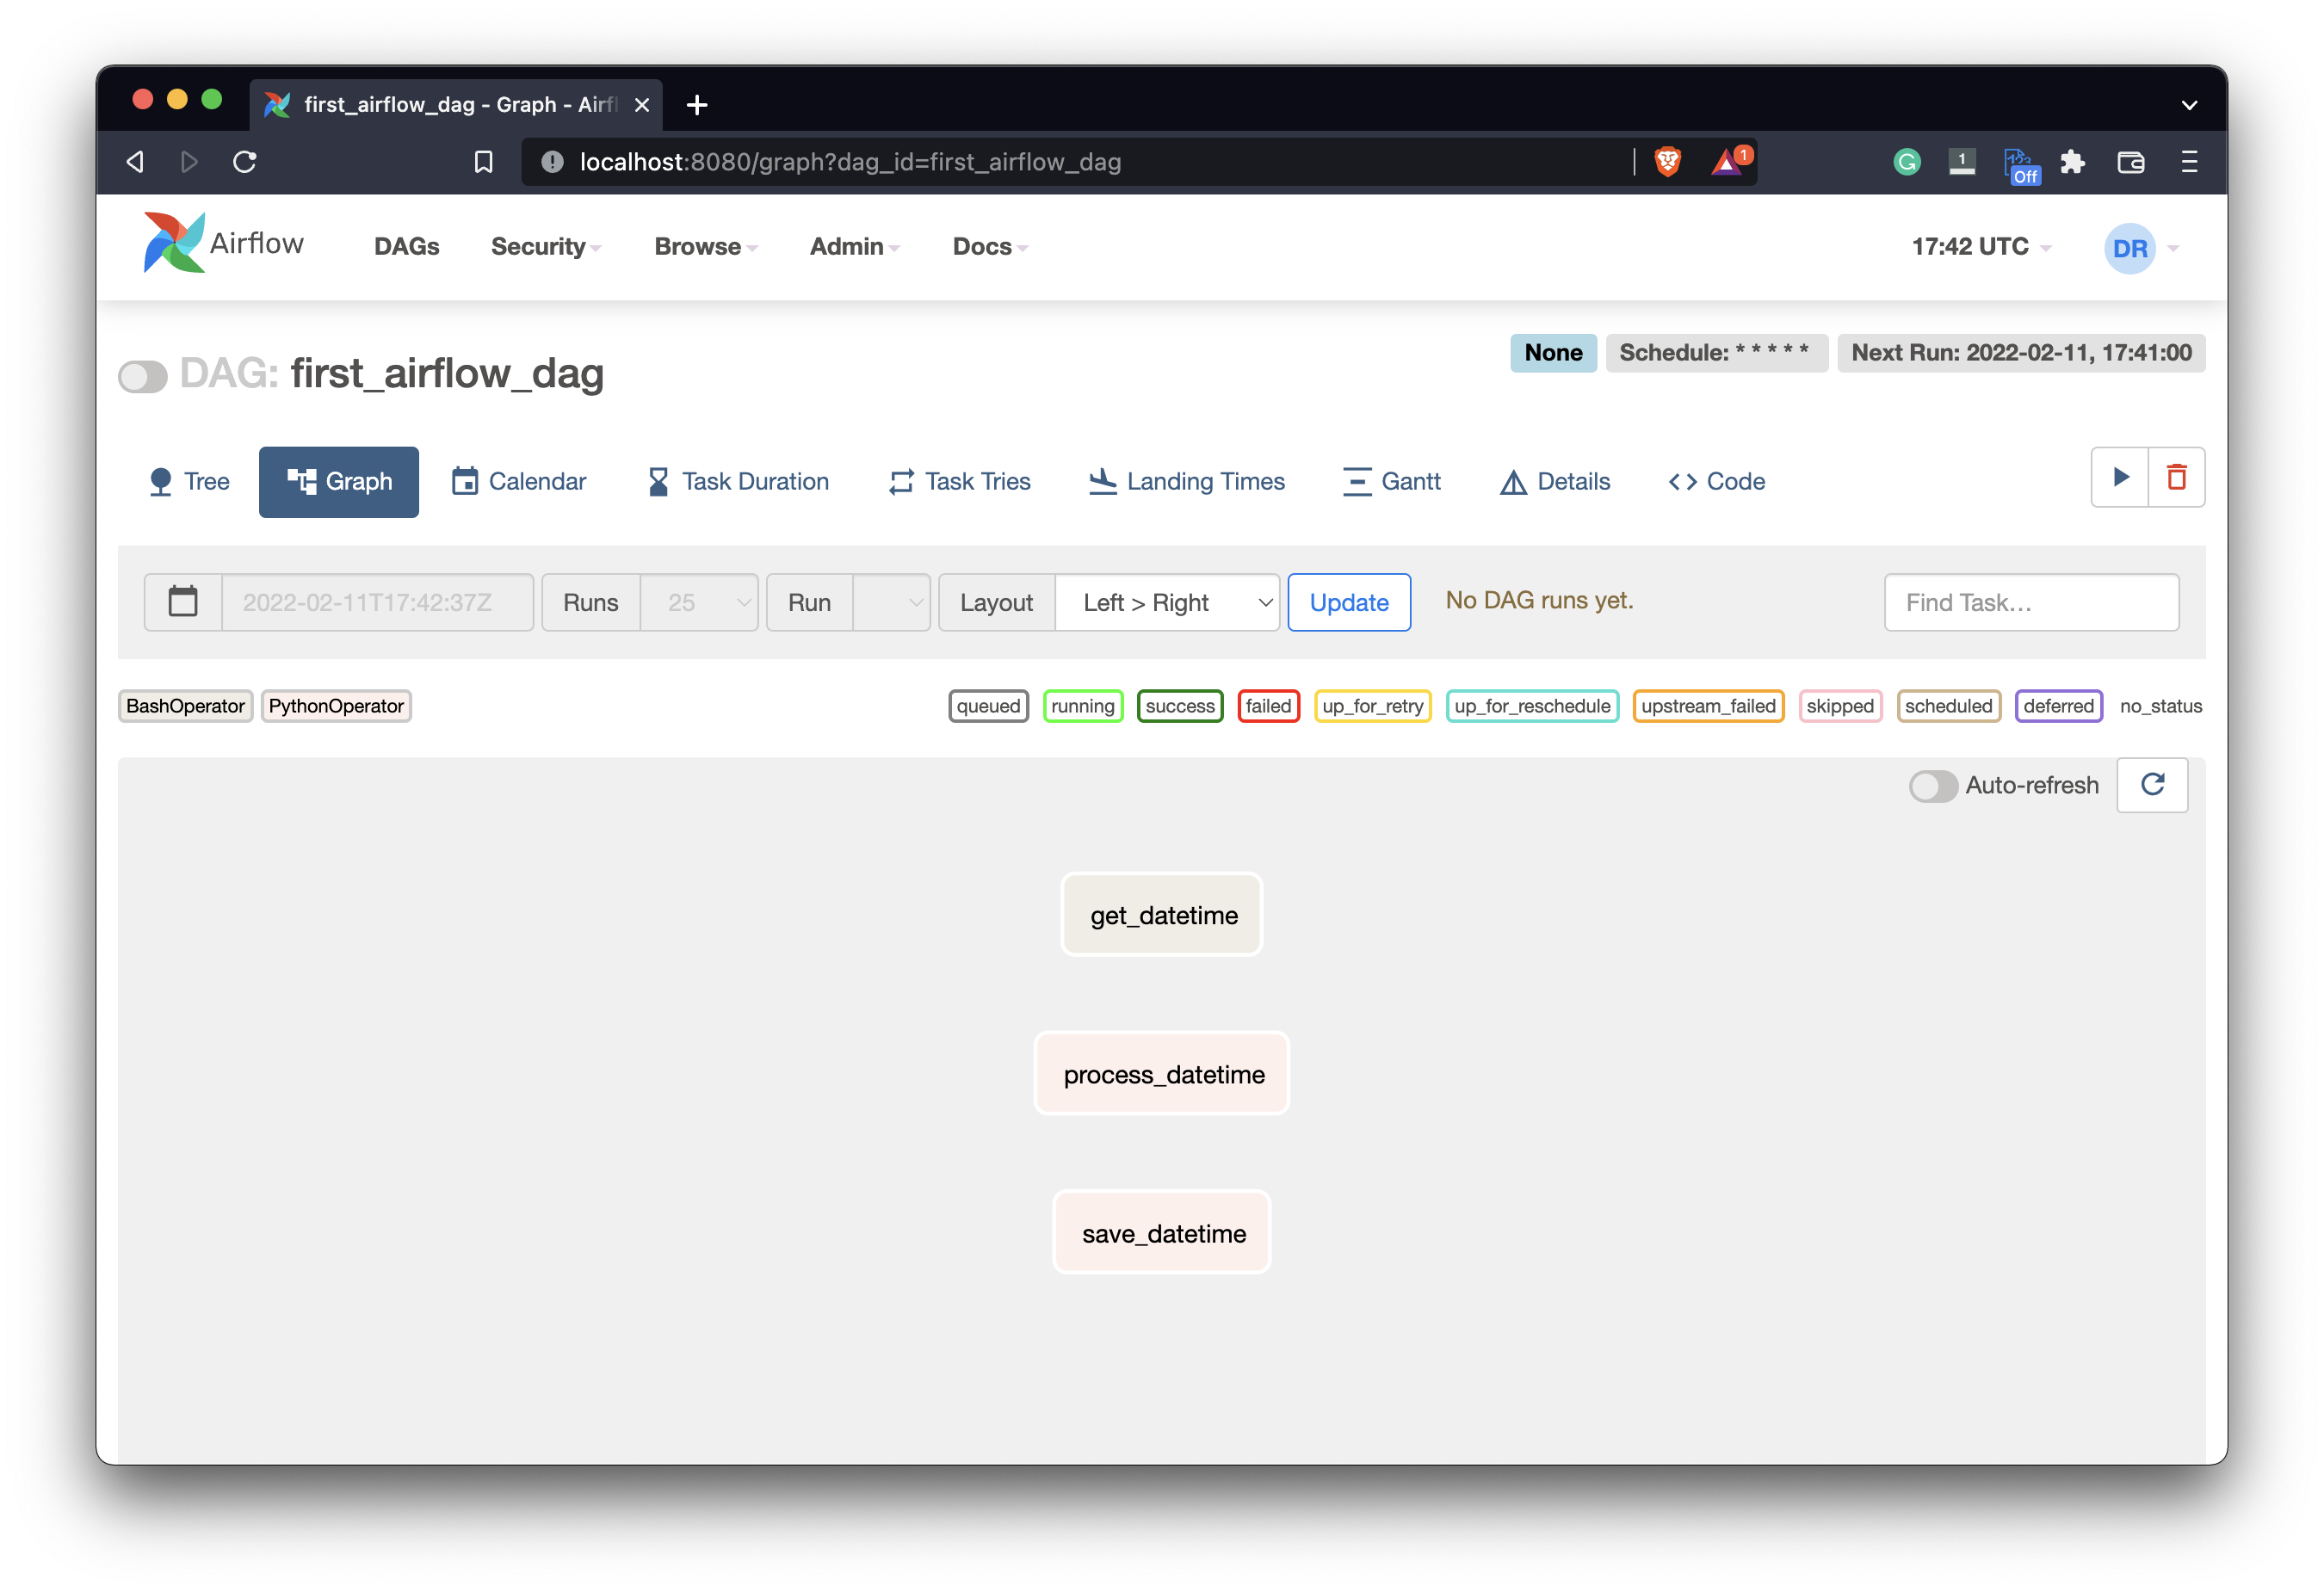
Image 11 - Airflow DAG task list in a graph view (image by author)
We have all the tasks, but they aren’t connected. Airflow doesn’t know which one should run first. For example. running a DAG in the current state could call the process_datetime task before get_datetime, which doesn’t make sense.
You can connect the tasks using the set_downstream() method or by using the bit shift operator (>>). We’ll use the latter today:
 	...
    # 3. Save processed datetime
    task_save_datetime = PythonOperator(
        task_id='save_datetime',
        python_callable=save_datetime
    )

    task_get_datetime >> task_process_datetime >> task_save_datetime
Refresh the Airflow home page and you should see your tasks connected:
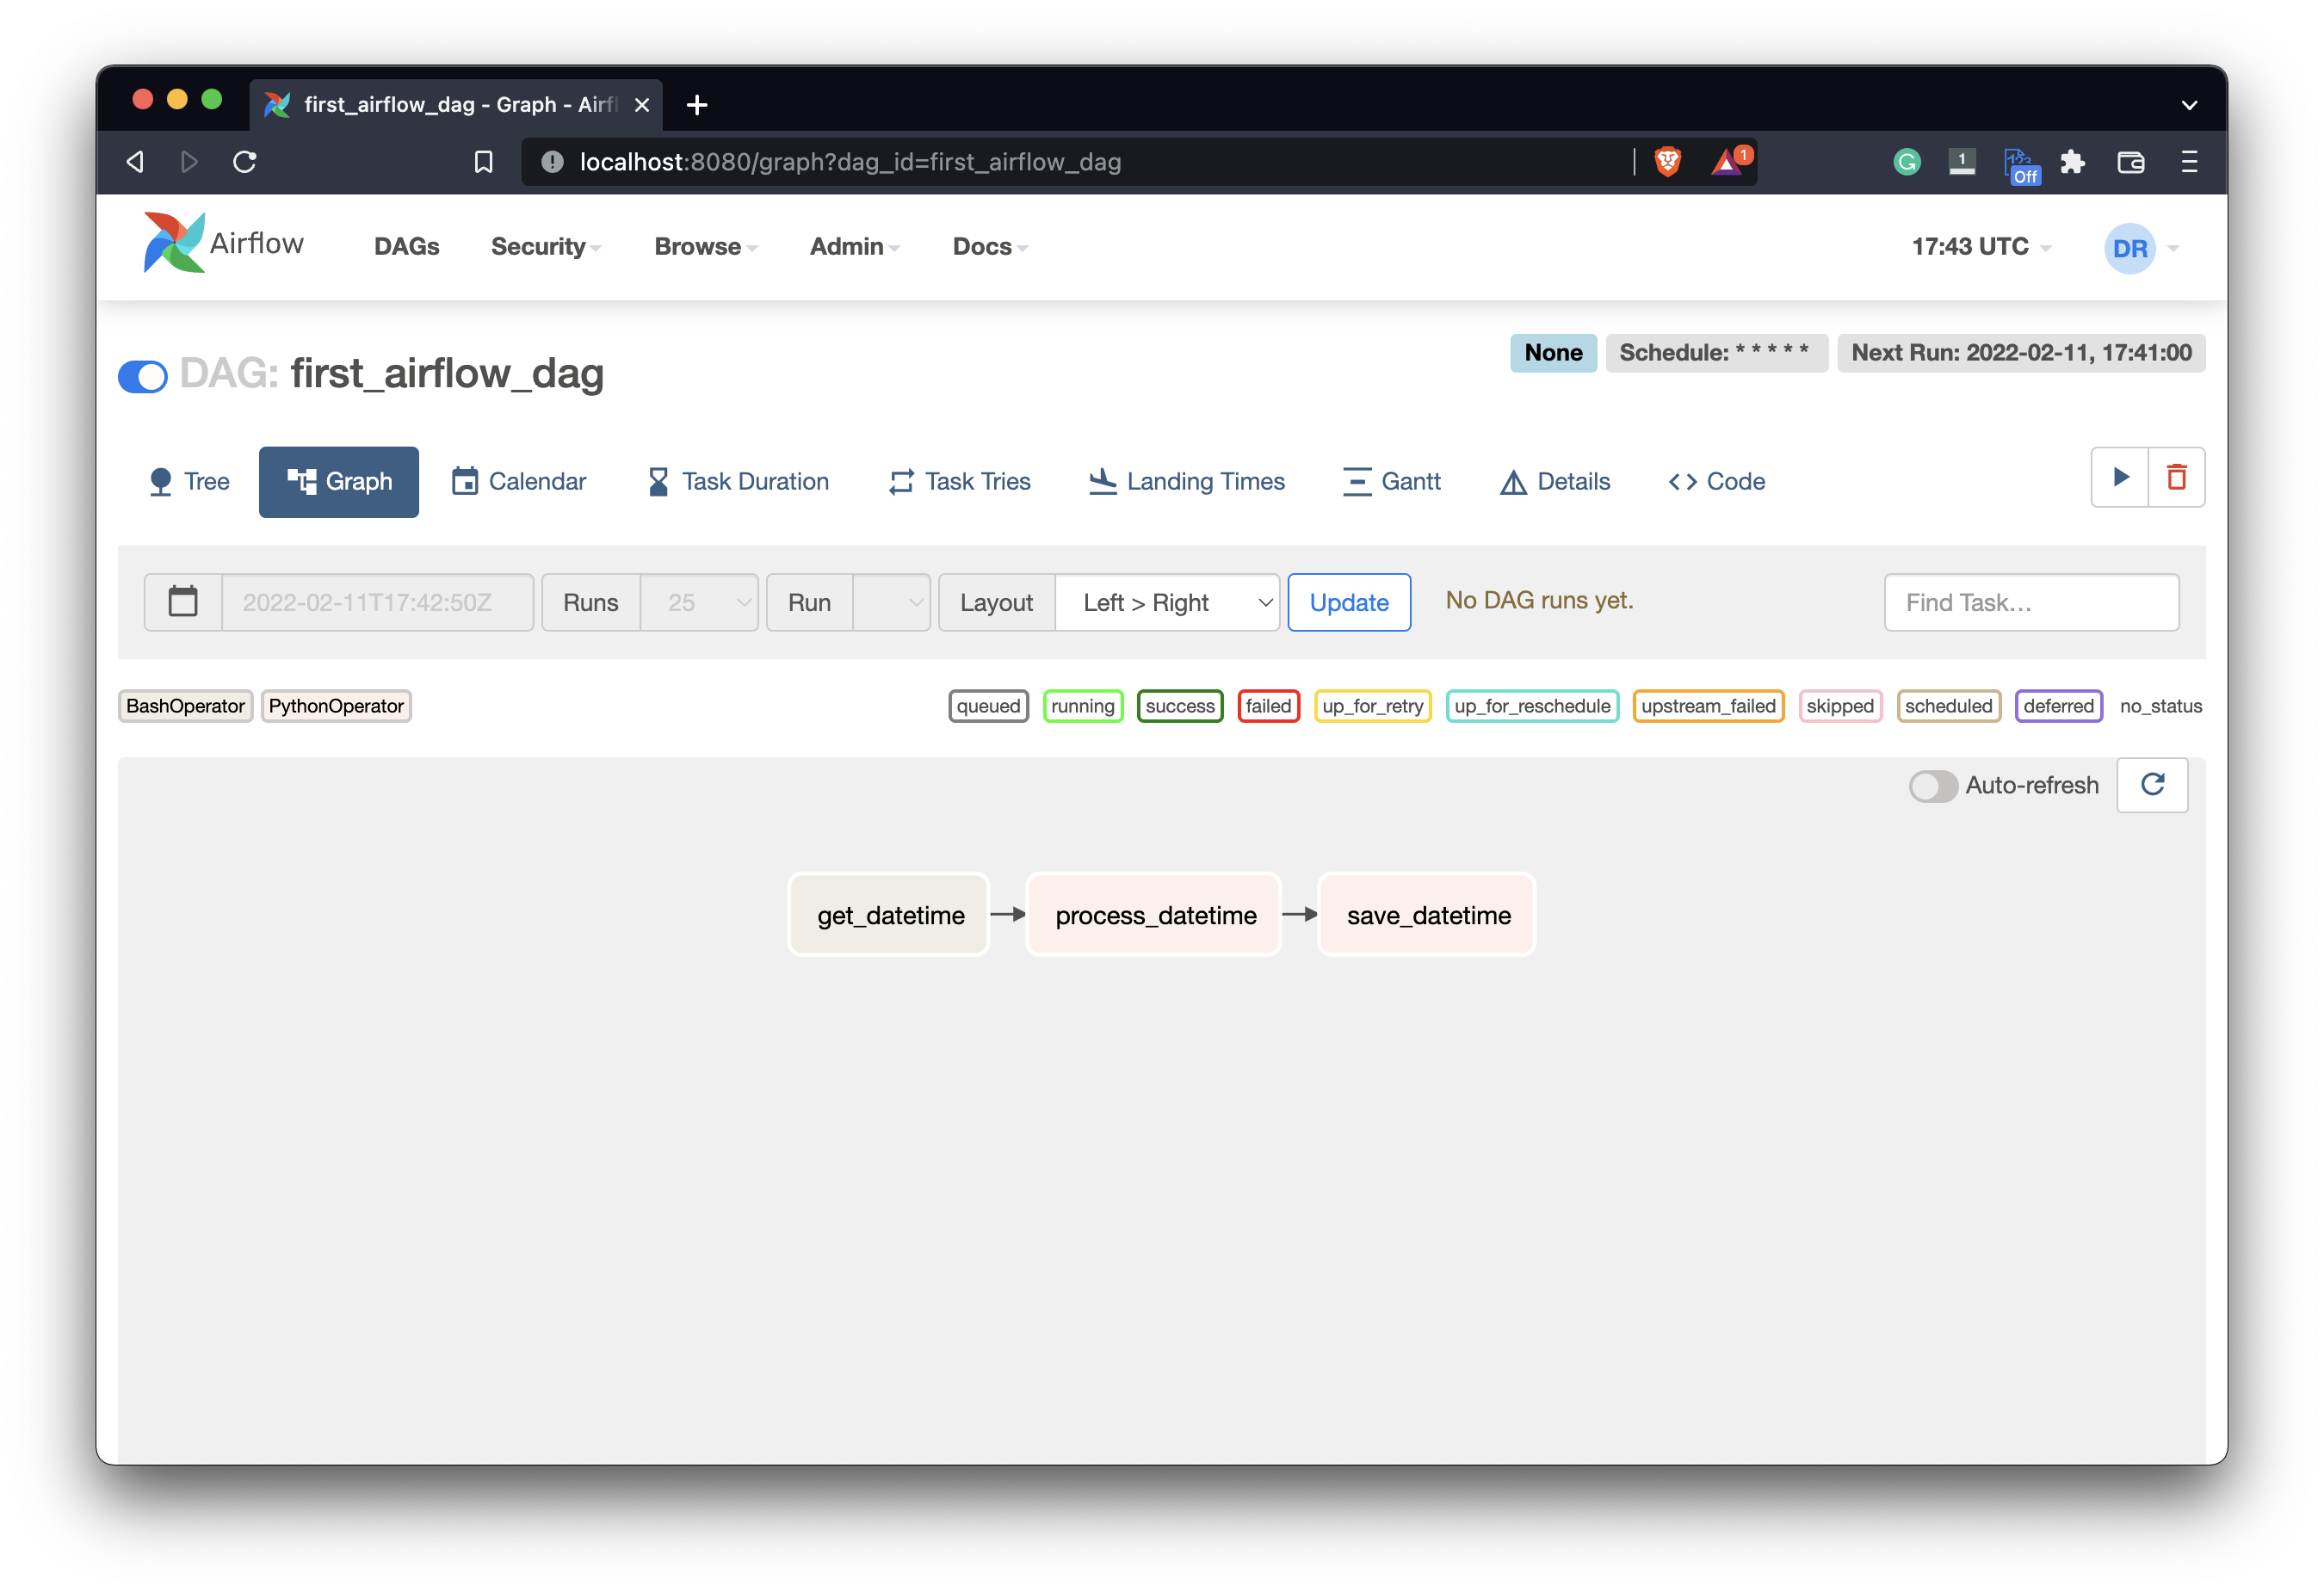
Image 12 - Connected tasks in the Airflow DAG (image by author)
Now Airflow knows in which order the tasks should run. I’ve also turned on the DAG by clicking on the Pause/Unpause switch right before the DAG’s name. We now have everything needed to run the DAG.
How to Run the Airflow DAG
Your DAG will run automatically as it’s scheduled to run every minute. You can also trigger it manually by clicking on the Start button (the one below the Next run text):
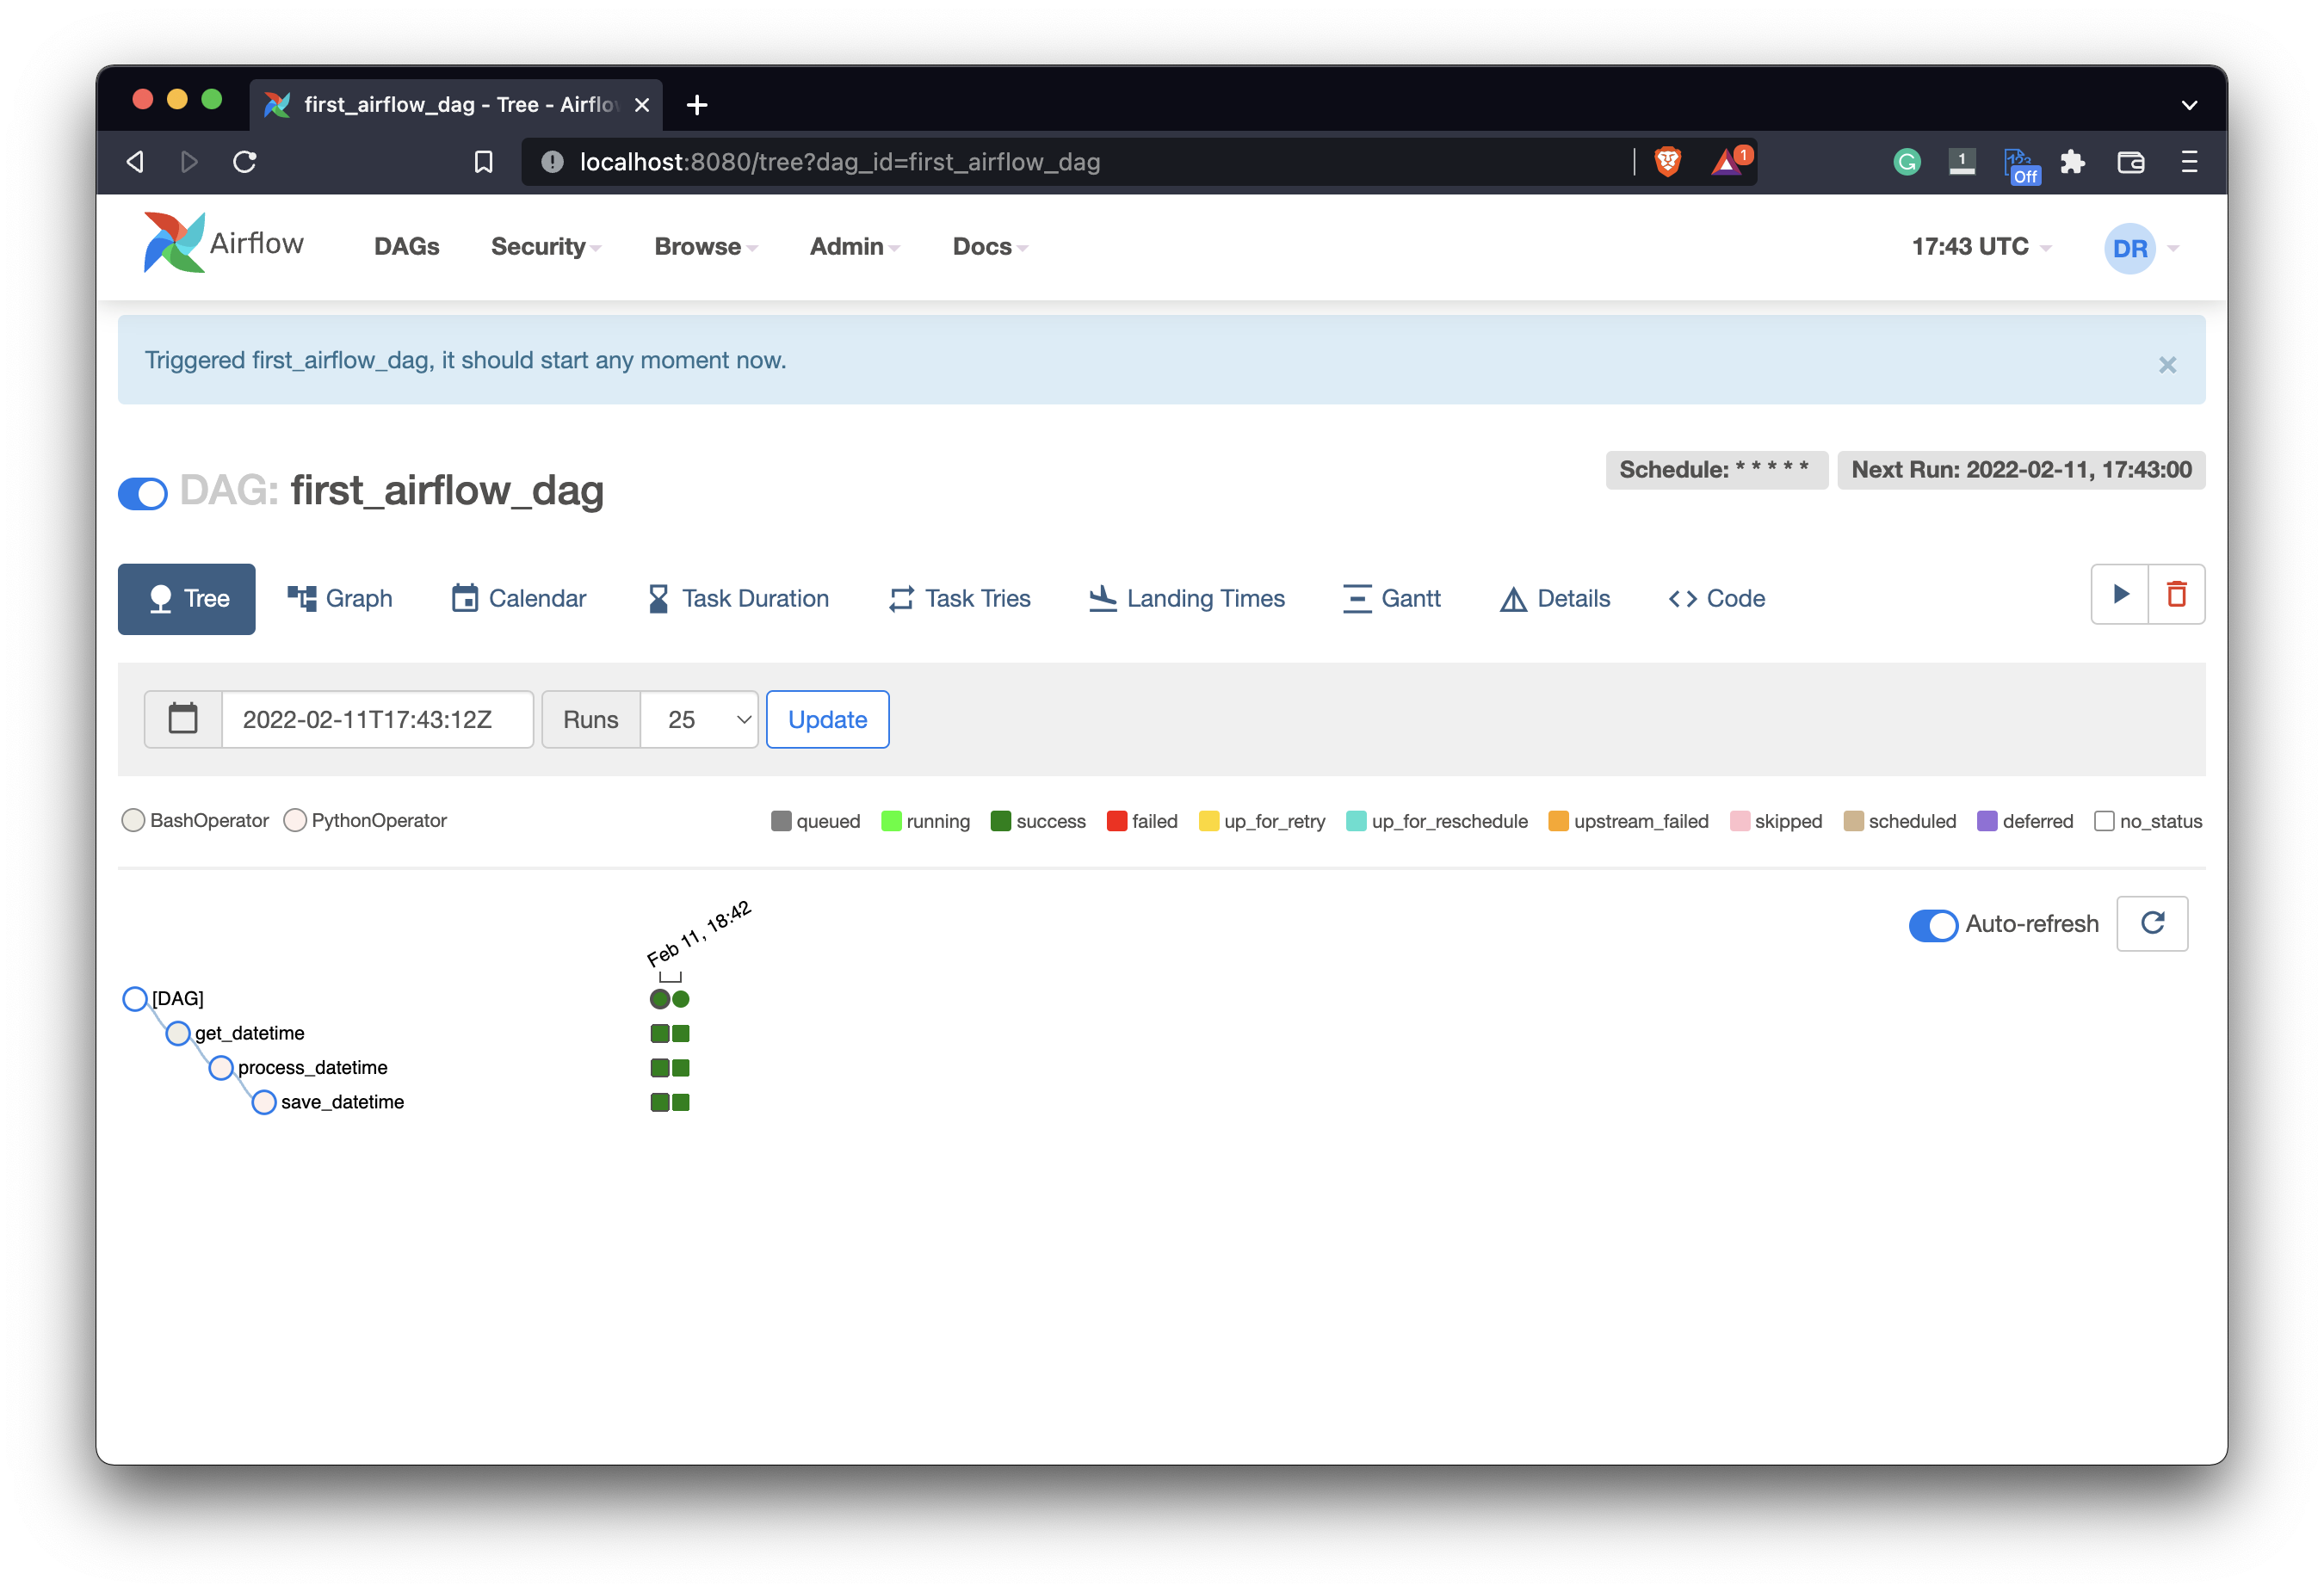
Image 13 - Airflow DAG executions (image by author)
If everything’s green then each task has finished without errors. You can see how the color-coding works by examining the legend above the tree view. After some time, we’ll see more and more runs finished successfully since it runs every minute:
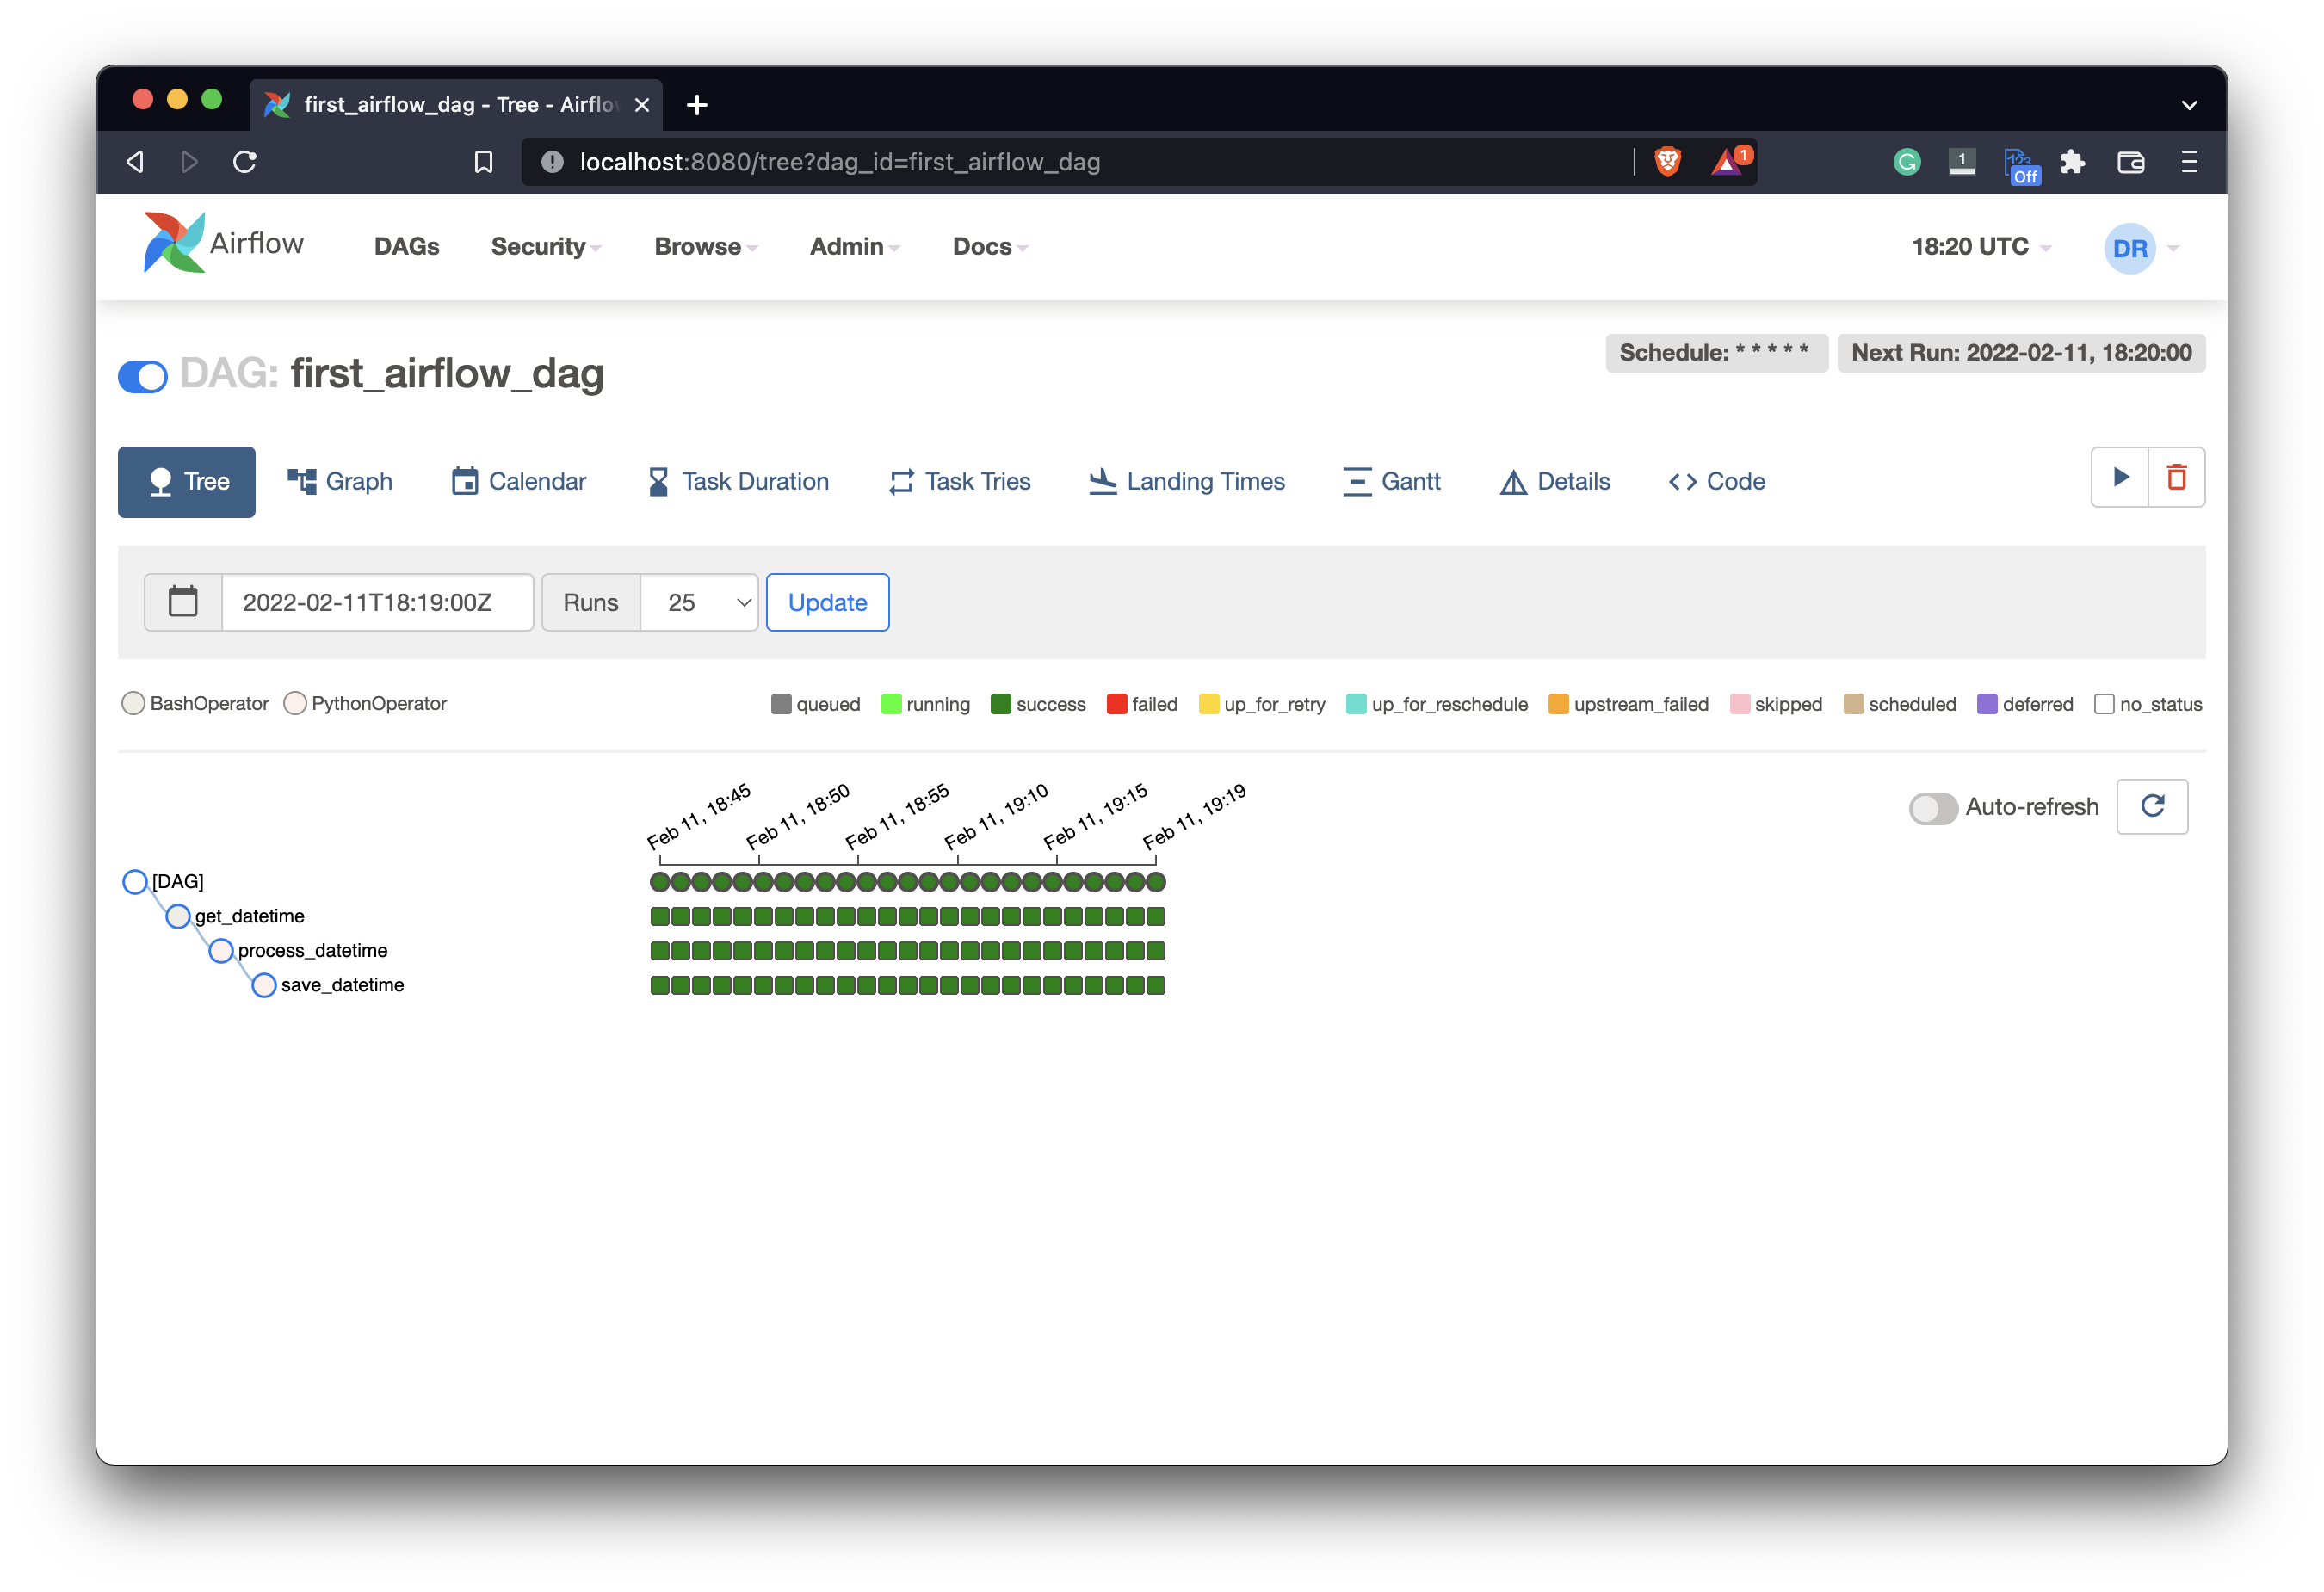
Image 14 - Airflow DAG executions (2) (image by author)
The resulting CSV file looks like this on my end:
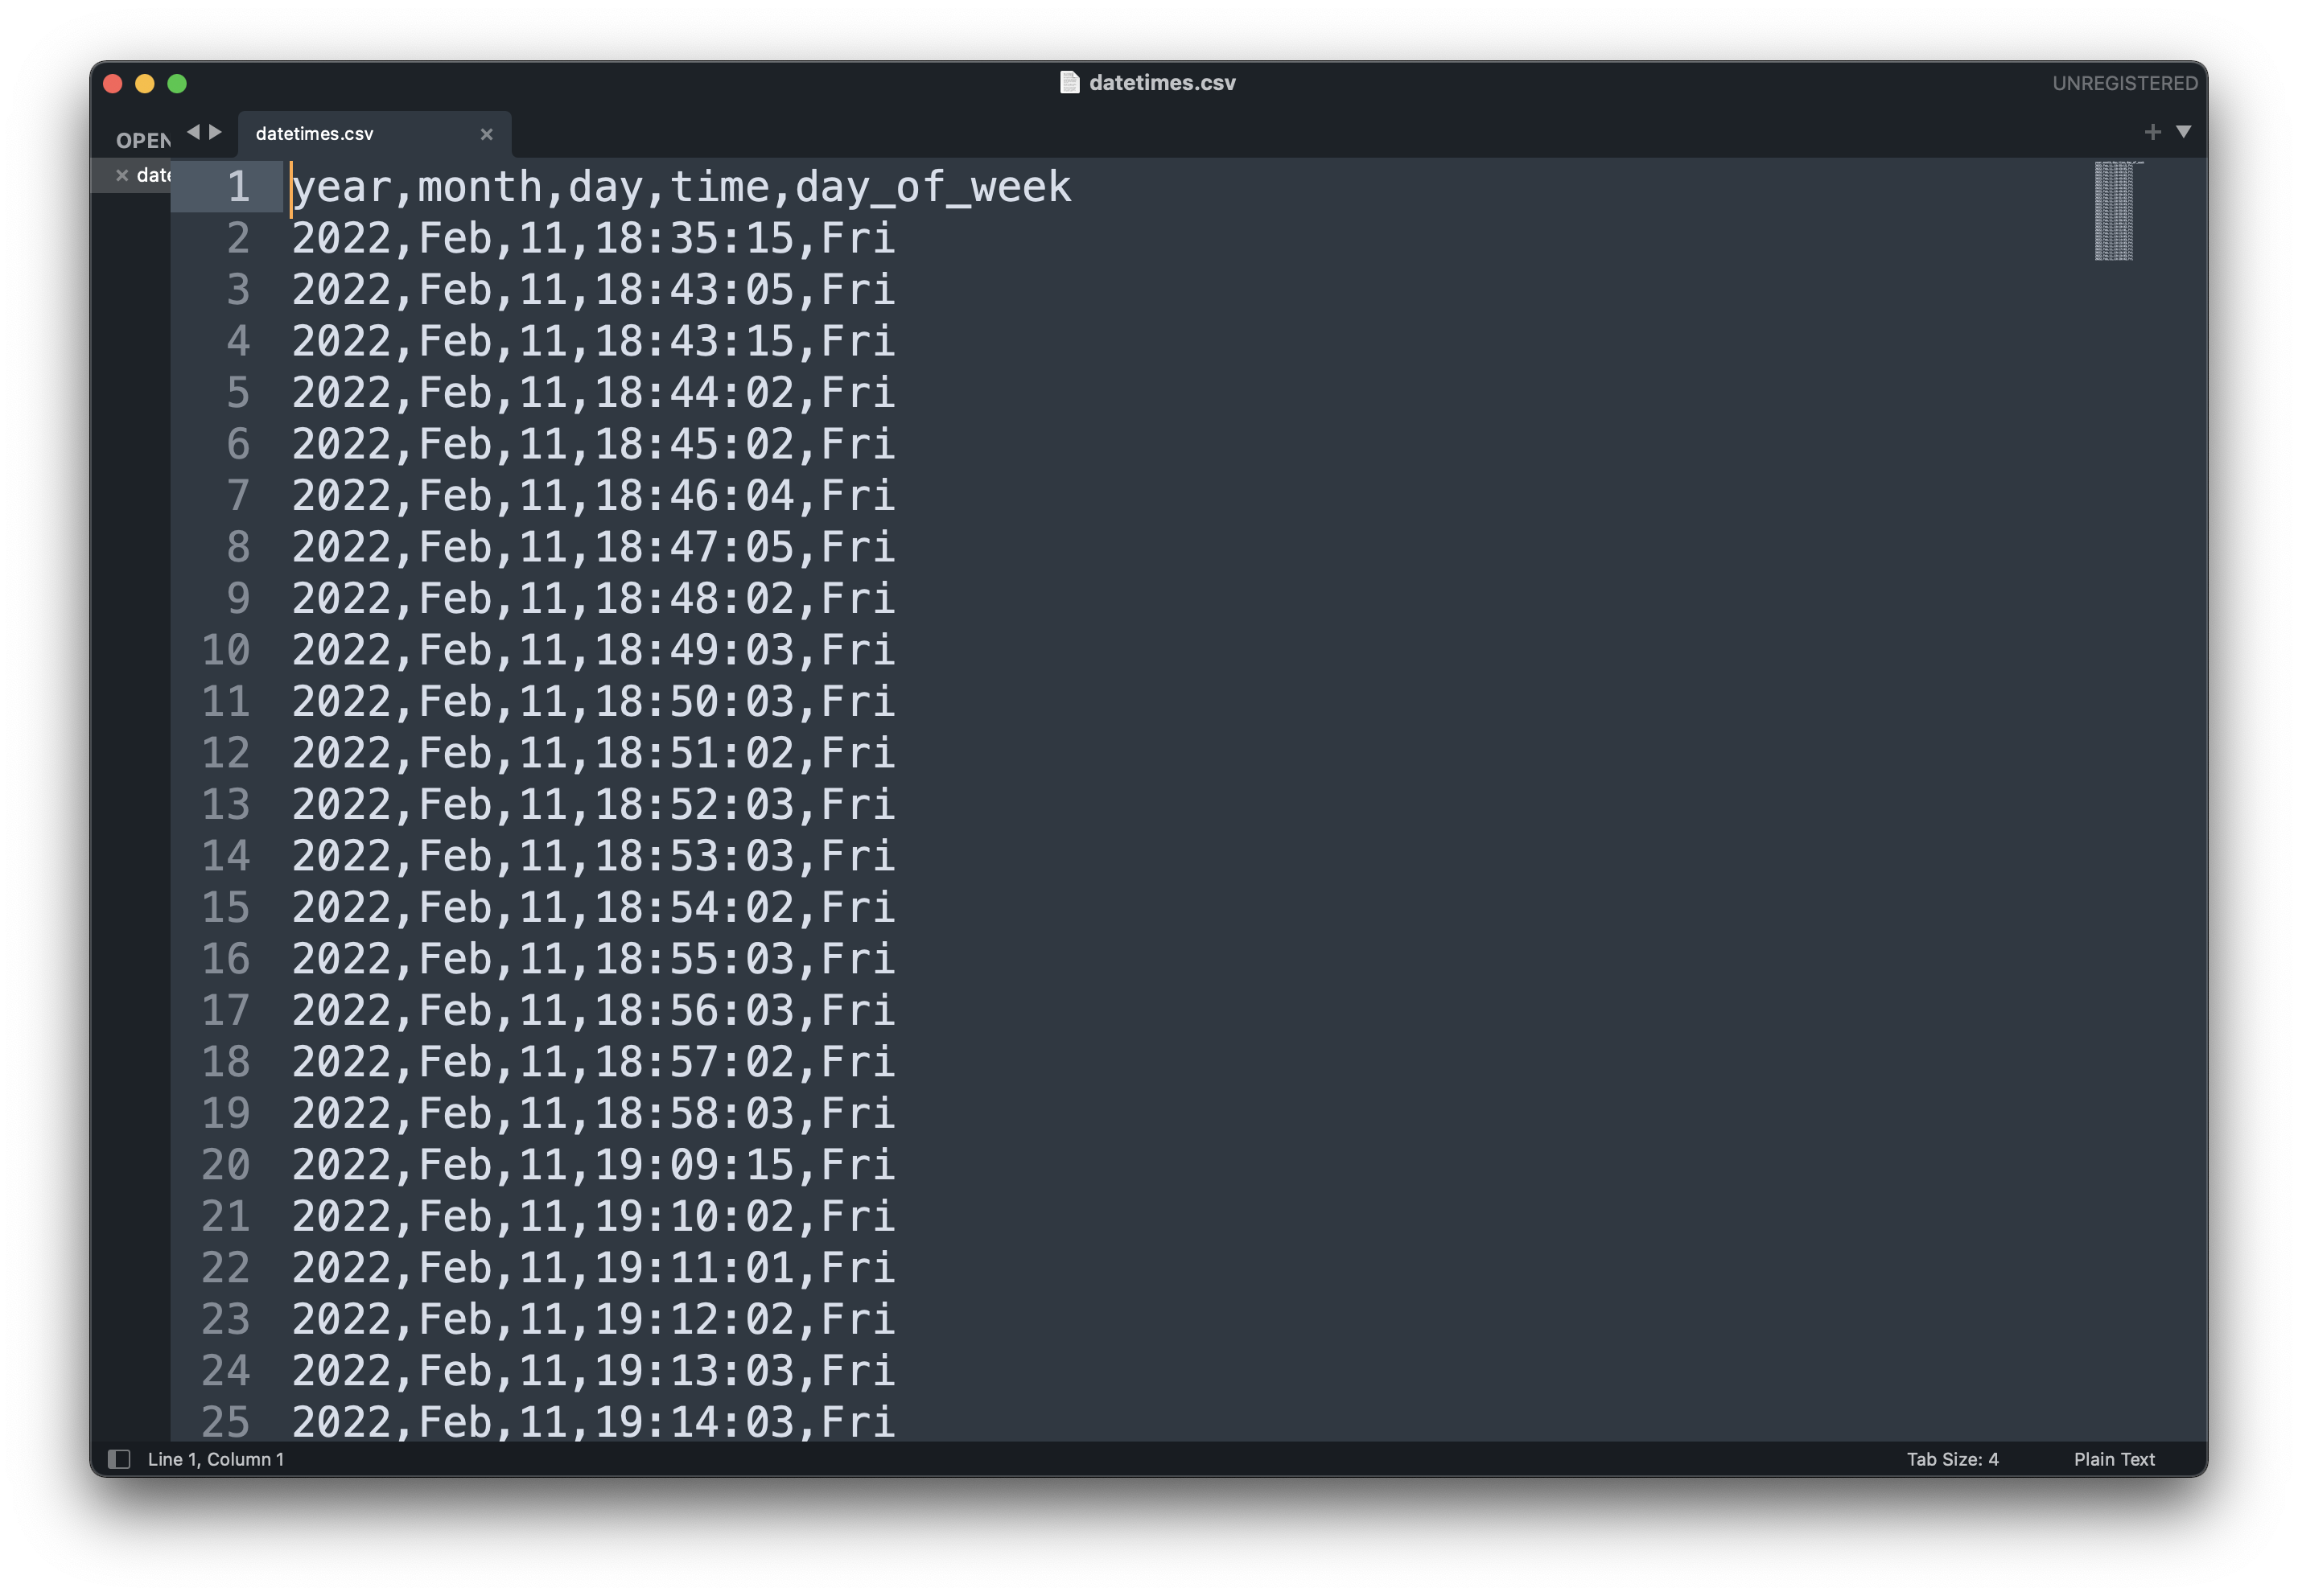
Image 15 - datetimes.csv file (Image by author)
There are some gaps between the datetimes, but only because I had to leave the house shortly so my laptop was turned off. As long as Airflow is running, you should see a new entry every minute.
Summary and Next Steps
And that’s your first data pipeline with Airflow - pretty basic but wraps your head around the concepts. You’ve learned how to run shell commands and Python functions, but also how to test each task individually. It’s a lot to process at once, I know. I recommend going through this pipeline a few times, and then implementing something similar from scratch.
For example, you could code a data pipeline that reads a CSV file, processes it in any way, and stores the results in another file. Try different schedule intervals to keep things interesting.
I’ll see you next time when you’ll learn how to work with databases in Airflow. Stay tuned!
Recommended reads
- 5 Best Books to Learn Data Science Prerequisites (Math, Stats, and Programming)
- Top 5 Books to Learn Data Science in 2022
- Structural Pattern Matching (Switch Statement) in Python 3.10
Stay connected
- Hire me as a technical writer
- Subscribe on YouTube
- Connect on LinkedIn