Stop hardcoding values in your Airflow DAGs - Use variables instead
Airflow Variables are the best way to save and access different types of content. You can store pretty much everything you can imagine, from plain text content, credentials, to JSON-like data structures. There are two ways to store variables in Airflow - from the Admin panel and from the Terminal - and we’ll explore both today.
Don’t feel like reading? Watch my video instead:
How to Add Variables in Apache Airflow
To start, make sure you have both the Airflow webserver and scheduler up and running. Go to the Airflow homepage (http://localhost:8080) and navigate to Admin - Variables. You’ll see a blank list if this is your first time here:
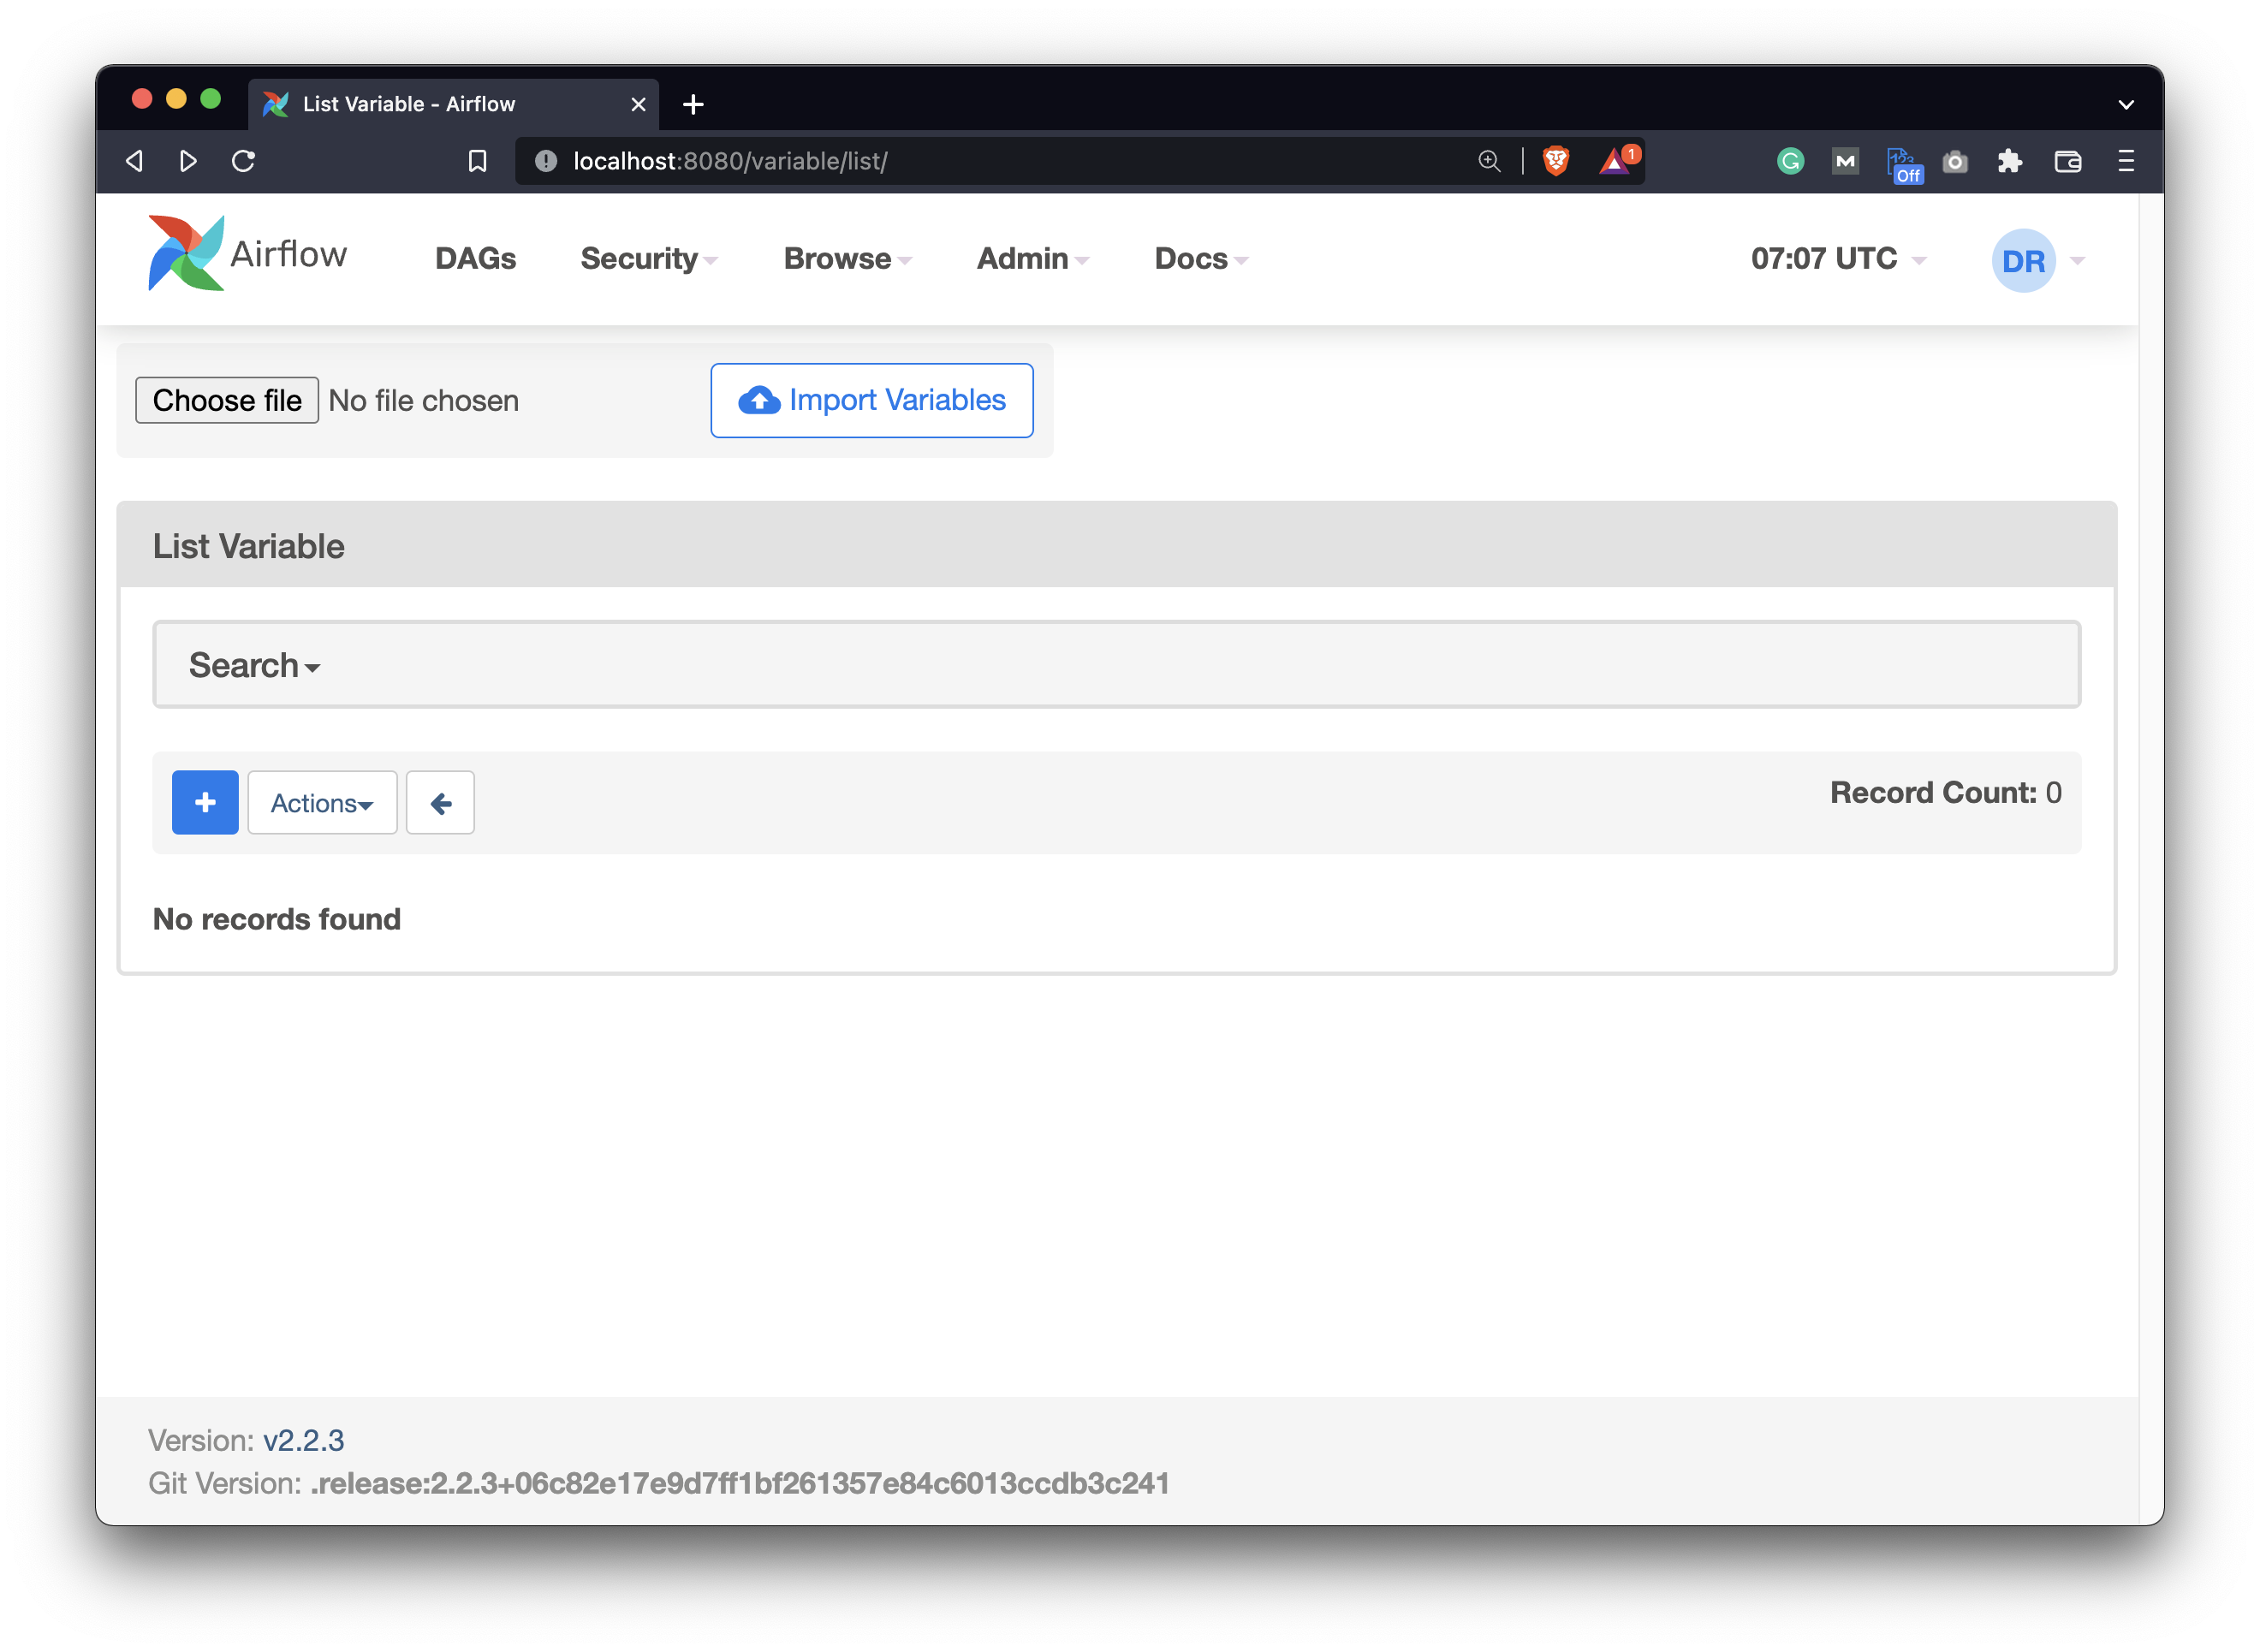
Image 1 - Airflow Variables page (image by author)
Click on the blue plus button to add a new variable. We’ll keep this one simple and specify it as follows:
- Key:
user_email - Val:
[email protected]
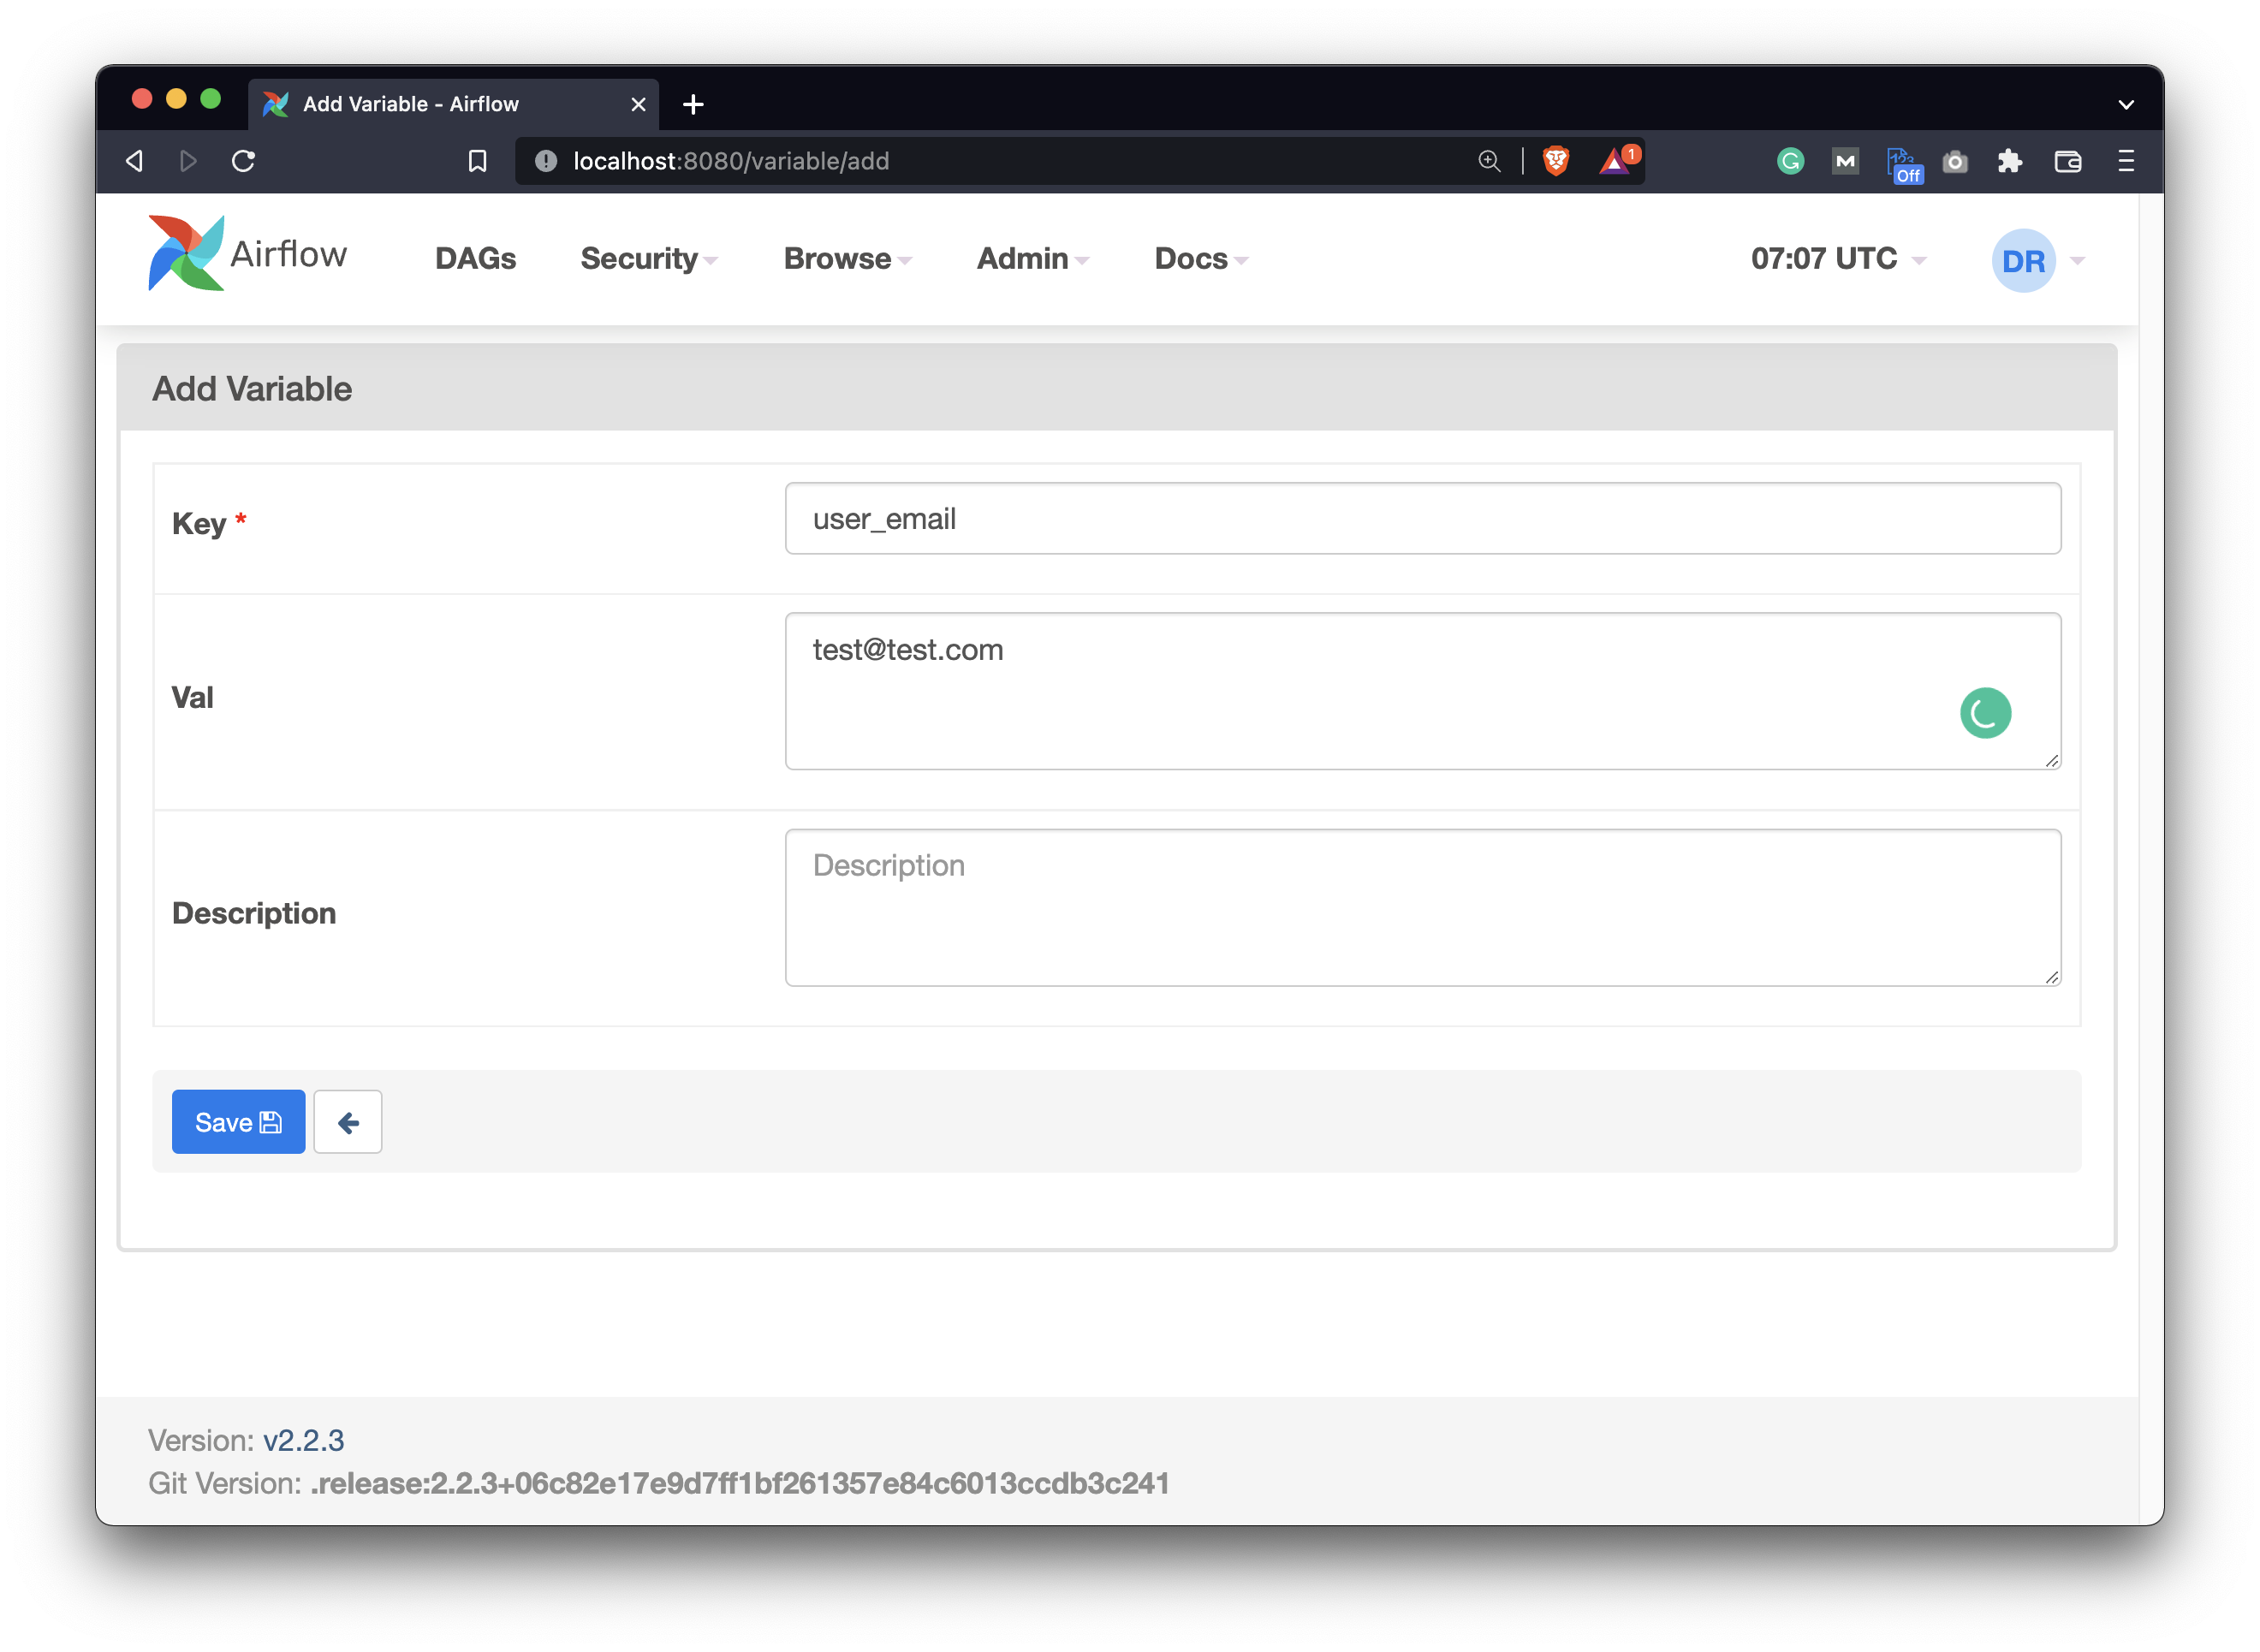
Image 2 - How to add a variable in Airflow (image by author)
Let’s add another one while we’re here. This will be a bit more complex and store a JSON-like object. Objects of this type need to be deserialized when accessed through the DAG, so that’s why we’re covering them:
- Key:
sample_json - Val:
{"user": "bob", "address": {"city": "NY", "street_name": "1st"}}
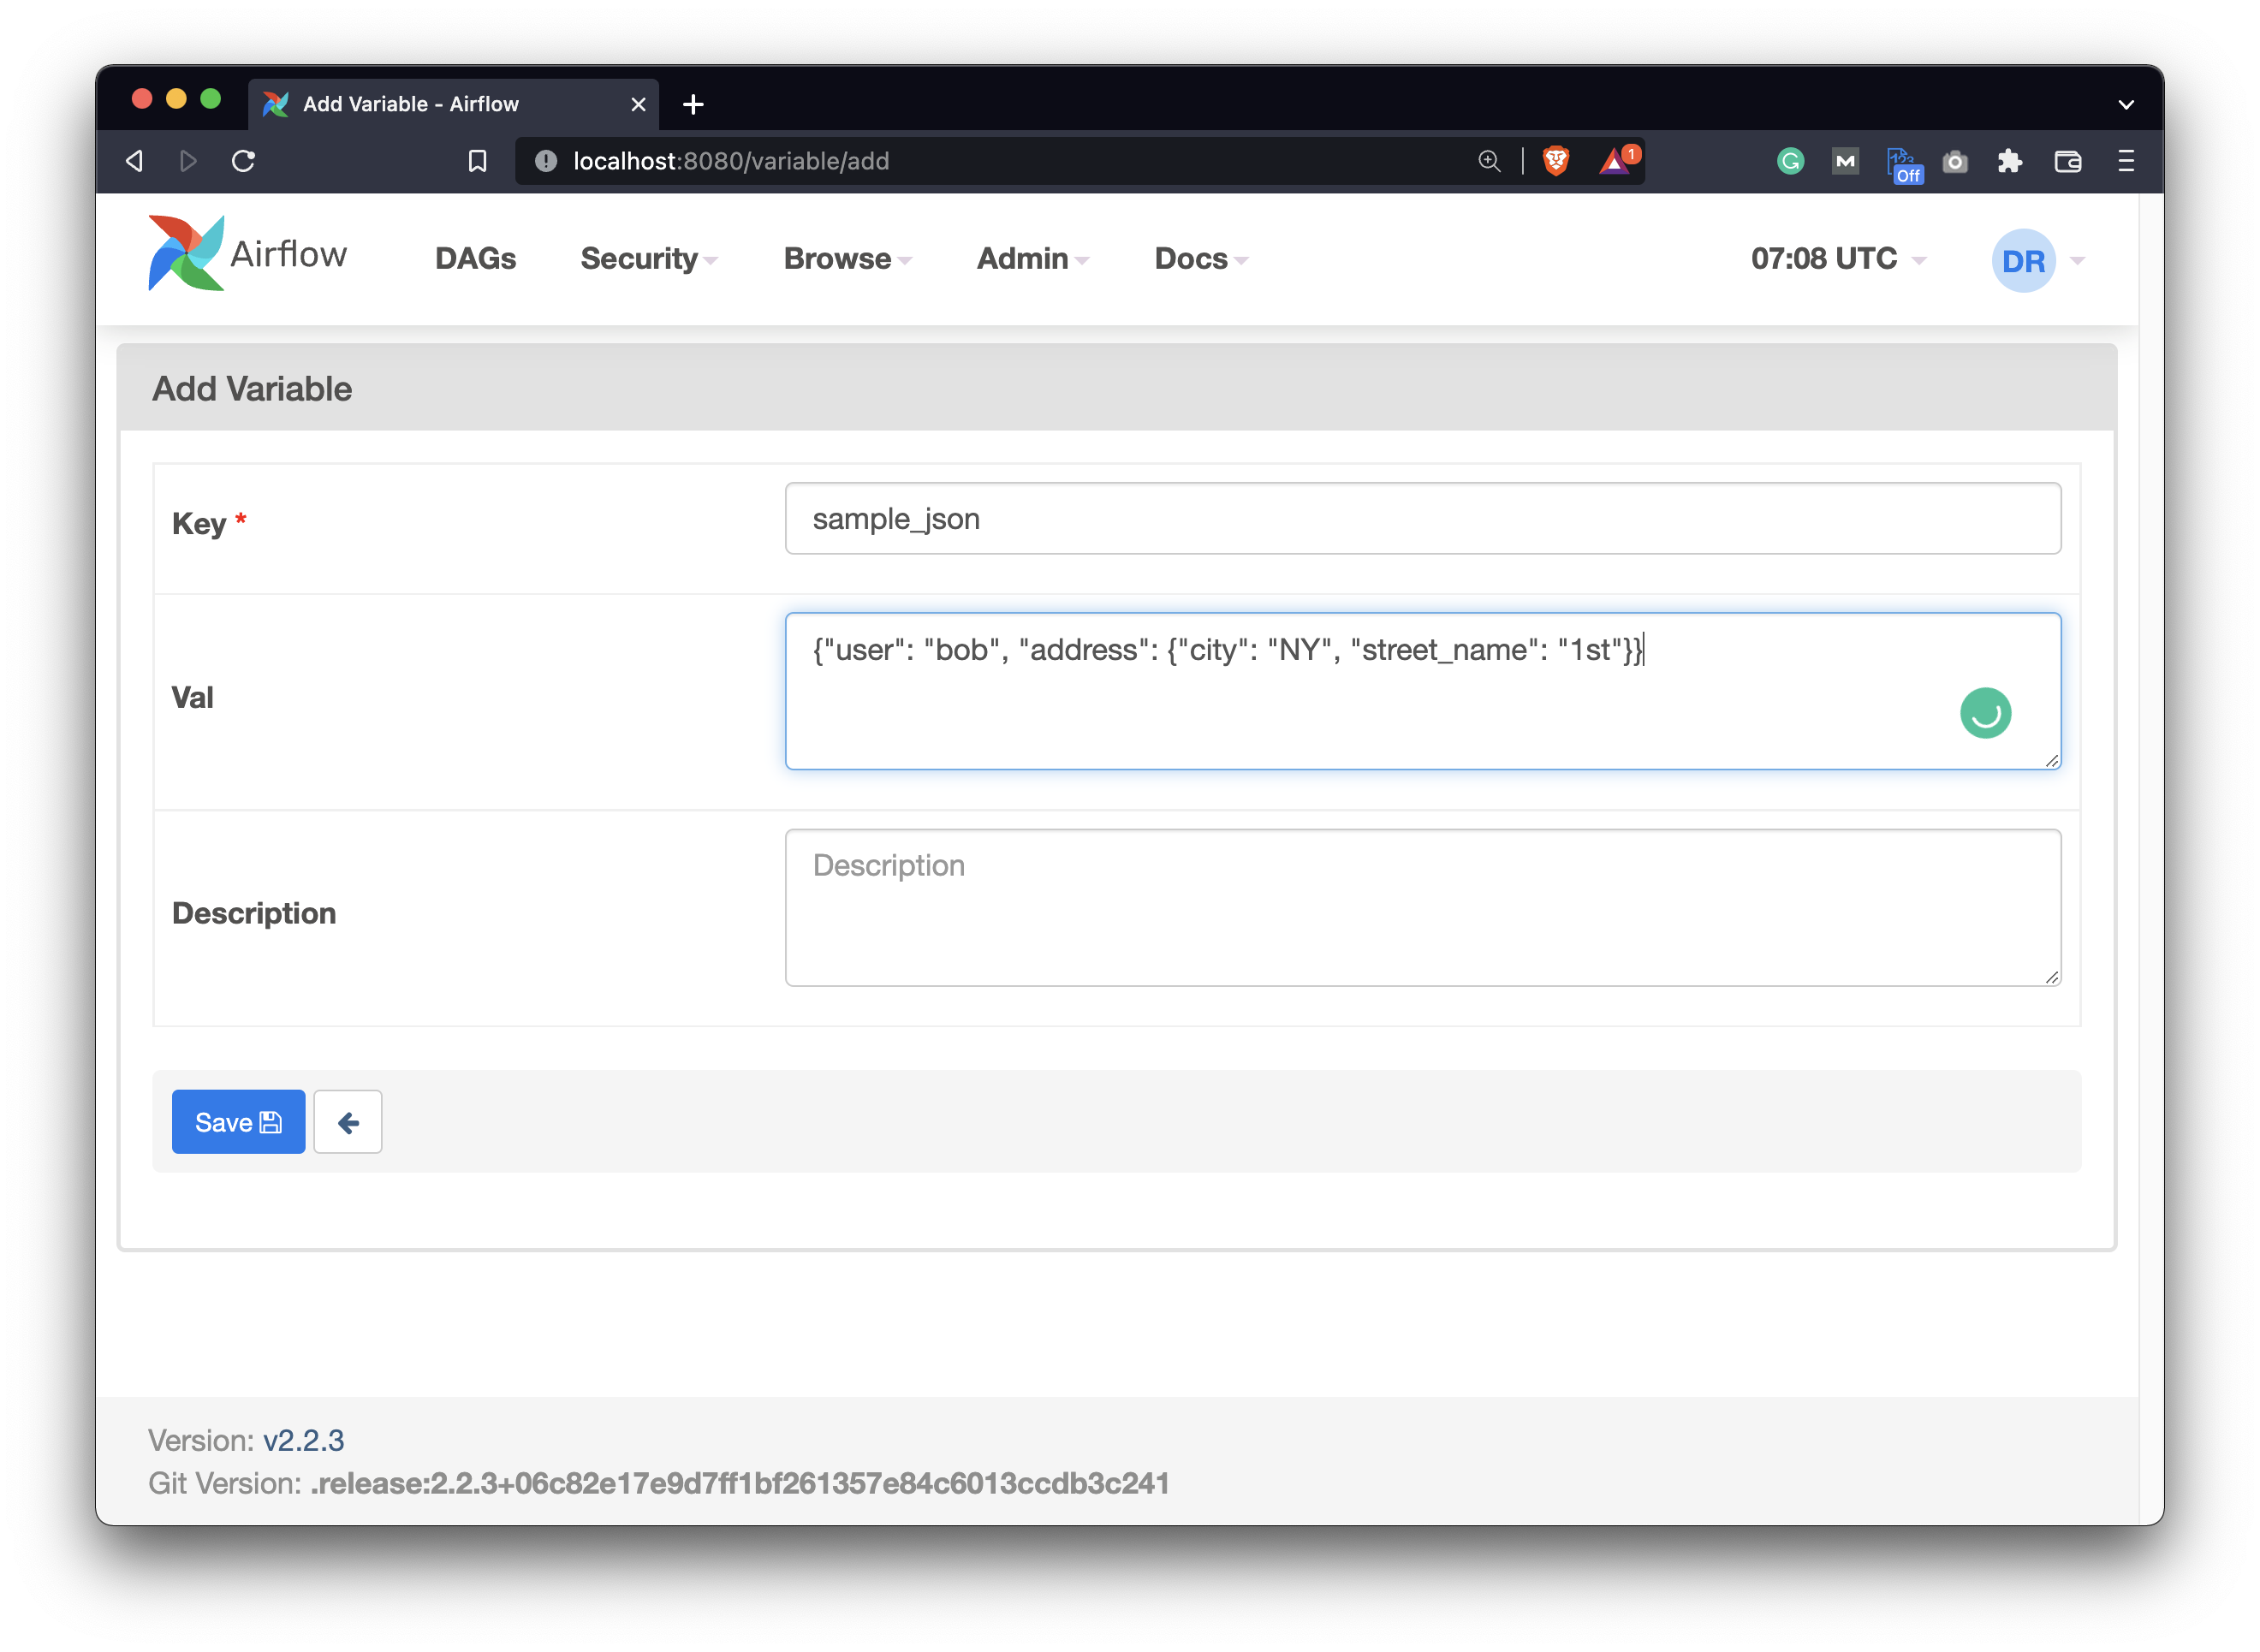
Image 3 - How to add a JSON-like variable in Airflow (image by author)
If you did everything correctly, you should see two variables listed under Admin - Variables. Make sure yours look the same before proceeding:
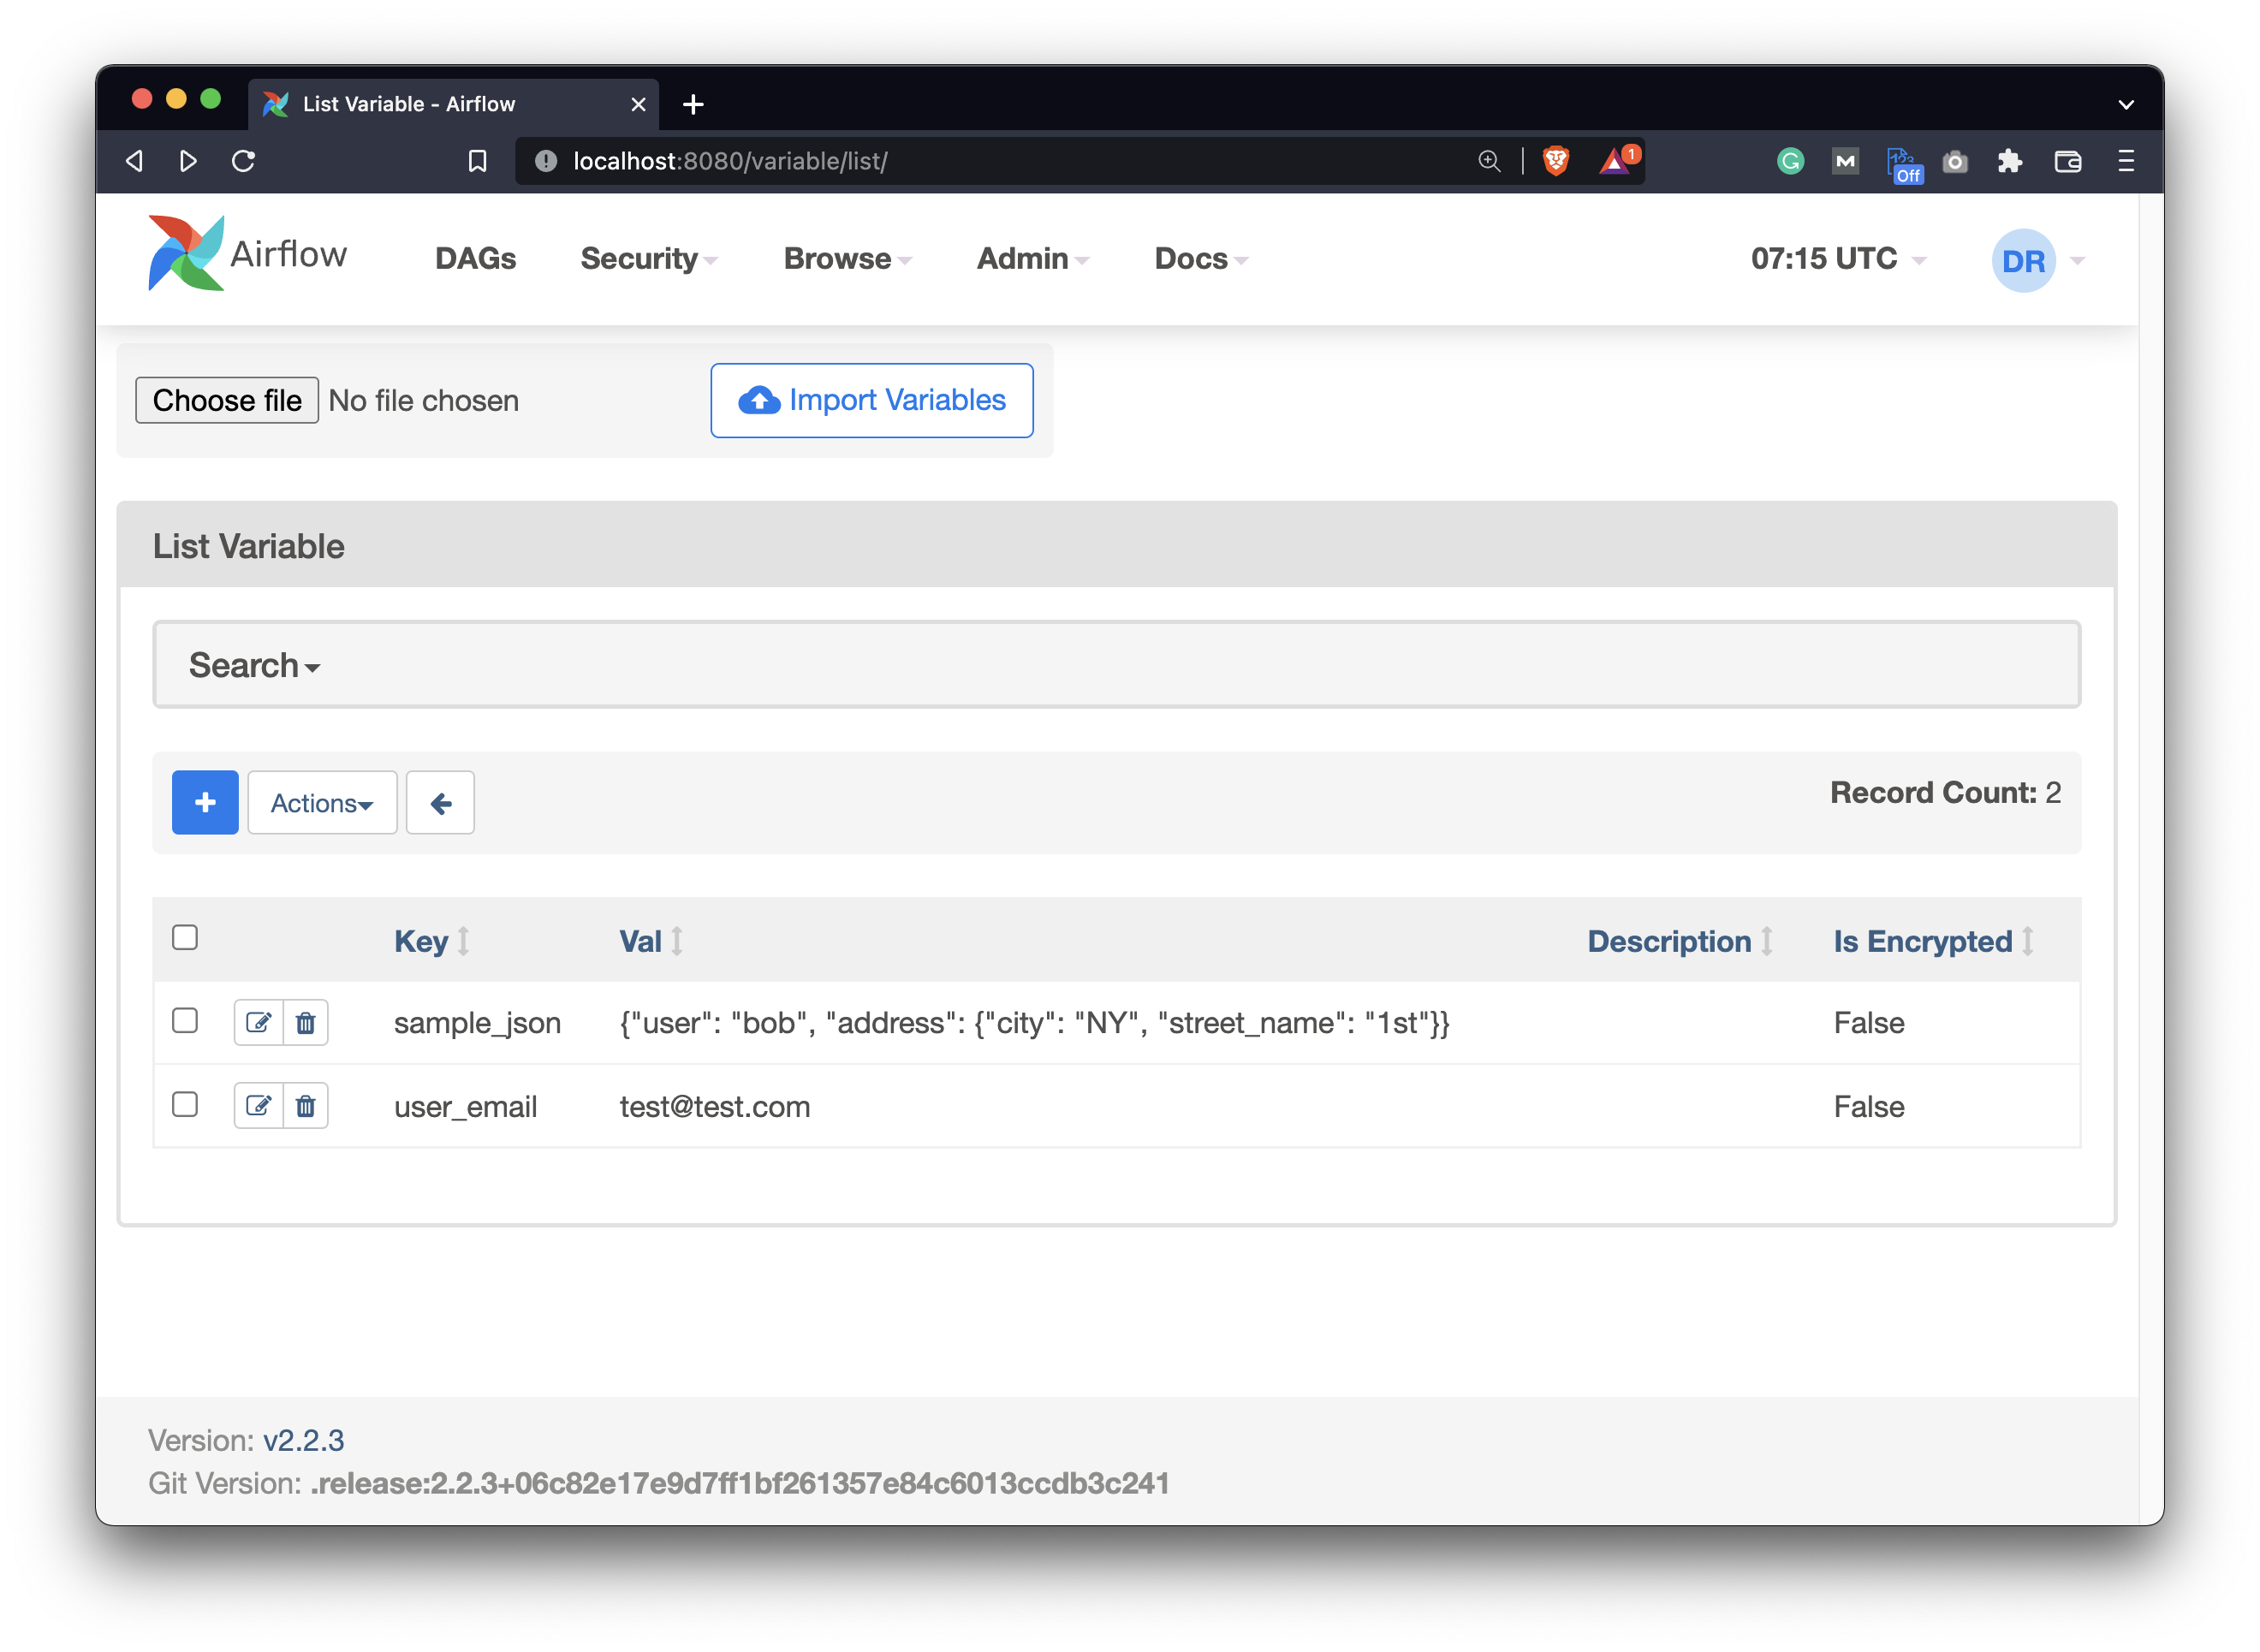
Image 4 - Airflow Variables page after adding variables (image by author)
And that’s how you can add Airflow variables through the Airflow web page. There’s another, potentially easier way, but it has a couple of quirks.
How to Add Variables in Apache Airflow Through the Terminal
From Airflow version 1.10.10 you can add Airflow variables from the Terminal. To be completely clear, these are just environment variables with a specific naming convention.
All Airflow variables must be set with the syntax AIRFLOW_VAR_{VARIABLE_NAME}, all uppercase. If you want to have a variable named TEST, declare it as AIRFLOW_VAR_TEST. The uppercase syntax is crucial here, but both uppercase and lowercase will work later in the Airflow DAG.
Here’s how to declare two variables this way - note how JSON is wrapped in single quotes:
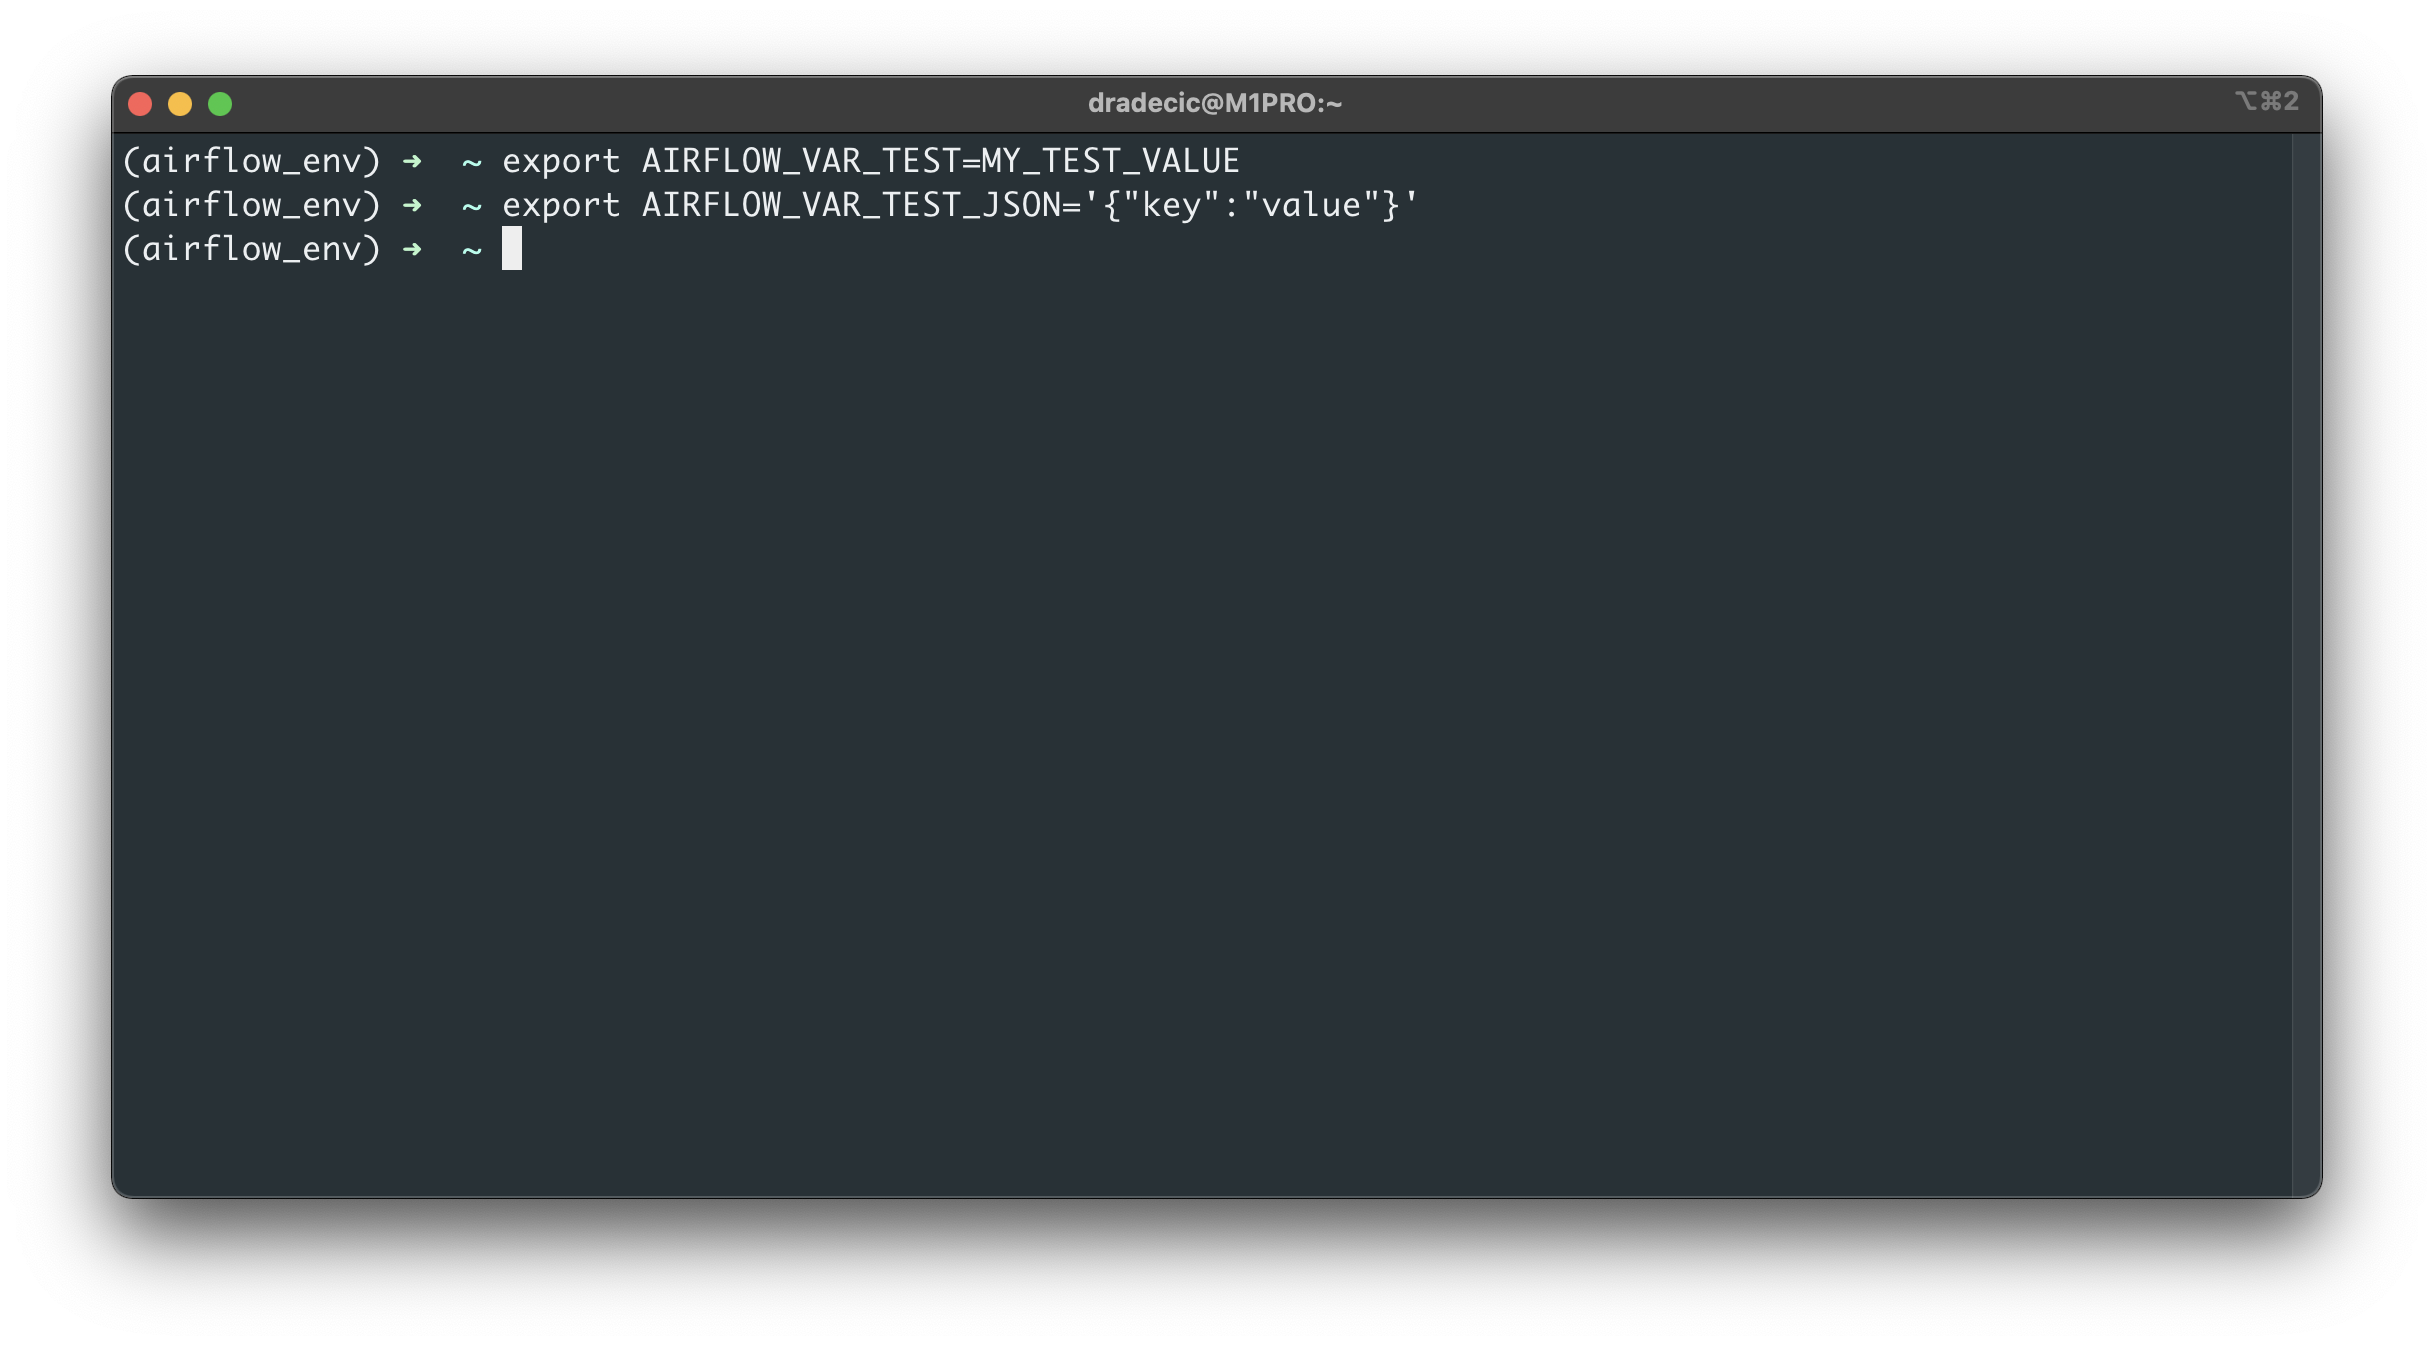
Image 5 - Adding Airflow variables through the Terminal (image by author)
Variables set using environment variables won’t appear under Admin - Variables on the Airflow home page, so keep that in mind.
So, how can you access them? Well, you can use the following shell command to print all environment variables:
env
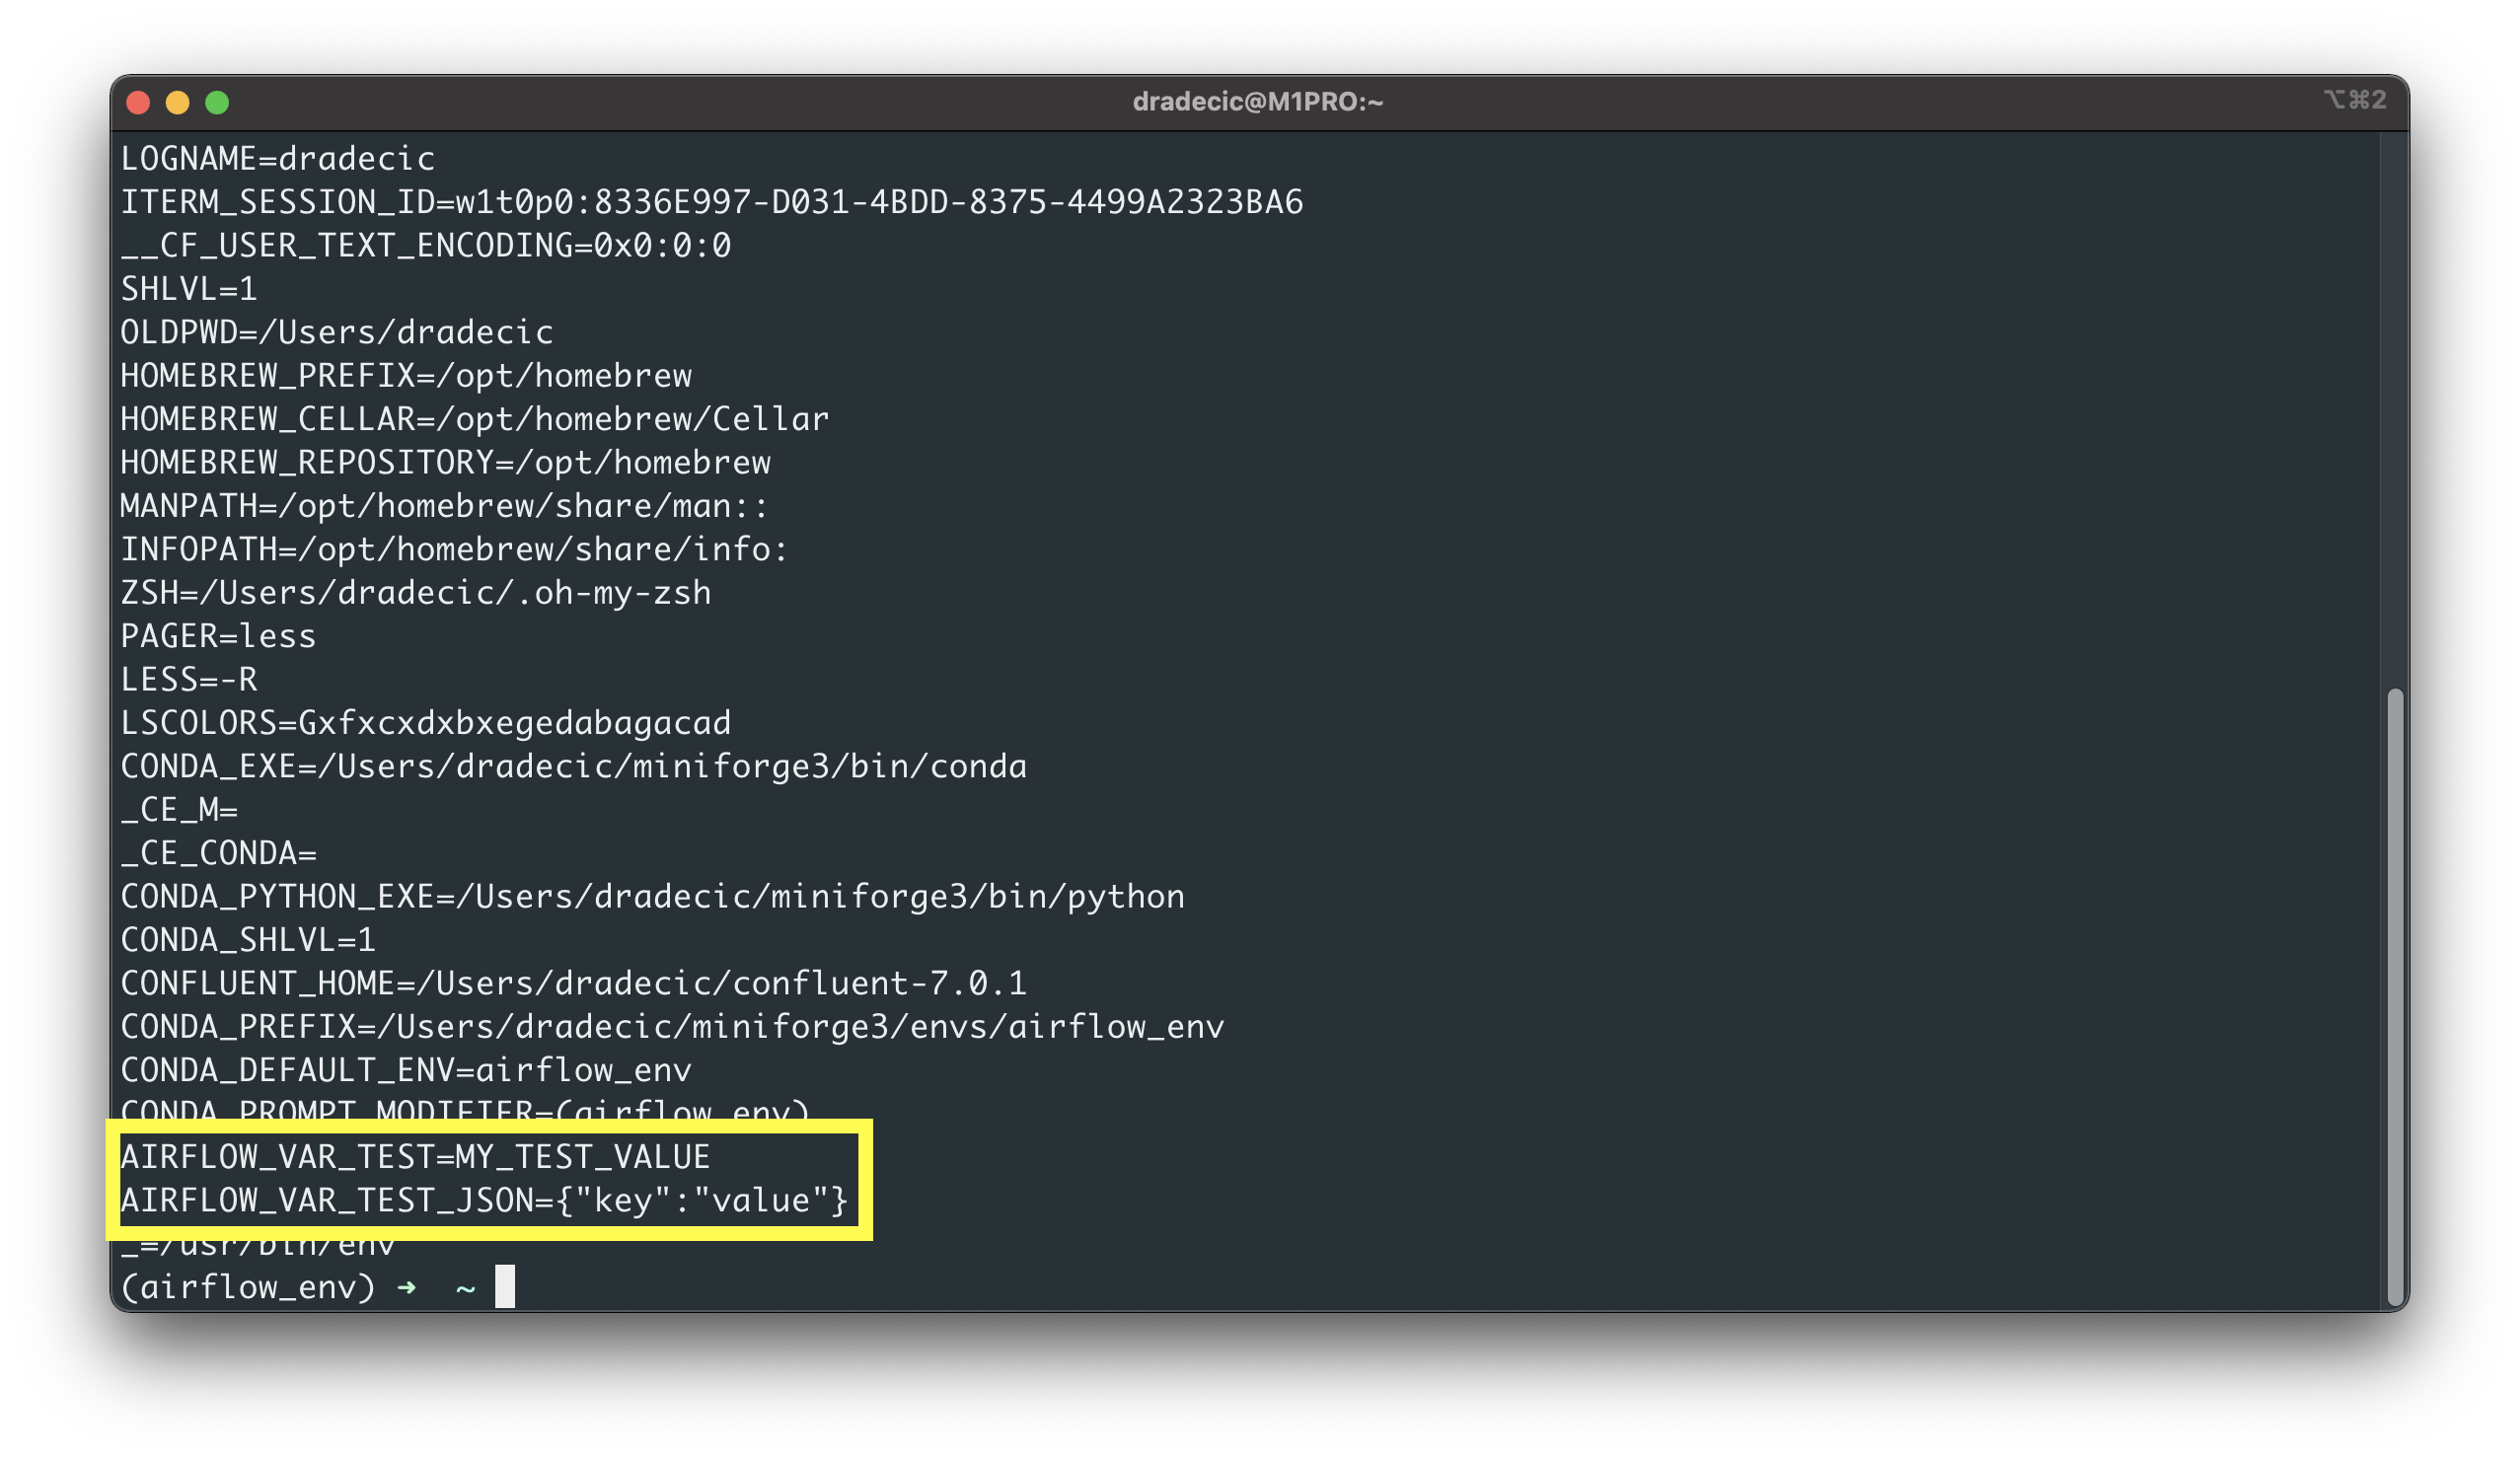
Image 6 - Printing all environment variables (image by author)
Or you can print a specific one:
echo $AIRFLOW_VAR_TEST_JSON
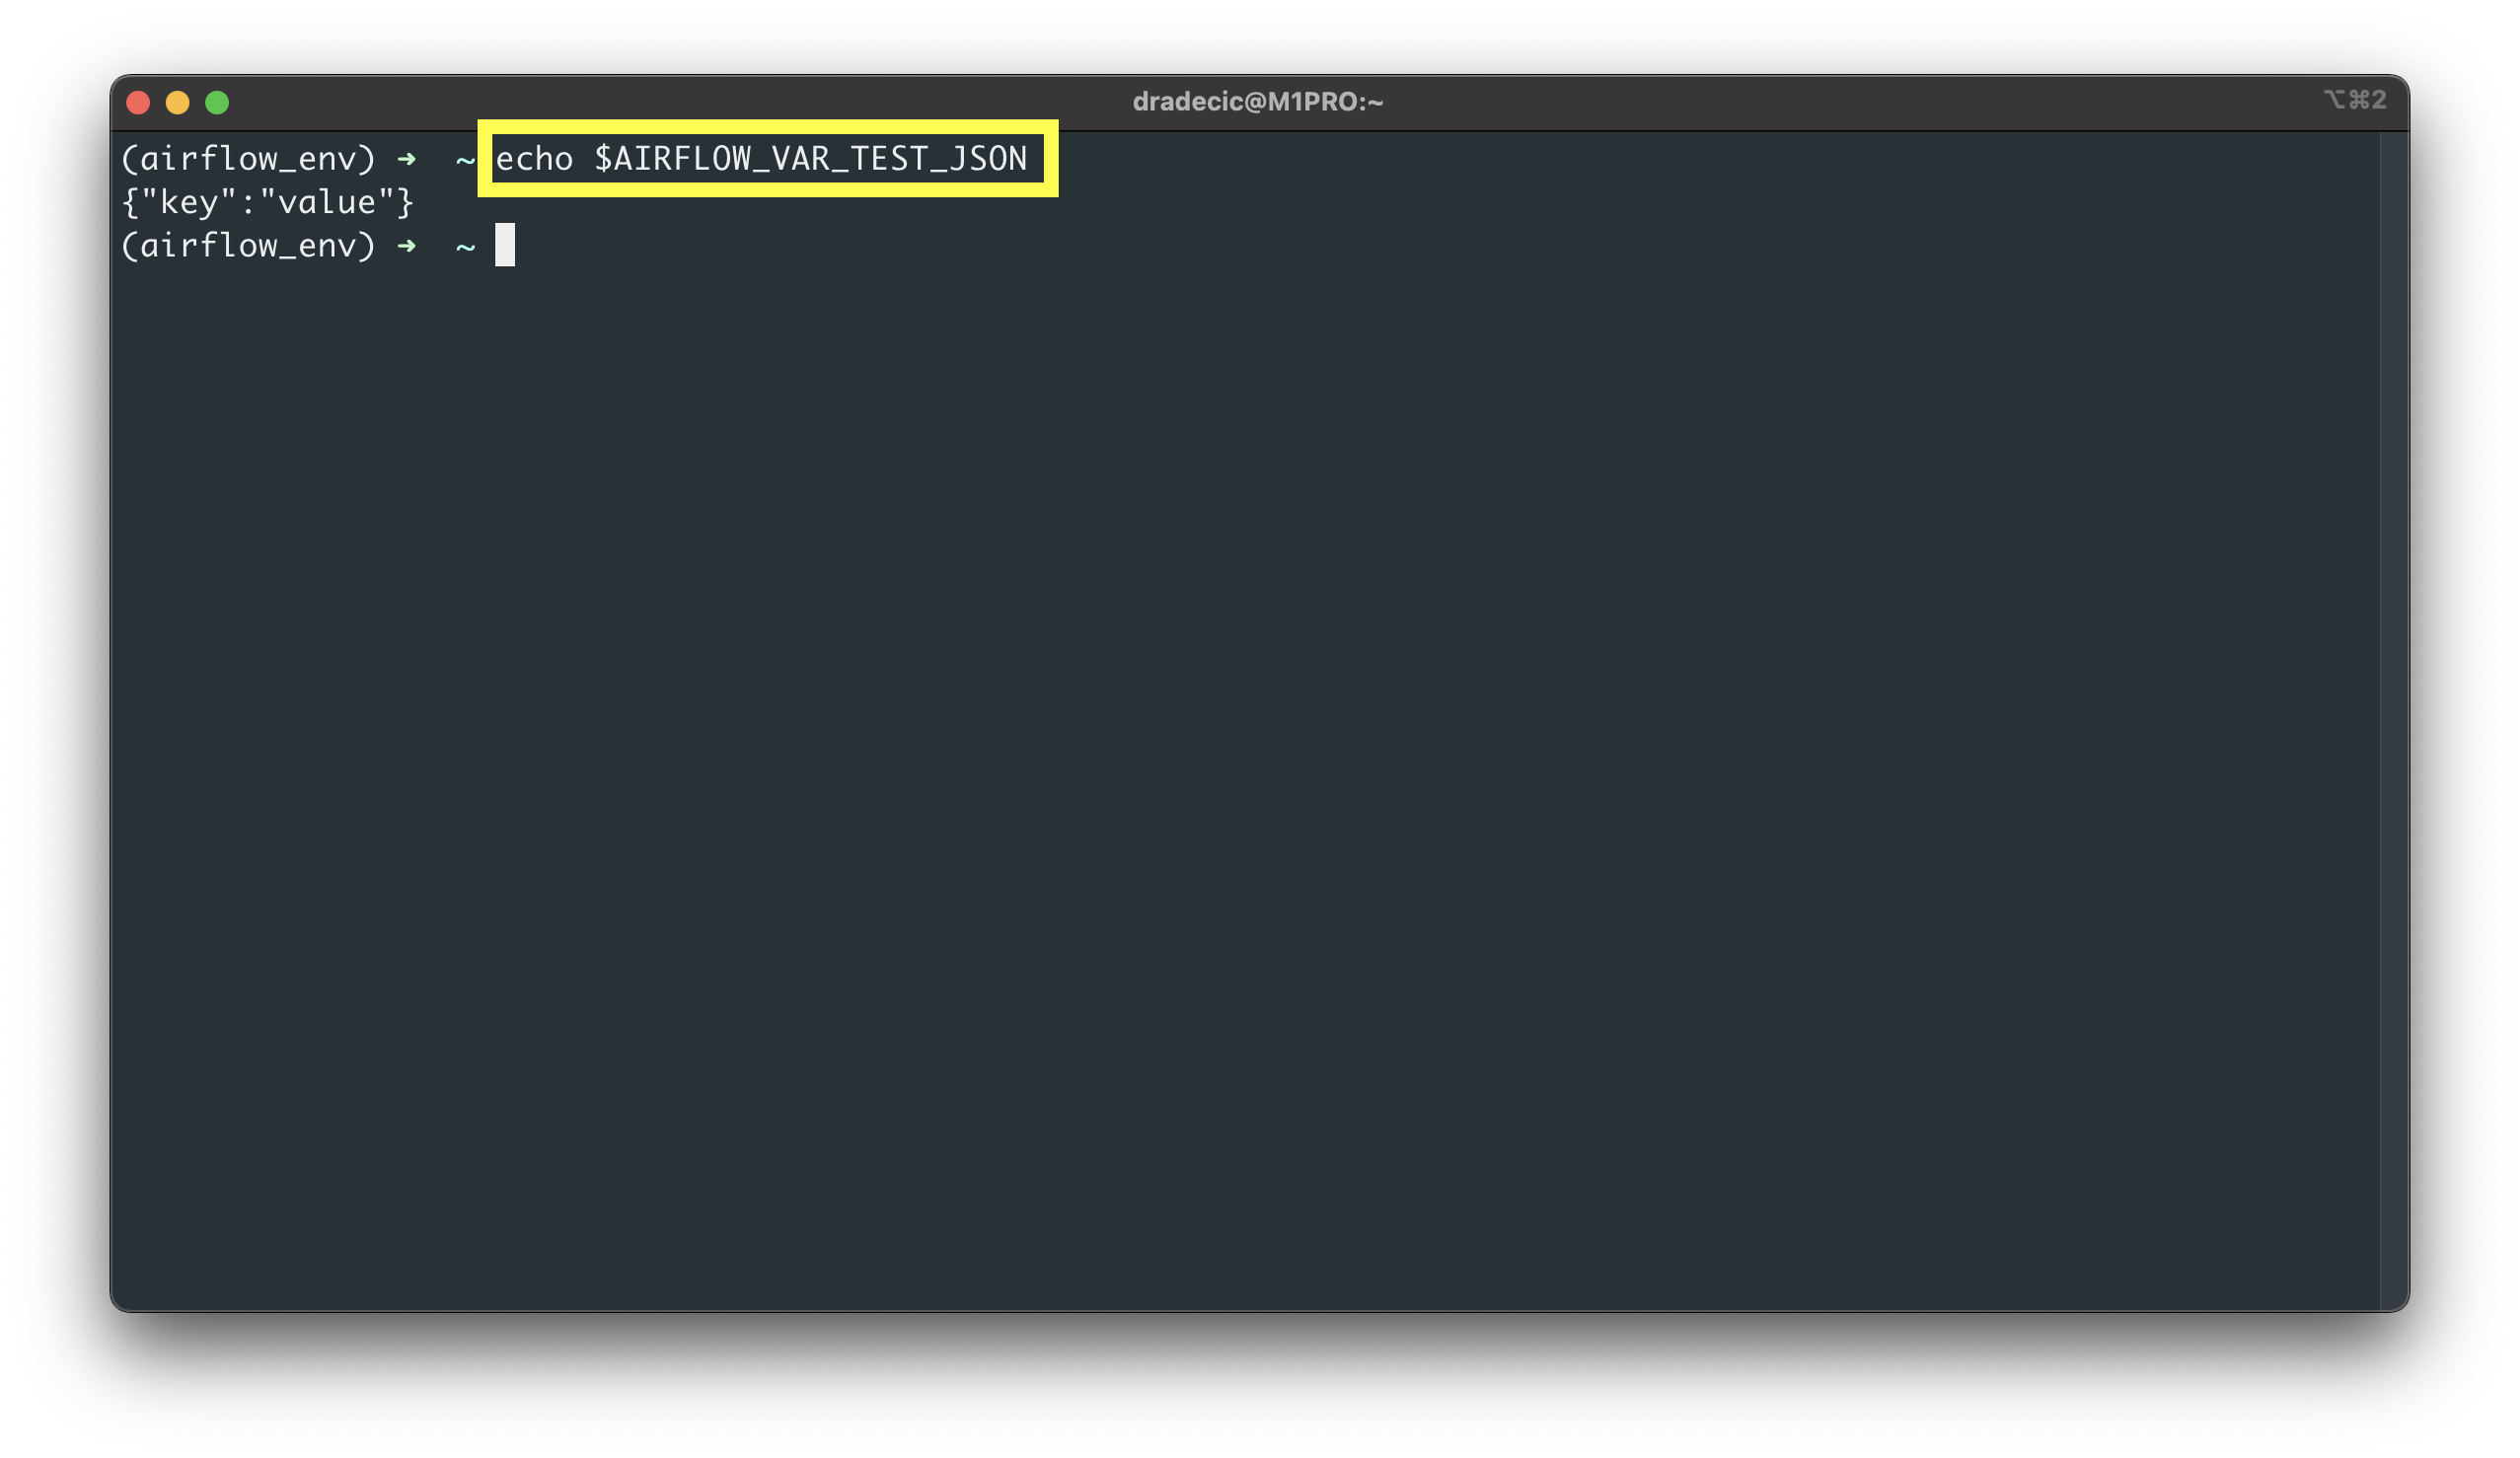
Image 7 - Printing a single environment variable (image by author)
Either way works. The only difference is that if you decide to declare variables this way, you won’t be able to inspect and change them through the Airflow’s UI.
Enough talk - let’s see how can you access the variables from the Airflow DAG.
How to Access Airflow Variables from the DAG
Create a new file in the ~/airflow/dags folder. I’ve named mine variables_dag.py. We’ll start with the library imports and the DAG boilerplate code. Note the additional airflow.models.Variable import. This class is used to fetch variables.
from datetime import datetime
from airflow.models import DAG, Variable
from airflow.operators.python import PythonOperator


with DAG(
    dag_id="variables_dag",
    schedule_interval="@daily",
    start_date=datetime(2022, 3, 1),
    catchup=False
) as dag:
    pass
The only task we’ll declare in this DAG will call the print_variables() function. Inside the function, use the Variable.get(key) method to access a plain variable, and Variable.get(key, deserialize_json=True) to access a JSON-like variable.
The function will print all the variable names and their values to the console:
from datetime import datetime
...


def print_variables() -> str:
    var_user_email = Variable.get("user_email")
    var_sample_json = Variable.get("sample_json", deserialize_json=True)
    var_env_test = Variable.get("test")
    var_env_test_json = Variable.get("test_json", deserialize_json=True)

    return f"""
        var_user_email = {var_user_email},
        var_sample_json = {var_sample_json},
        var_env_test = {var_env_test},
        var_env_test_json = {var_env_test_json}
    """


with DAG(...) as dag:

    task_print_variables = PythonOperator(
        task_id="print_variables",
        python_callable=print_variables
    )
Use the following shell command to test the task:
airflow tasks test variables_dag print_variables 2022-3-1
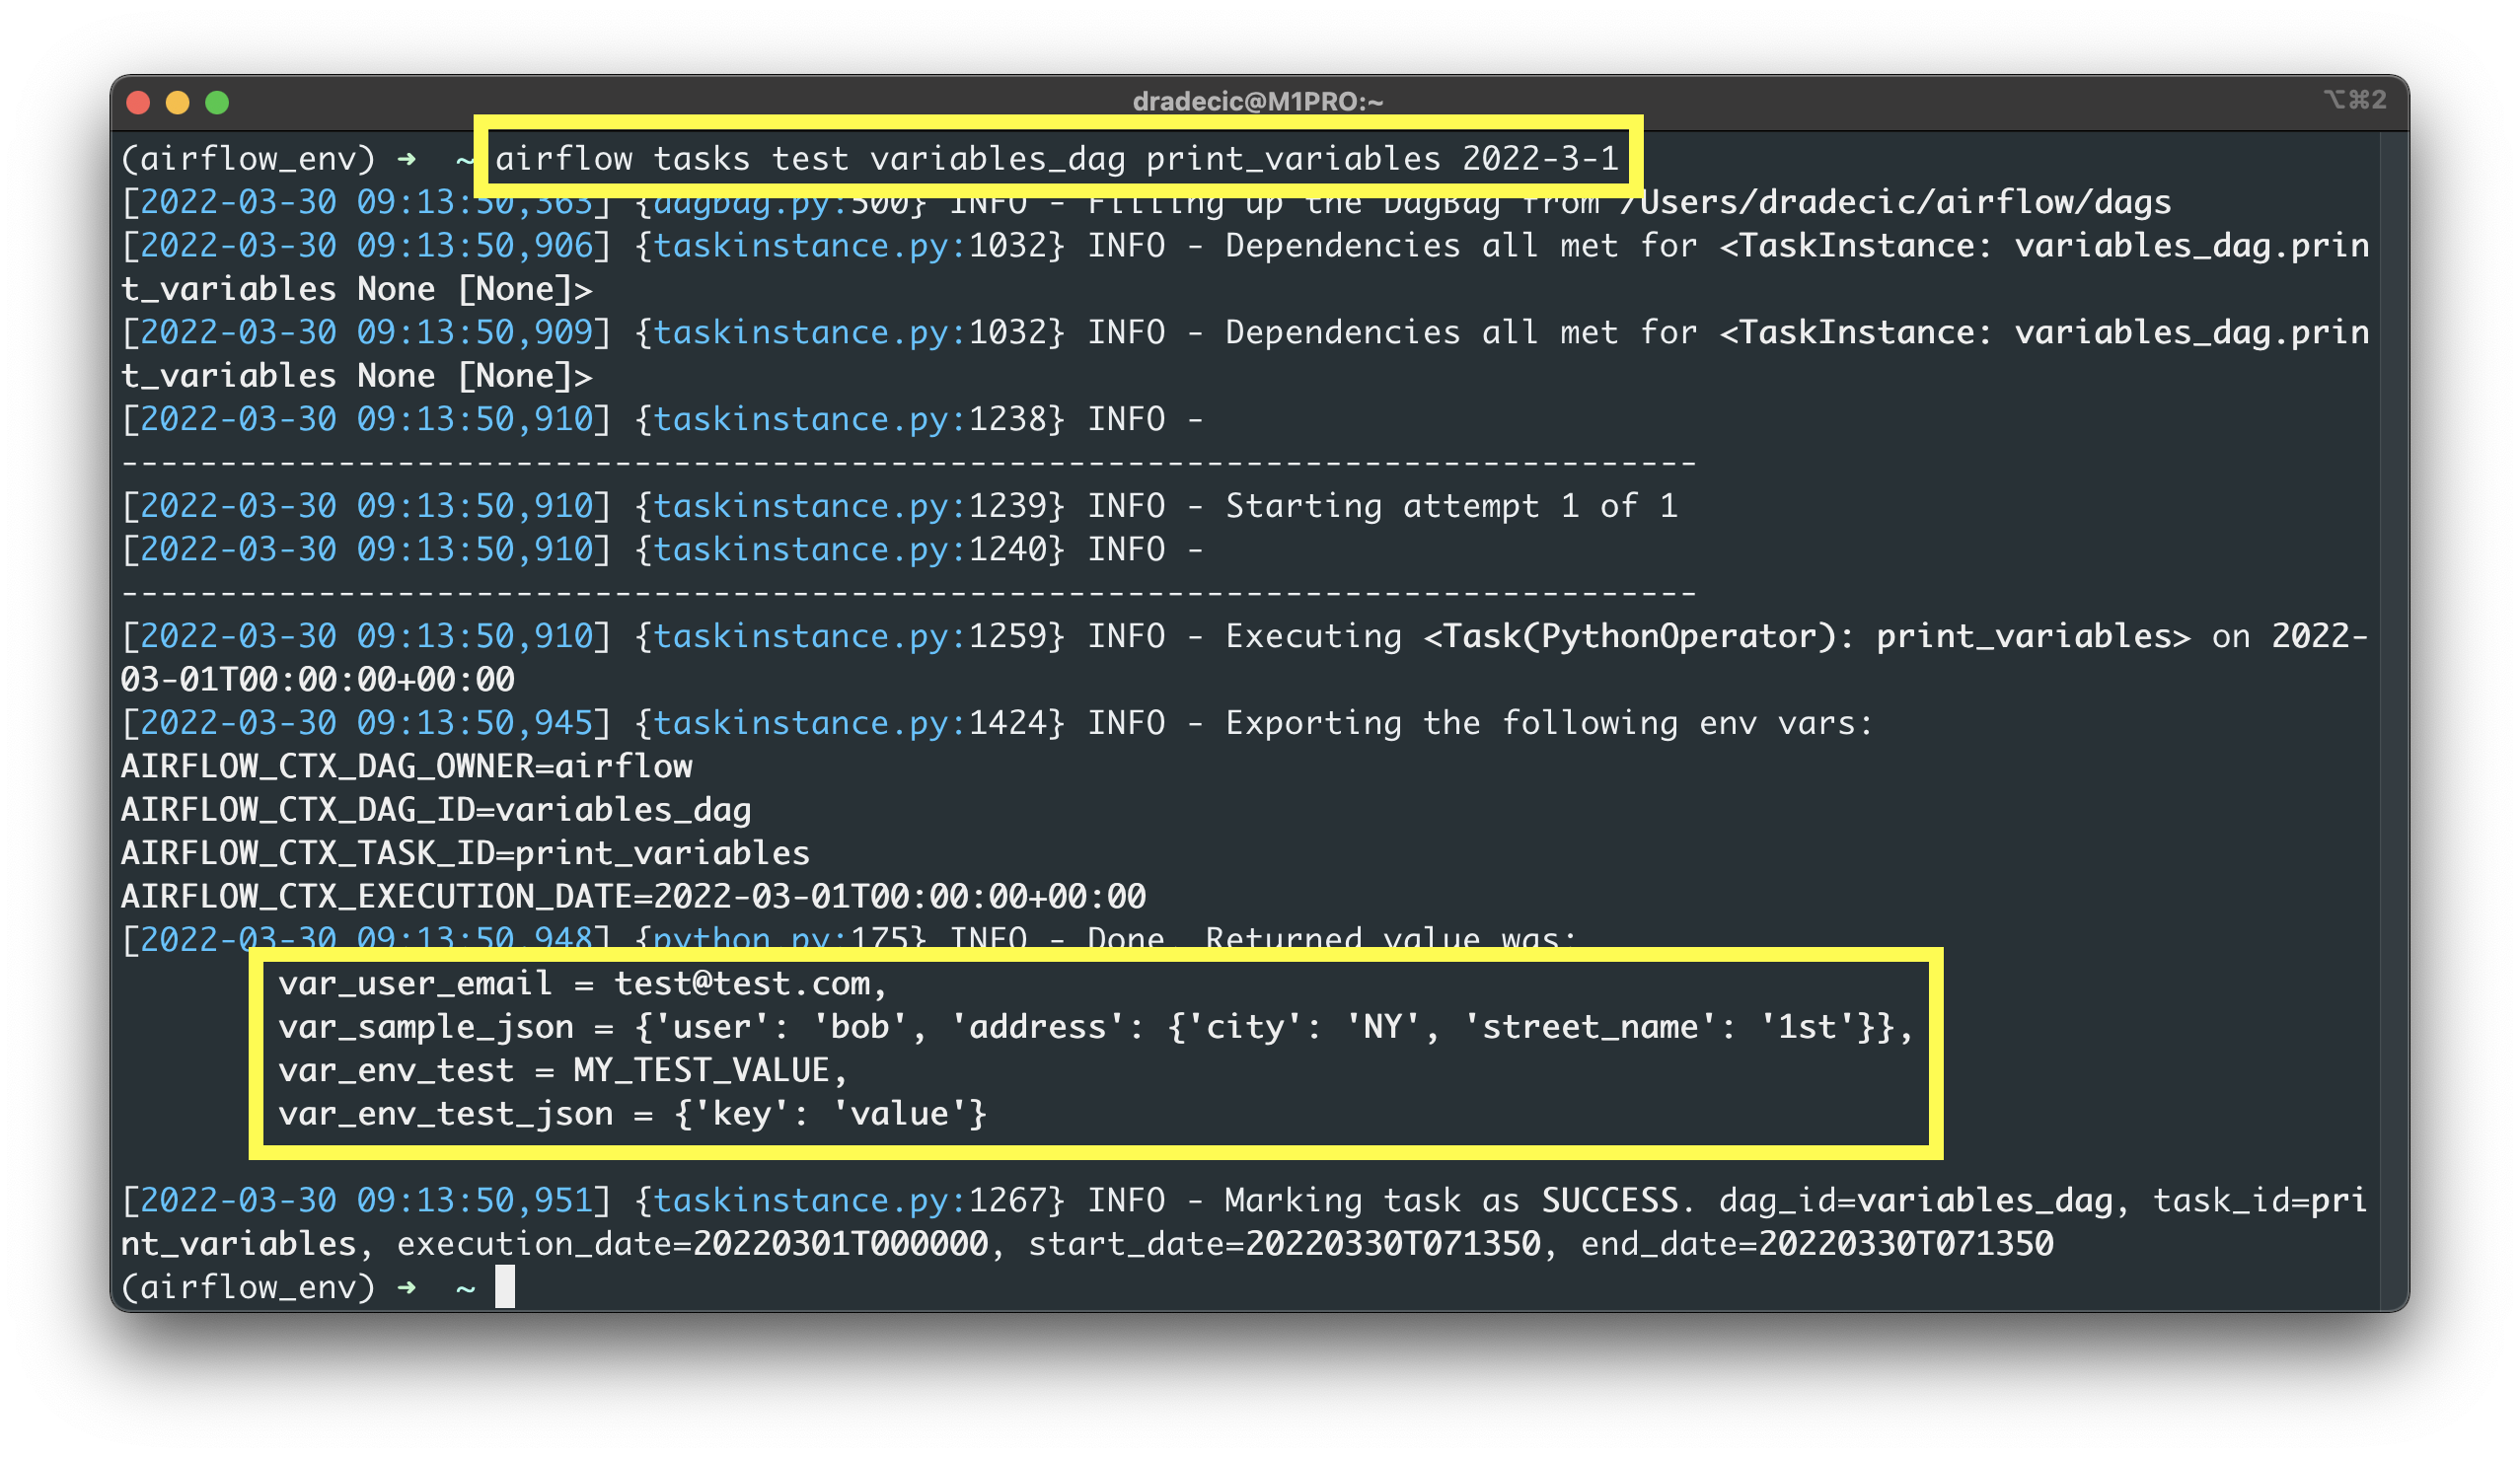
Image 8 - Accessing Airflow variables in code (image by author)
As you can see, all variables and their values were printed successfully. Accessing variables through Airflow is easy, so there’s no reason to ever hardcode any information in the code.
Summary of Airflow Variables
If you know the basics of programming, you know what’s the purpose of variables. If you don’t, why in the world are you learning Airflow?
Airflow Variables are simple to understand. You can store them either through the web UI or through the Terminal as environment variables. Either way is fine, but the latter is a bit more limiting. If you’re storing JSON-like objects, make sure to deserialize the JSON when accessing the variable in the DAG.
That’s all you should know.
Recommended reads
- 5 Best Books to Learn Data Science Prerequisites (Math, Stats, and Programming)
- Top 5 Books to Learn Data Science in 2022
- How to Install Apache Airflow Locally
Stay connected
- Hire me as a technical writer
- Subscribe on YouTube
- Connect on LinkedIn