
In the last week’s article, you’ve seen how to write an Airflow DAG that gets the current datetime information from the Terminal, parses it, and saves it to a local CSV file. It was a rather simple DAG, but enough to let you see how Airflow works. Today we’ll shift into a higher gear and extensively work with the Postgres database.
You’ll see how to get data from the database, run SQL queries, and insert a CSV file into the database - all within a single DAG. So without much ado, let’s dive straight in.
Don’t feel like reading? Watch my video instead:
What You’ll Do Today
Today you’ll code an Airflow DAG that implements the following data pipeline:
- Fetches the data from a Postgres table
- Processes the data with Python and Pandas and saves it to a CSV file
- Truncates the target table in the Postgres database
- Copies the CSV file into a Postgres table
We’ll first have to configure everything dataset and database related.
Dataset and Database Configuration
Download the Iris dataset from this link. It’s a relatively small one, but it’ll suit our needs for today:
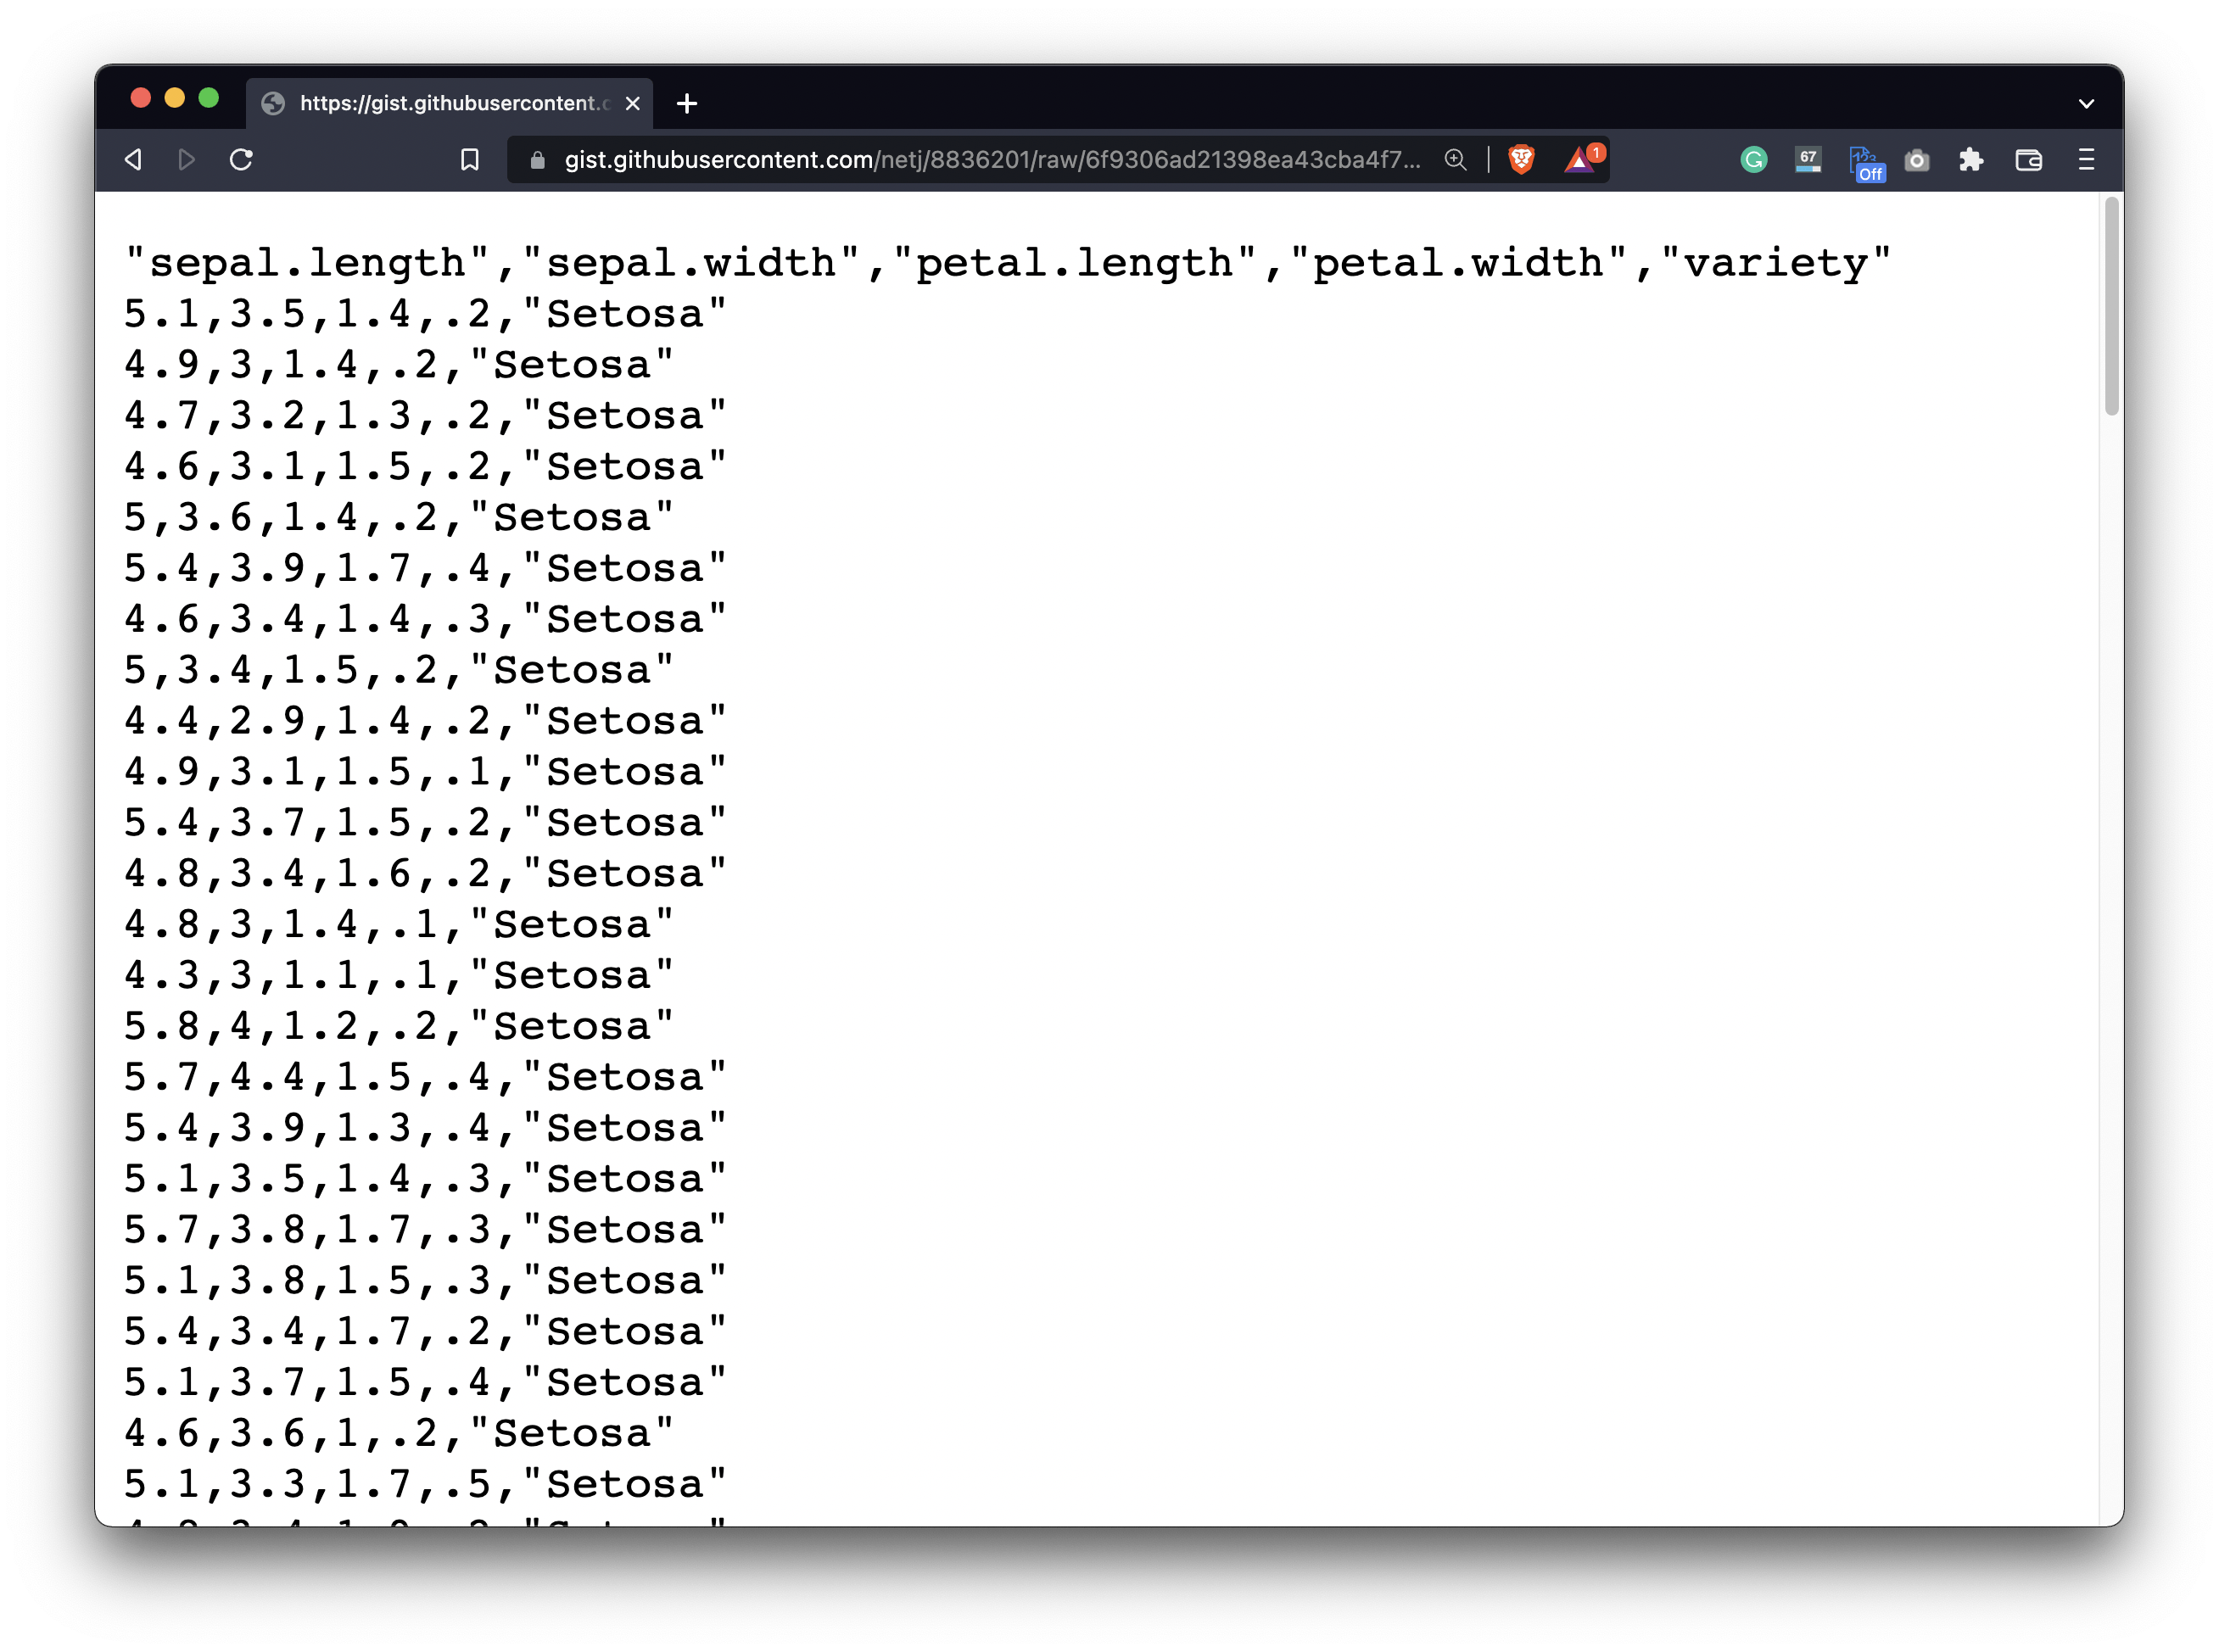
Image 1 - The Iris dataset (image by author)
Open a DBMS in which you have a Postgres connection established. Use the following statement to create the table - don’t feel obligated to use the same naming conventions:
CREATE TABLE iris(
	iris_id SERIAL PRIMARY KEY,
	iris_sepal_length REAL,
	iris_sepal_width REAL,
	iris_petal_length REAL,
	iris_petal_width REAL,
	iris_variety VARCHAR(16)
);
Once the table is created, load the Iris CSV dataset into it. Make appropriate changes where applicable - either column names or path - or both:
COPY iris(iris_sepal_length, iris_sepal_width, iris_petal_length, iris_petal_width, iris_variety)
FROM '/Users/dradecic/Desktop/iris.csv'
DELIMITER ','
CSV HEADER;
Our data pipeline will load data into Postgres on the last step. The target table will have the identical structure as the iris table, minus the ID column. Use the below SQL statement to create it:
CREATE TABLE iris_tgt AS (
	SELECT
		iris_sepal_length, iris_sepal_width, iris_petal_length, iris_petal_width, iris_variety
	FROM iris
	WHERE 1 = 2
);
And finally, let’s verify the data was copied to the iris table:
SELECT * FROM iris;
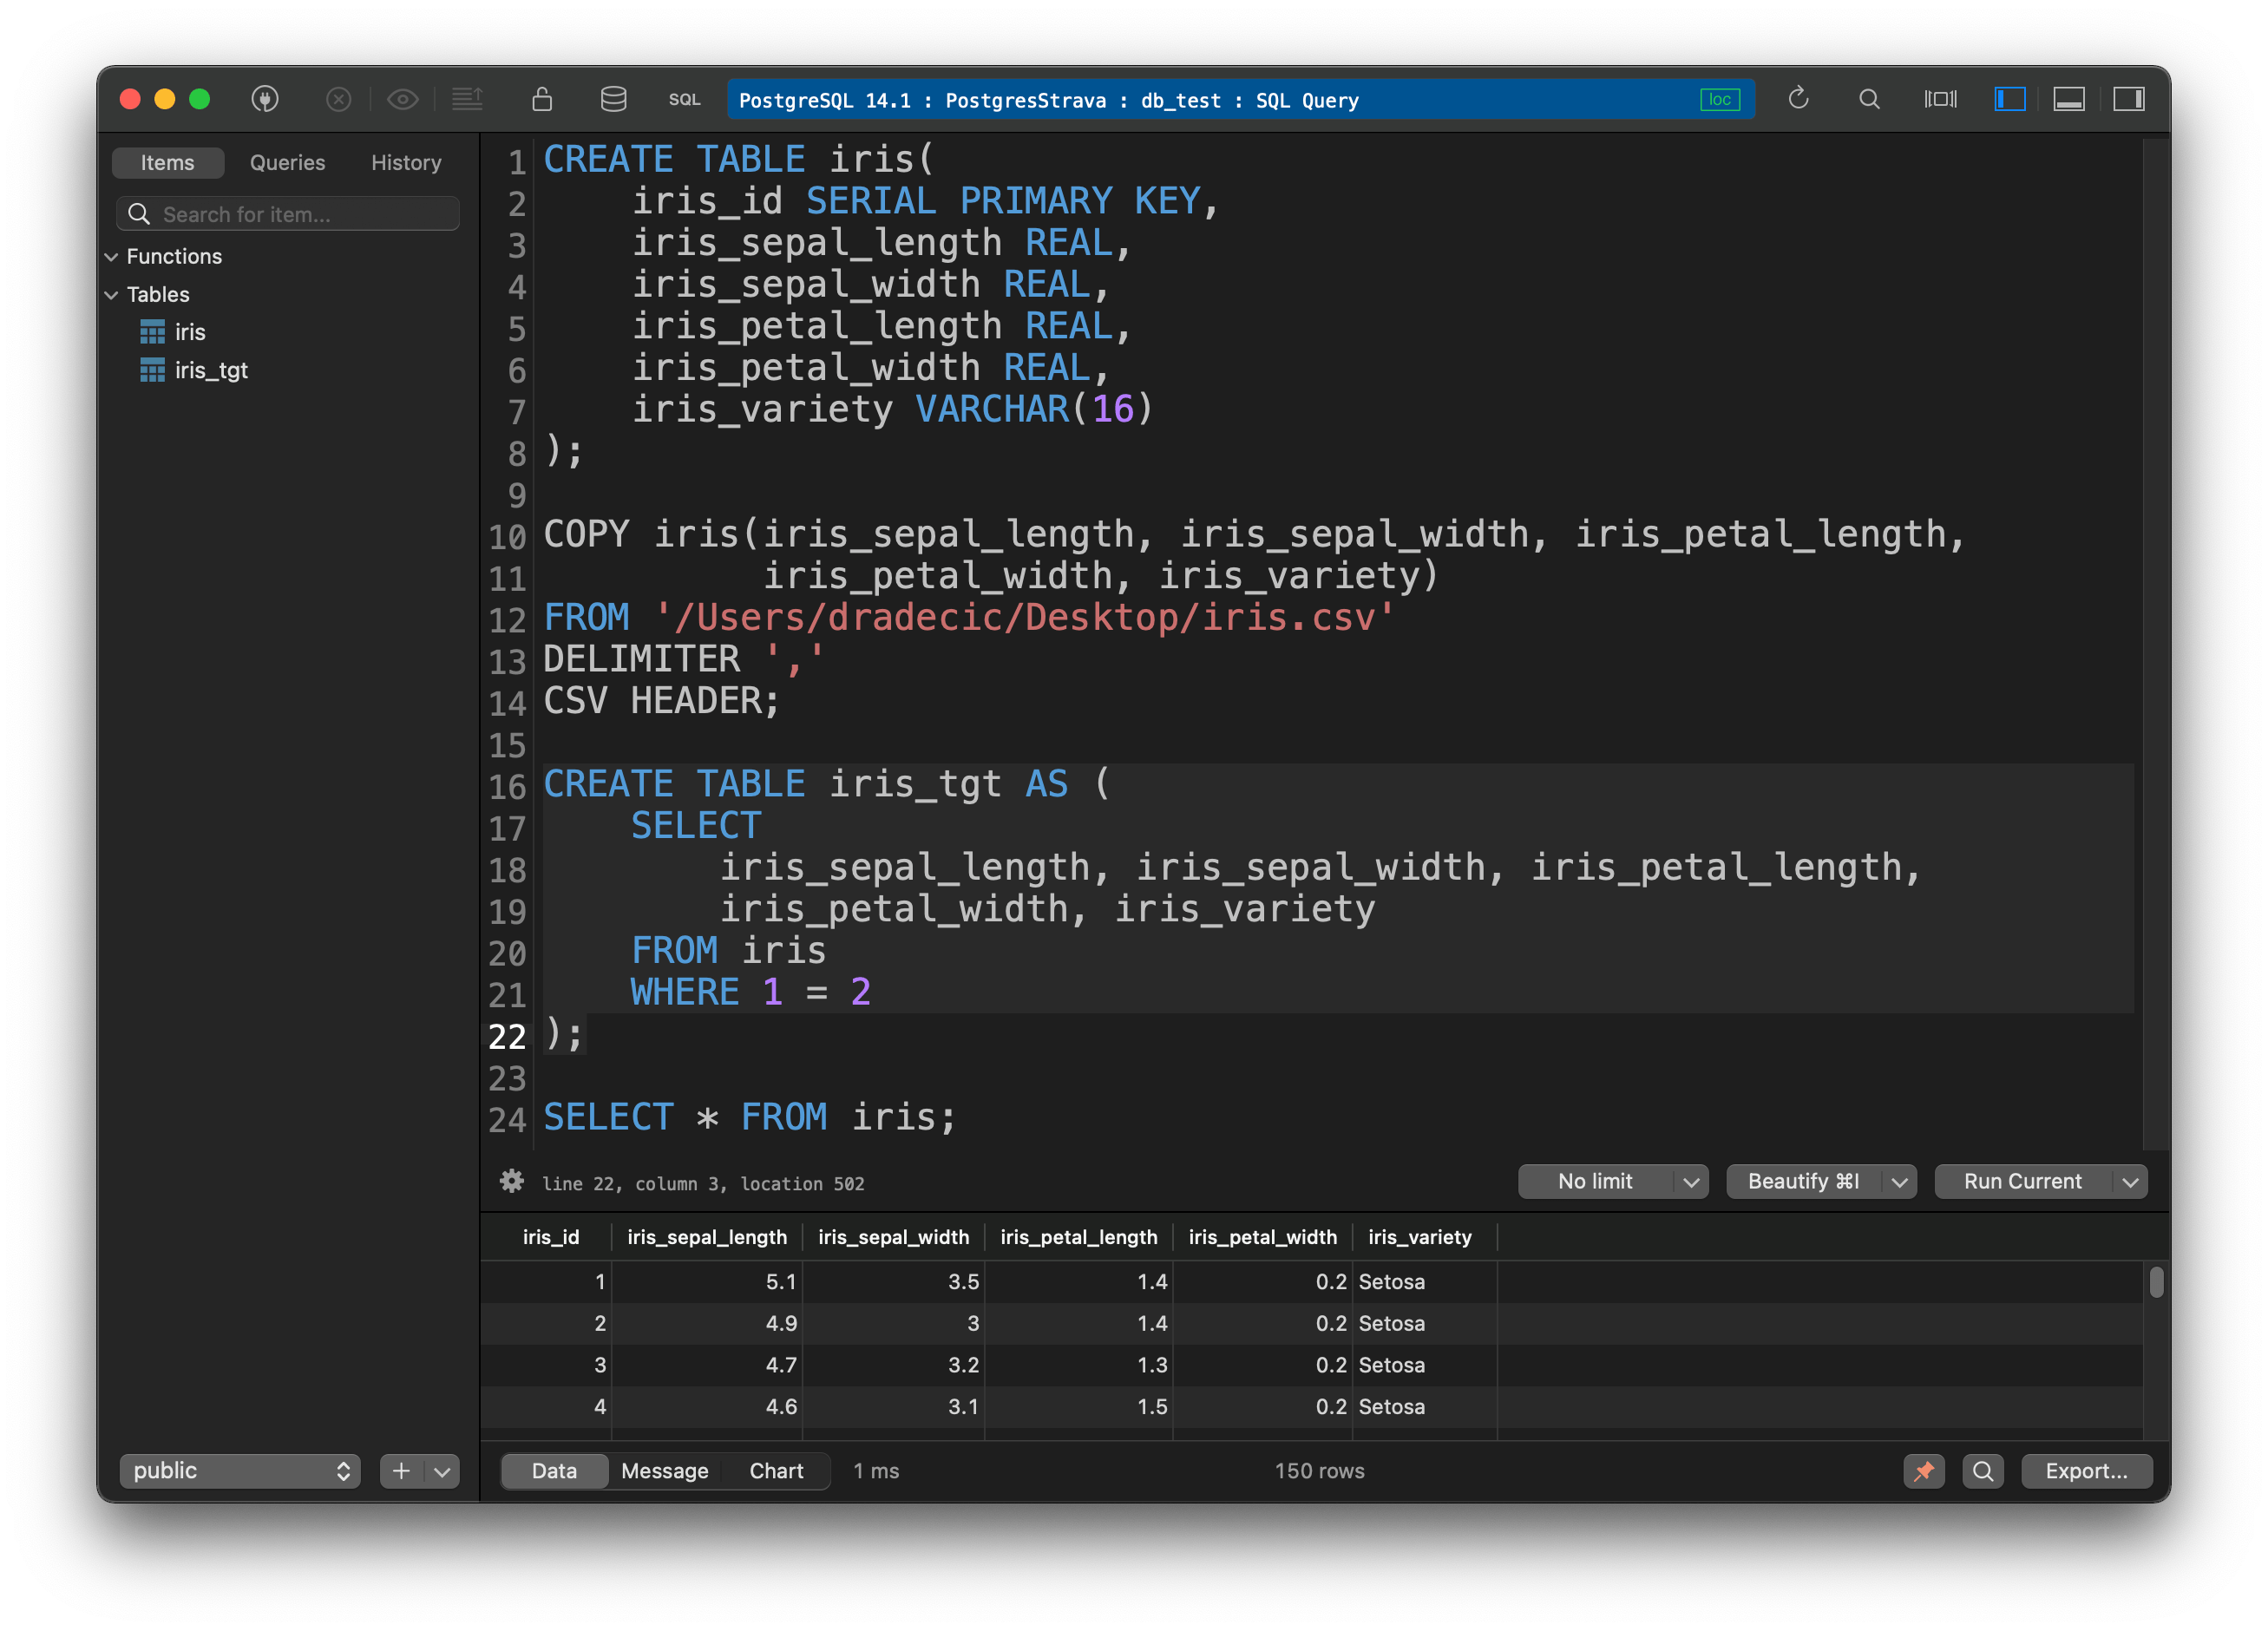
Image 2 - Dataset copied to the Postgres database (image by author)
That’s all we need to do on the database end, but there’s still one step to go over before writing the DAG - setting up a Postgres connection in Airflow.
How to Setup a Postgres Connection in Airflow
Kill Airflow webserver and scheduler if you have them running and run the below command to install Airflow’s Postgres provider package:
pip install 'apache-airflow[postgres]'
Here’s the Terminal output:
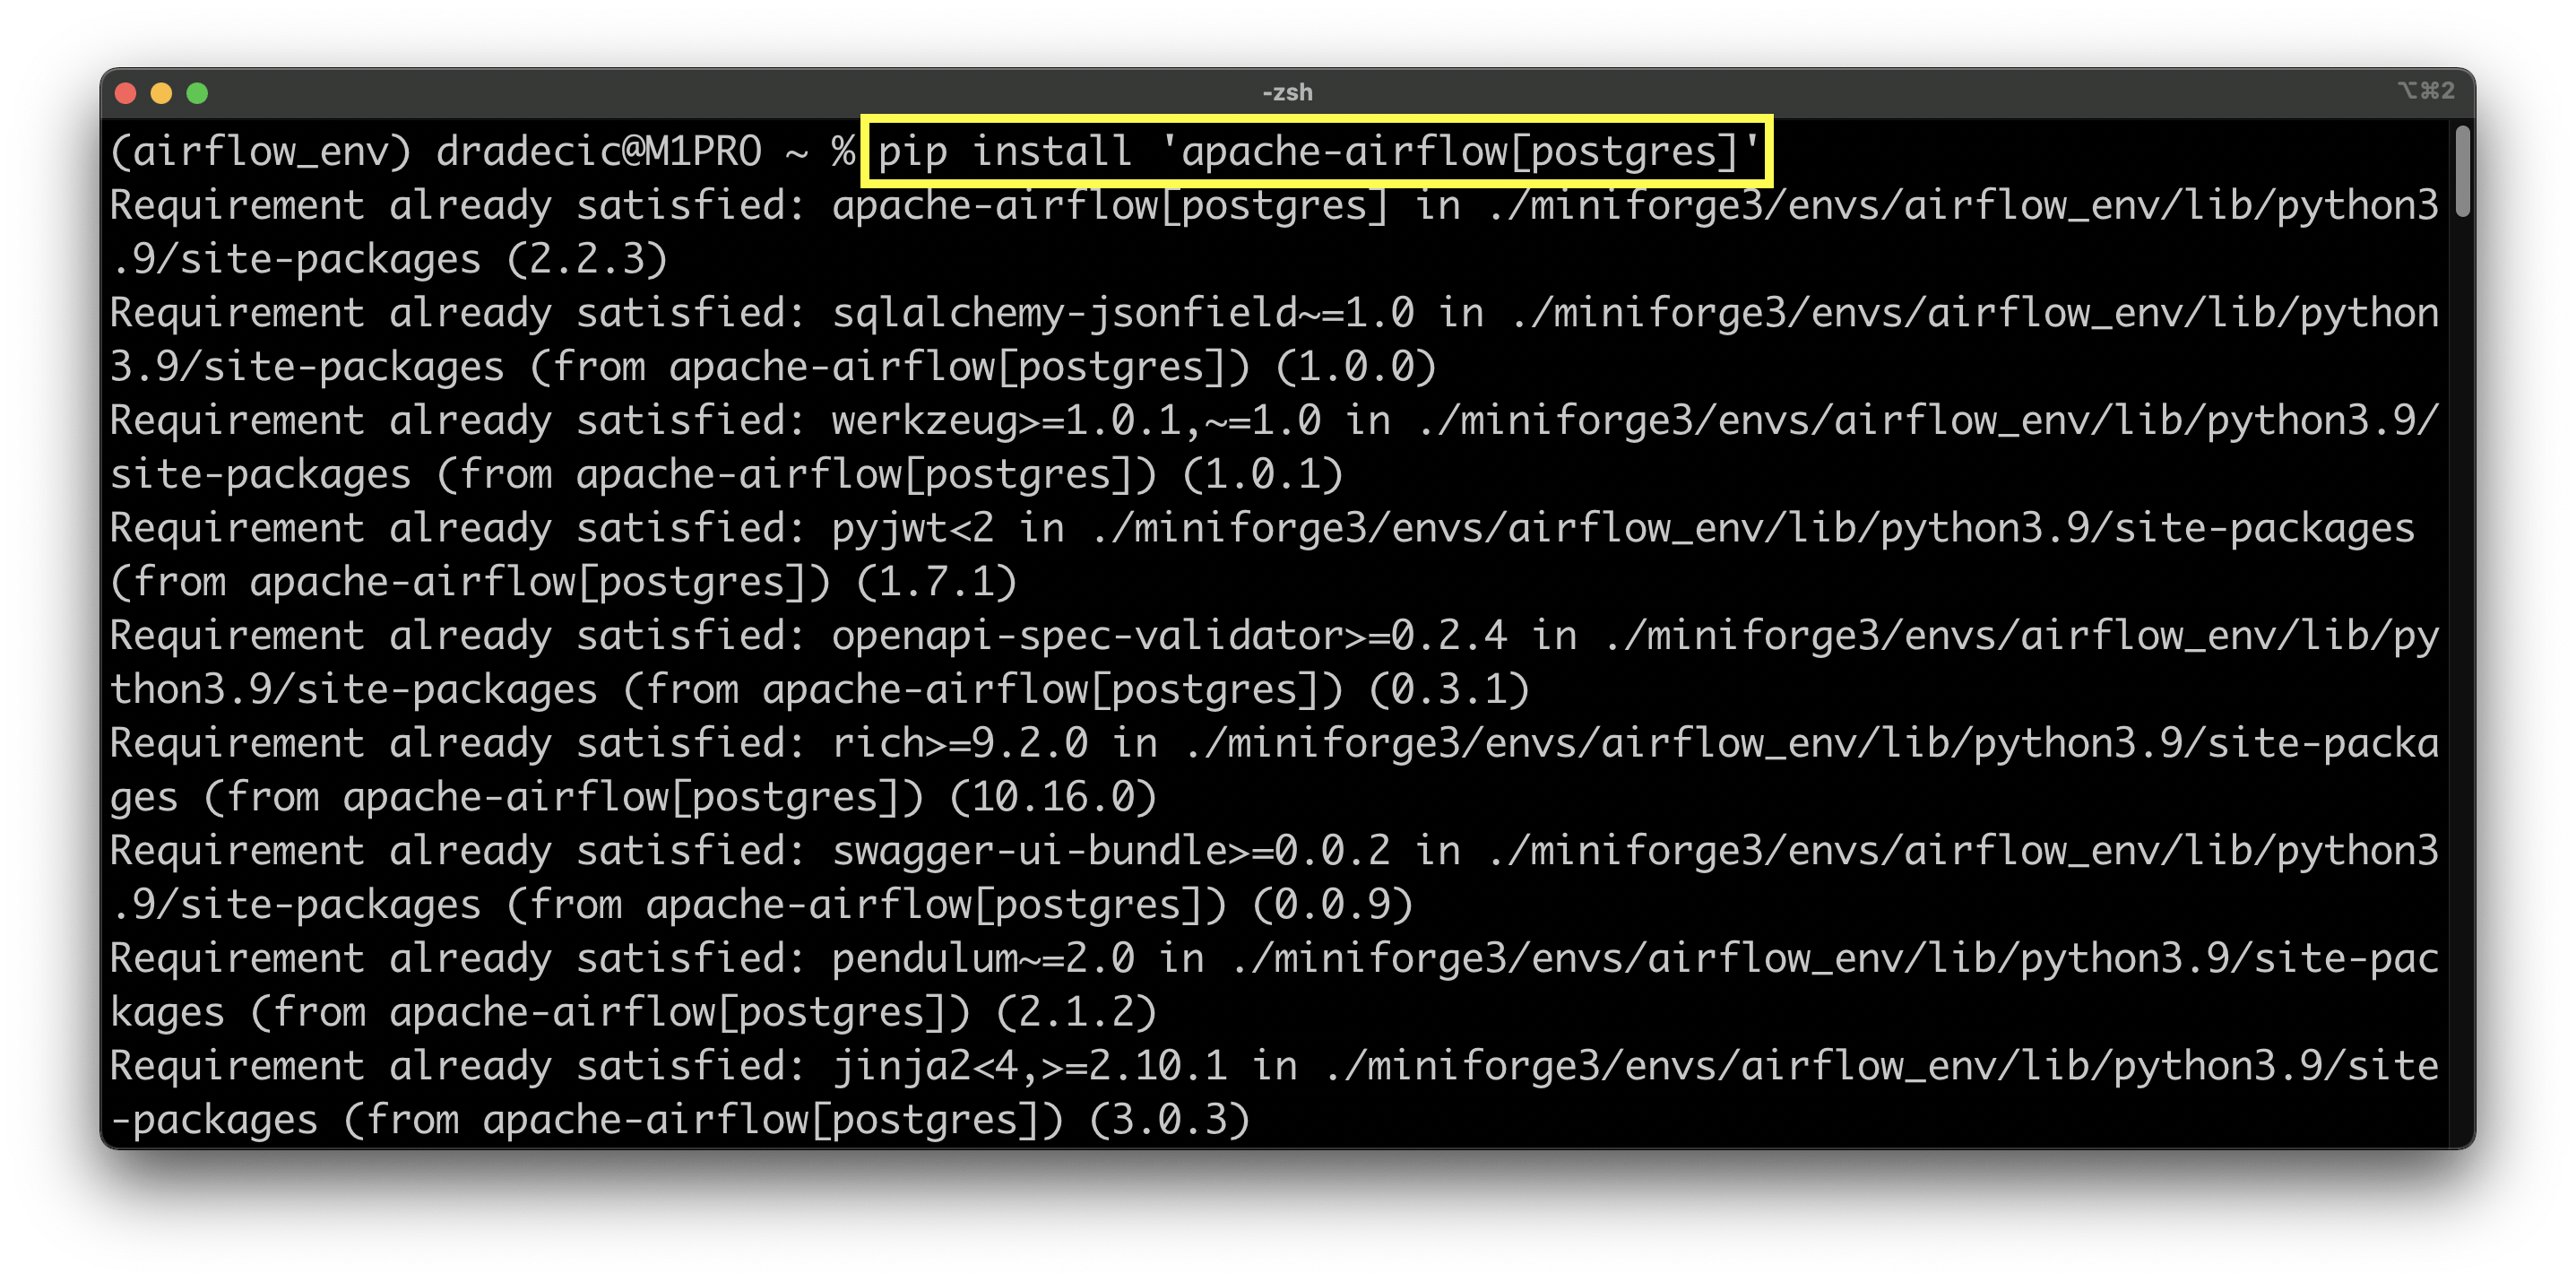
Image 3 - Installing Airflow plugin for Postgres (image by author)
Once done, start both the webserver and the scheduler, and navigate to Airflow - Admin - Connections. Click on the plus sign to add a new connection and specify the connection parameters. Here’s what mine looks like:

Image 4 - Defining a Postgres connection in Airflow (image by author)
Once done, scroll to the bottom of the screen and click on Save.
We’re not done yet. Let’s also declare a variable under Admin - Variables that hold the location for the processed CSV file:
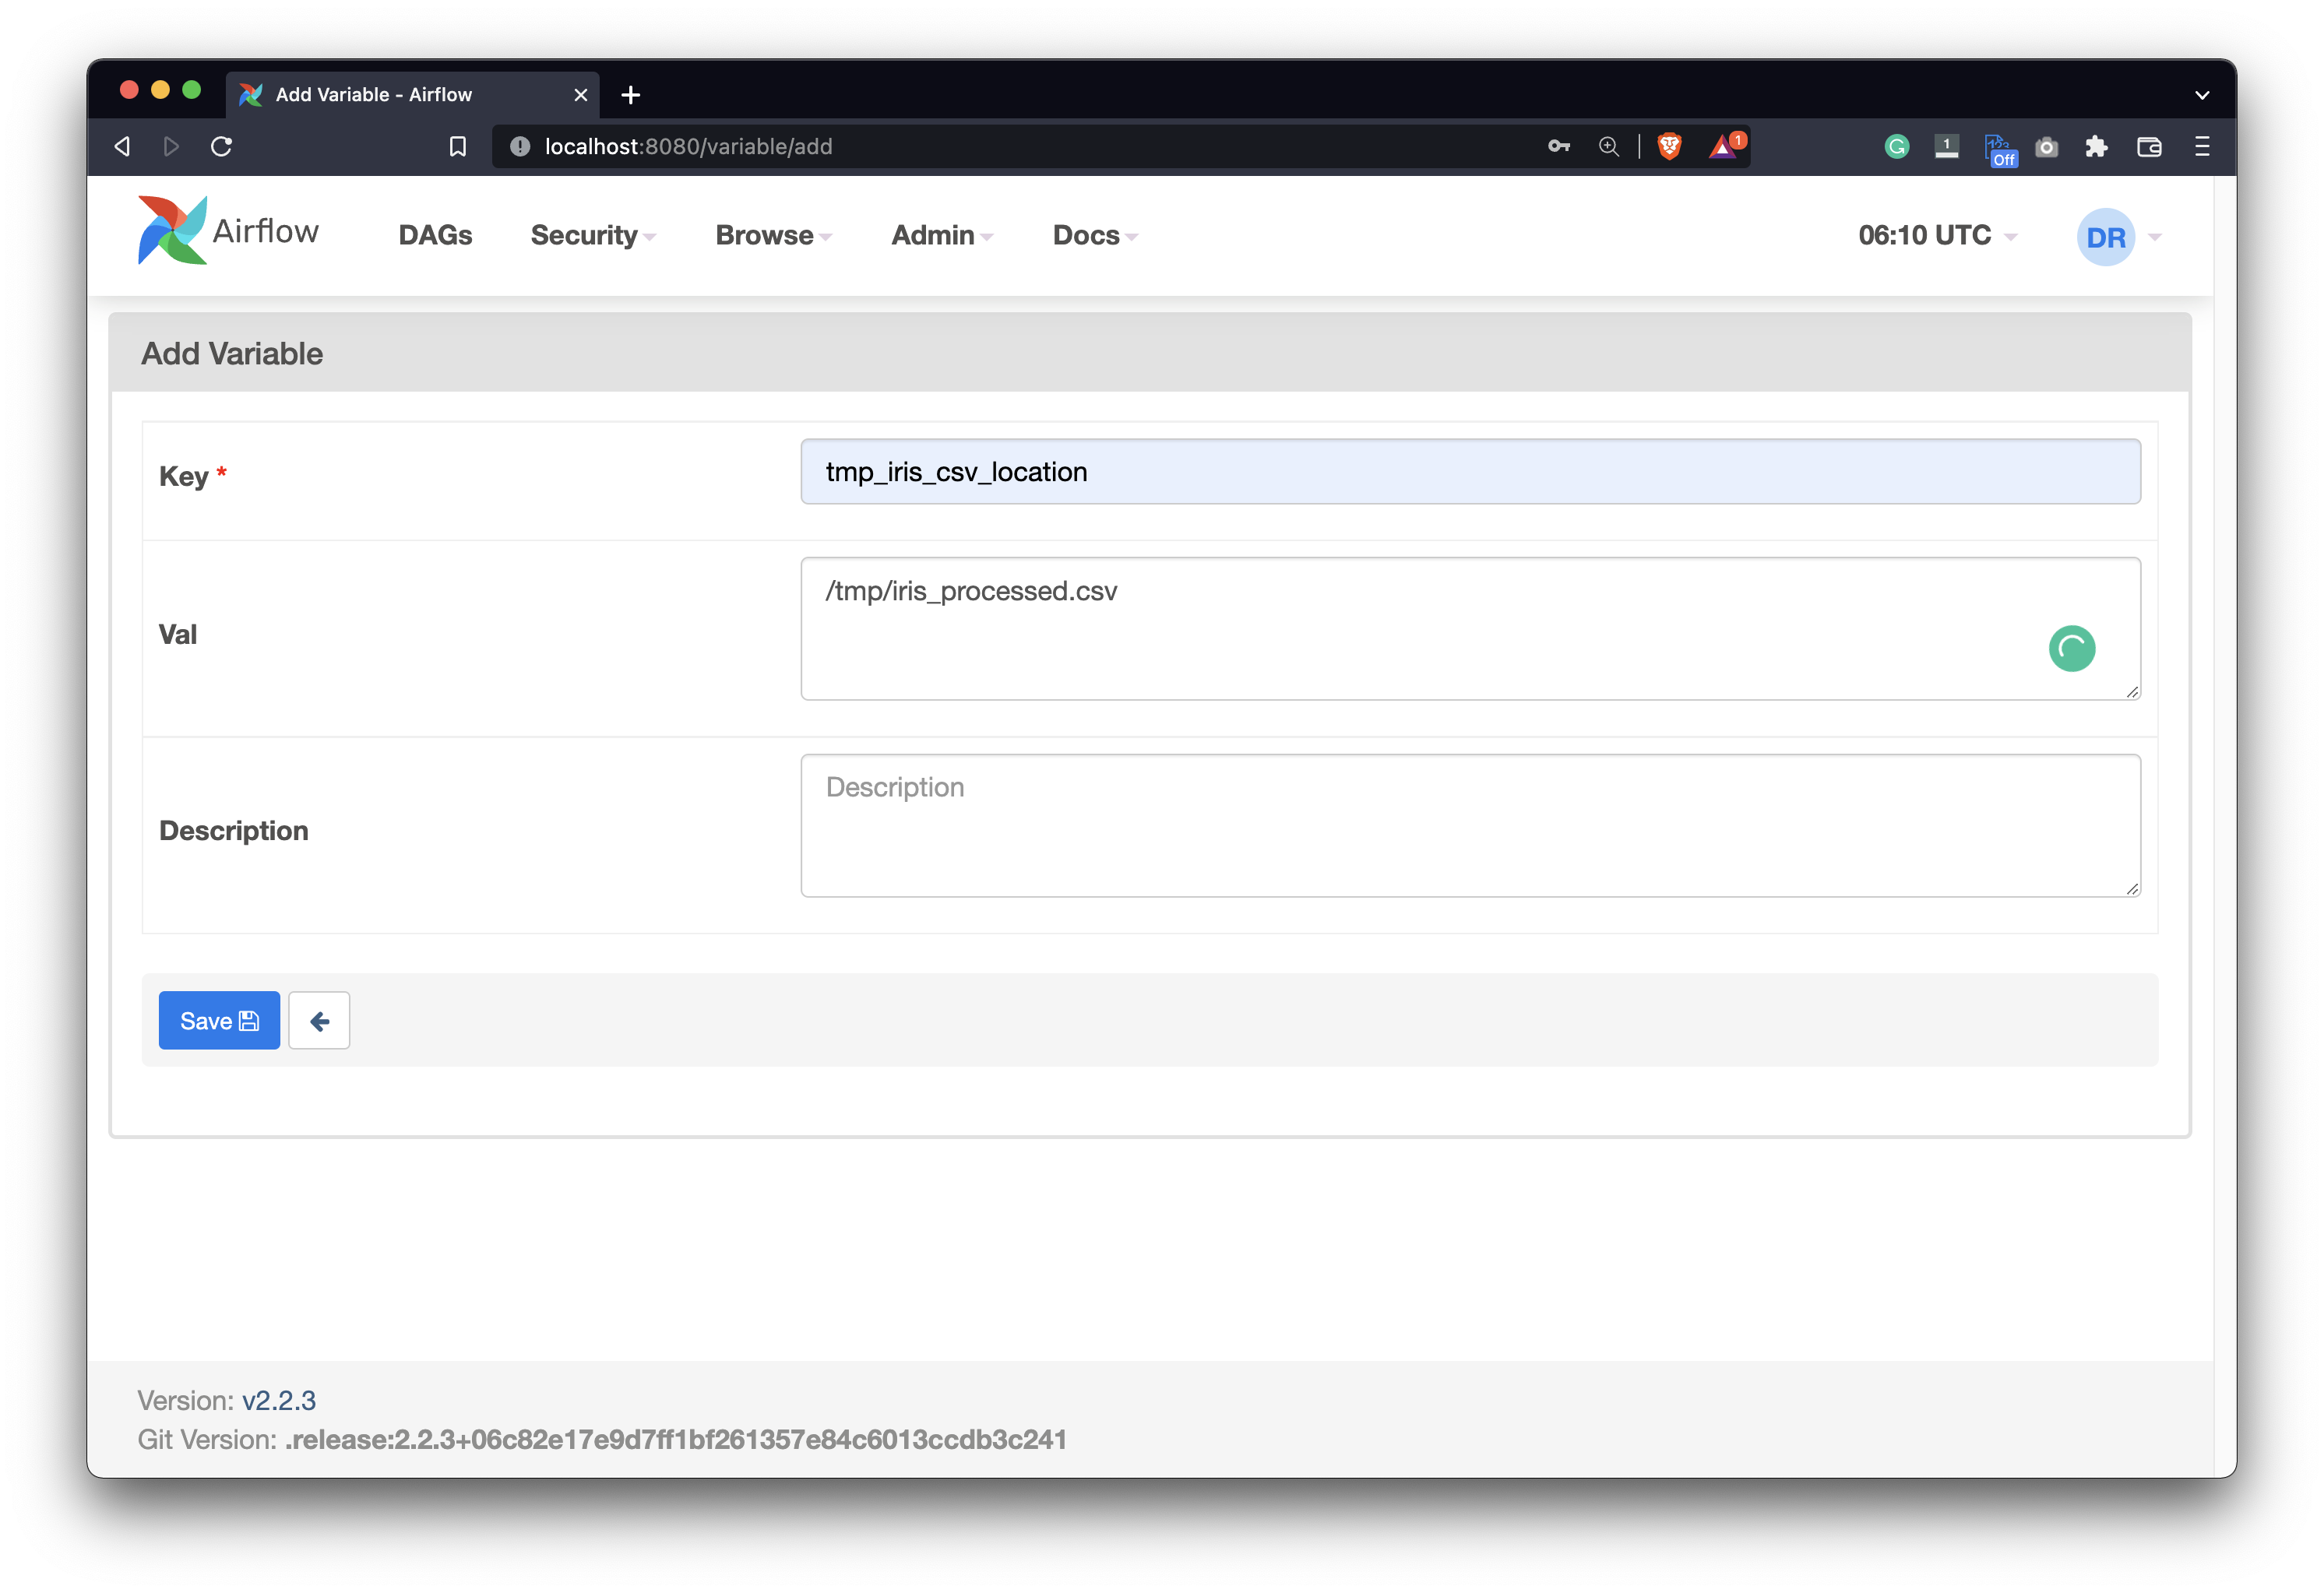
Image 5 - Declaring a variable for storing a temporary CSV file (image by author)
Okay, now we’re done. Onto the DAG next.
Write the DAG - Apache Airflow and Postgres
This is the meat and potatoes of today’s article. We’ll split the DAG into multiple, manageable chunks so you don’t get overwhelmed. We’ll start with the boilerplate code and then start working with Postgres.
Library imports and DAG boilerplate
The following code snippet imports everything we need from Python and Airflow. It also declares a DAG with the ID of postgres_db_dag that is scheduled to run once per day:
import pandas as pd
from datetime import datetime
from airflow.models import DAG
from airflow.operators.python import PythonOperator
from airflow.hooks.postgres_hook import PostgresHook
from airflow.models import Variable
from airflow.operators.bash import BashOperator
from airflow.providers.postgres.operators.postgres import PostgresOperator


with DAG(
    dag_id='postgres_db_dag',
    schedule_interval='@daily',
    start_date=datetime(year=2022, month=2, day=1),
    catchup=False
) as dag:
    pass
We’ll now implement each of the four tasks separately and explain what’s going on. If you’re in a hurry, scroll down a bit as there’s a snippet with the entire DAG code.
Task #1 - Getting data from Postgres with Airflow
The first task of our DAG is to get the data out of the Postgres database. It’s not as straightforward of a task as you would assume. We won’t use a Postgres operator, but instead, we’ll call a Python function through the PythonOperator. The task will call the get_iris_data() function and will push the returned value to Airflow’s Xcoms:
# 1. Get the Iris data from a table in Postgres
task_get_iris_data = PythonOperator(
	task_id='get_iris_data',
	python_callable=get_iris_data,
	do_xcom_push=True
)
The get_iris_data() function leverages the PostgresHook - a way to establish a connection to a Postgres database, run a SQL statement and fetch the results. The entire table is fetched, and then pushed to Airflow’s Xcoms:
def get_iris_data():
    sql_stmt = "SELECT * FROM iris"
    pg_hook = PostgresHook(
        postgres_conn_id='postgres_db',
        schema='db_test'
    )
    pg_conn = pg_hook.get_conn()
    cursor = pg_conn.cursor()
    cursor.execute(sql_stmt)
    return cursor.fetchall()
Use the following shell command to test the task:
airflow tasks test postgres_db_dag get_iris_data 2022-2-1
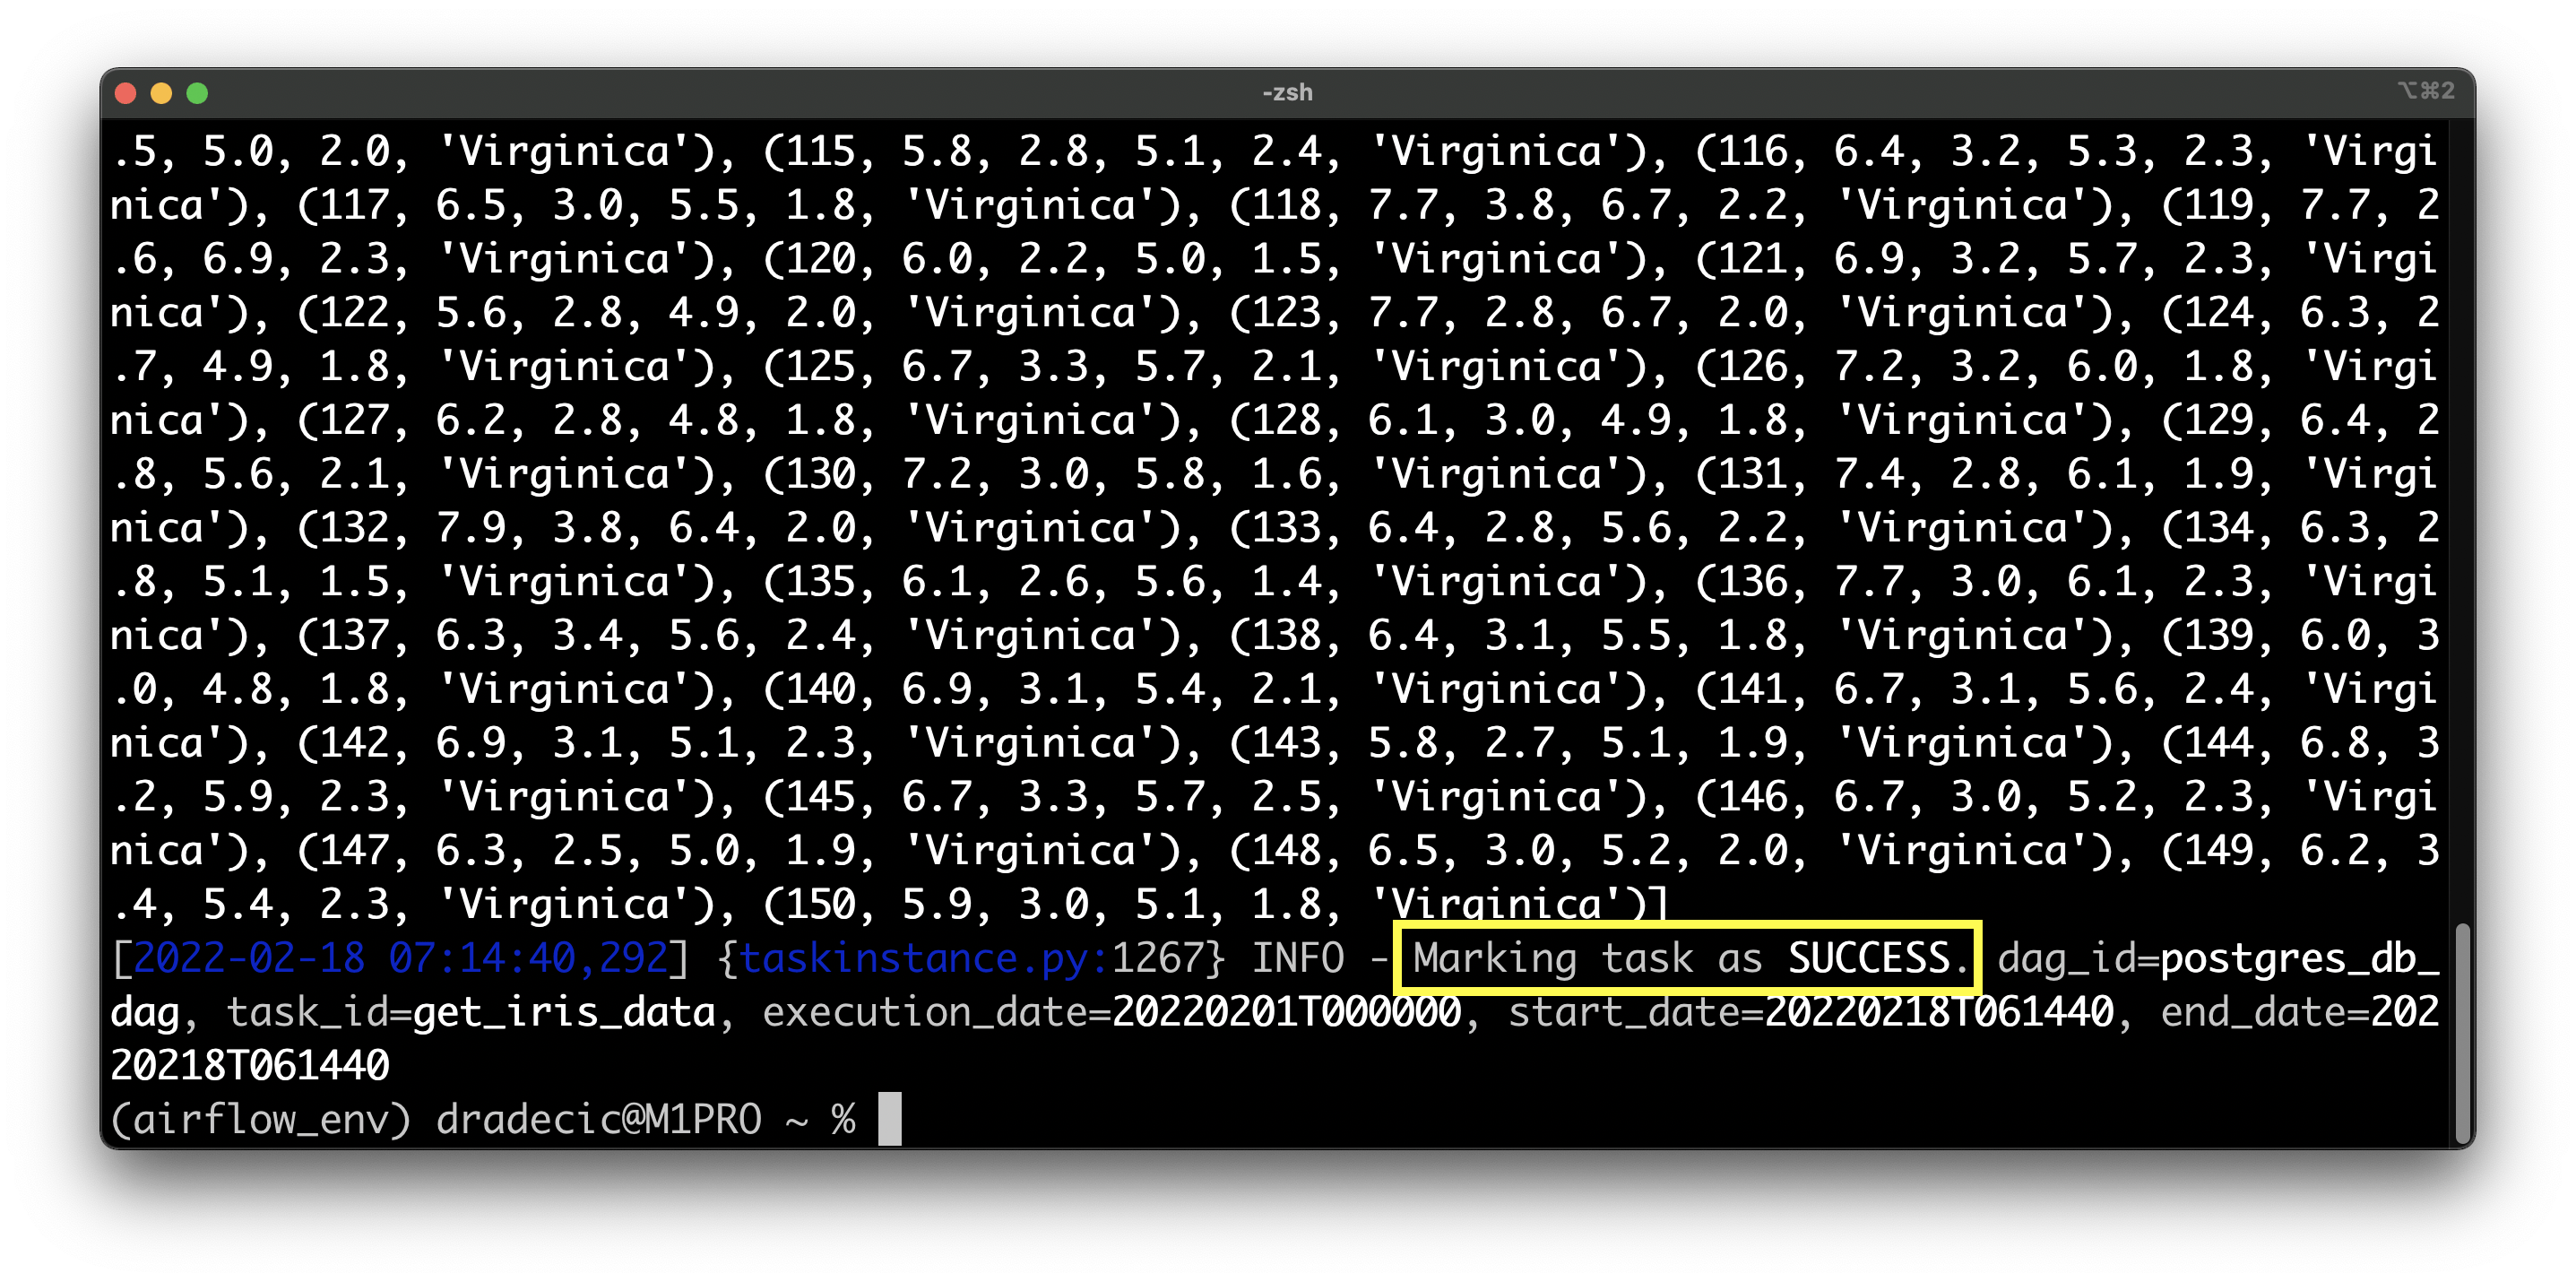
Image 6 - Testing the task of retrieving data from Postgres (image by author)
Success - you can see the Iris table is printed to the console as a list of tuples. Let’s process it next.
Task #2 - Processing Iris data
Processing the Iris dataset should feel familiar if you’re an everyday Pandas user. We’ll declare yet another PythonOperator that calls the process_iris_data() function:
# 2. Process the Iris data
task_process_iris_data = PythonOperator(
	task_id='process_iris_data',
	python_callable=process_iris_data
)
The function retrieves a list of tuples from Airflow’s Xcoms and creates a Pandas DataFrame of it. Then, for the processing part, only rows that match four criteria are kept, and the filtered DataFrame is saved to a CSV file, without the ID column. We’re getting the CSV location through the earlier declared Airflow variable:
def process_iris_data(ti):
    iris = ti.xcom_pull(task_ids=['get_iris_data'])
    if not iris:
        raise Exception('No data.')

    iris = pd.DataFrame(
        data=iris[0],
        columns=['iris_id', 'iris_sepal_length', 'iris_sepal_width',
                 'iris_petal_length', 'iris_petal_width', 'iris_variety']
    )
    iris = iris[
        (iris['iris_sepal_length'] > 5) &
        (iris['iris_sepal_width'] == 3) &
        (iris['iris_petal_length'] > 3) &
        (iris['iris_petal_width'] == 1.5)
    ]
    iris = iris.drop('iris_id', axis=1)
    iris.to_csv(Variable.get('tmp_iris_csv_location'), index=False)
Onto the test:
airflow tasks test postgres_db_dag process_iris_data 2022-2-1
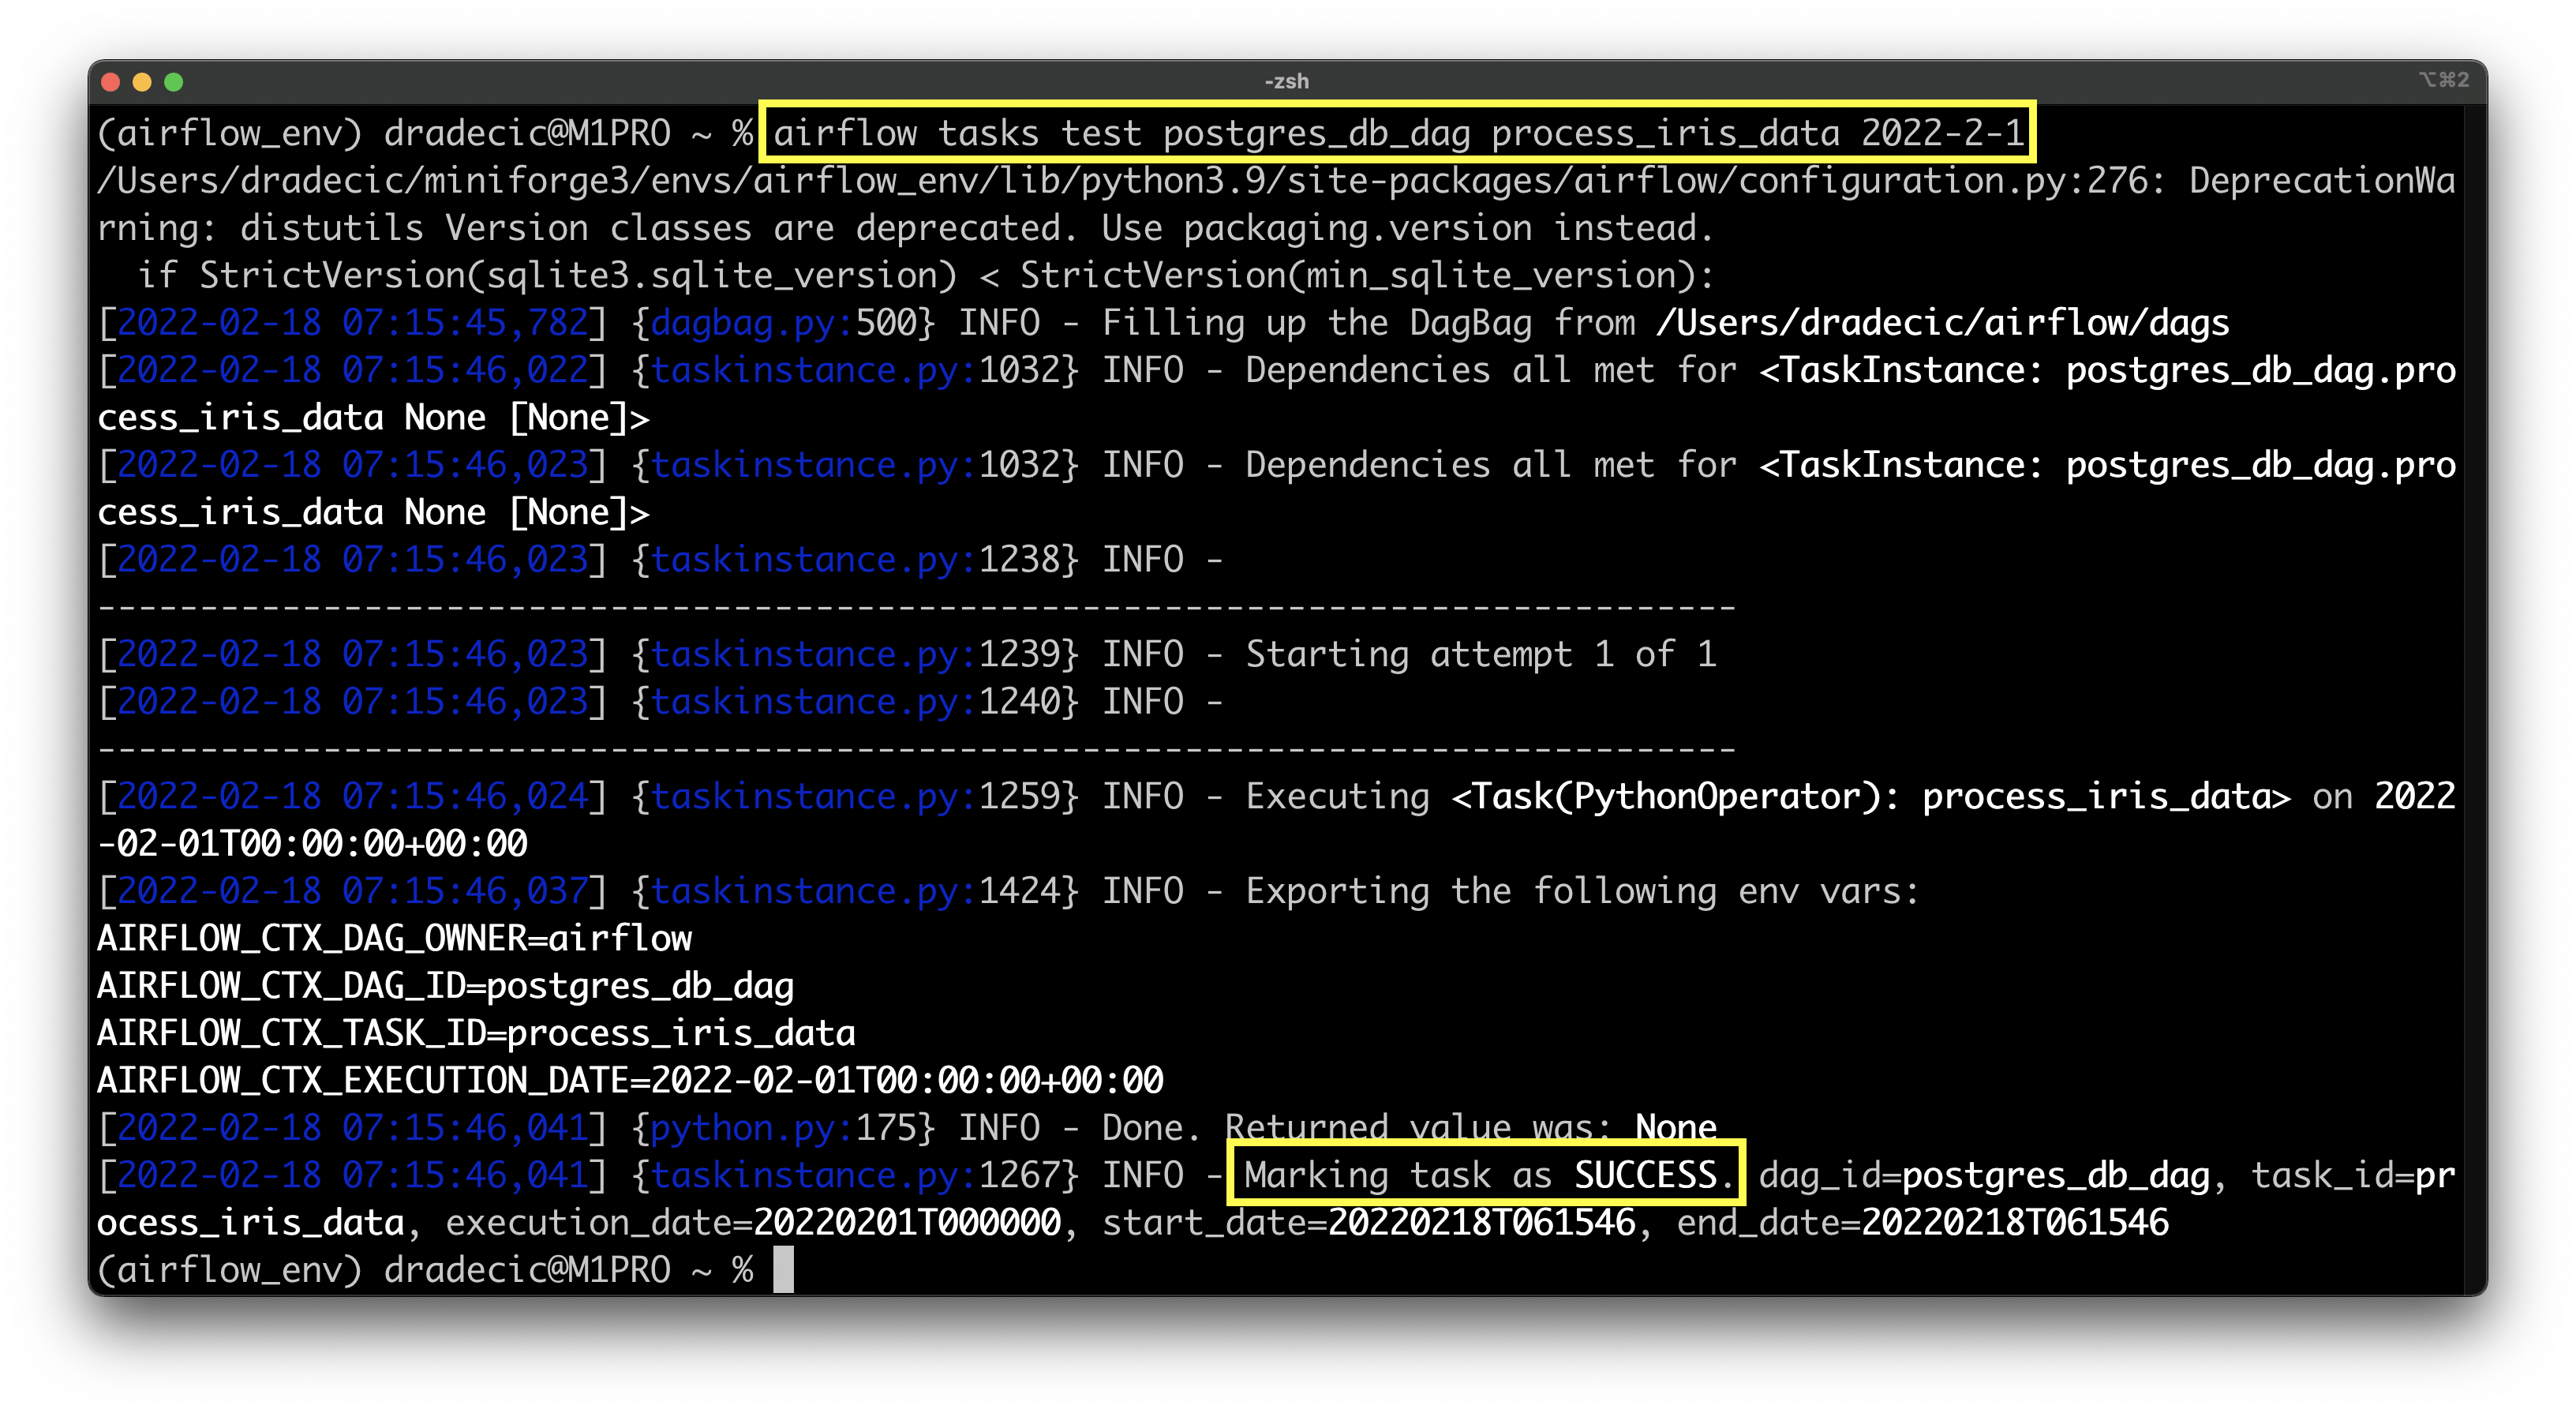
Image 7 - Testing the task of processing Iris data (image by author)
Once again a success. The CSV should be stored at /tmp/iris_processed.csv, so let’s print the file while in Terminal:
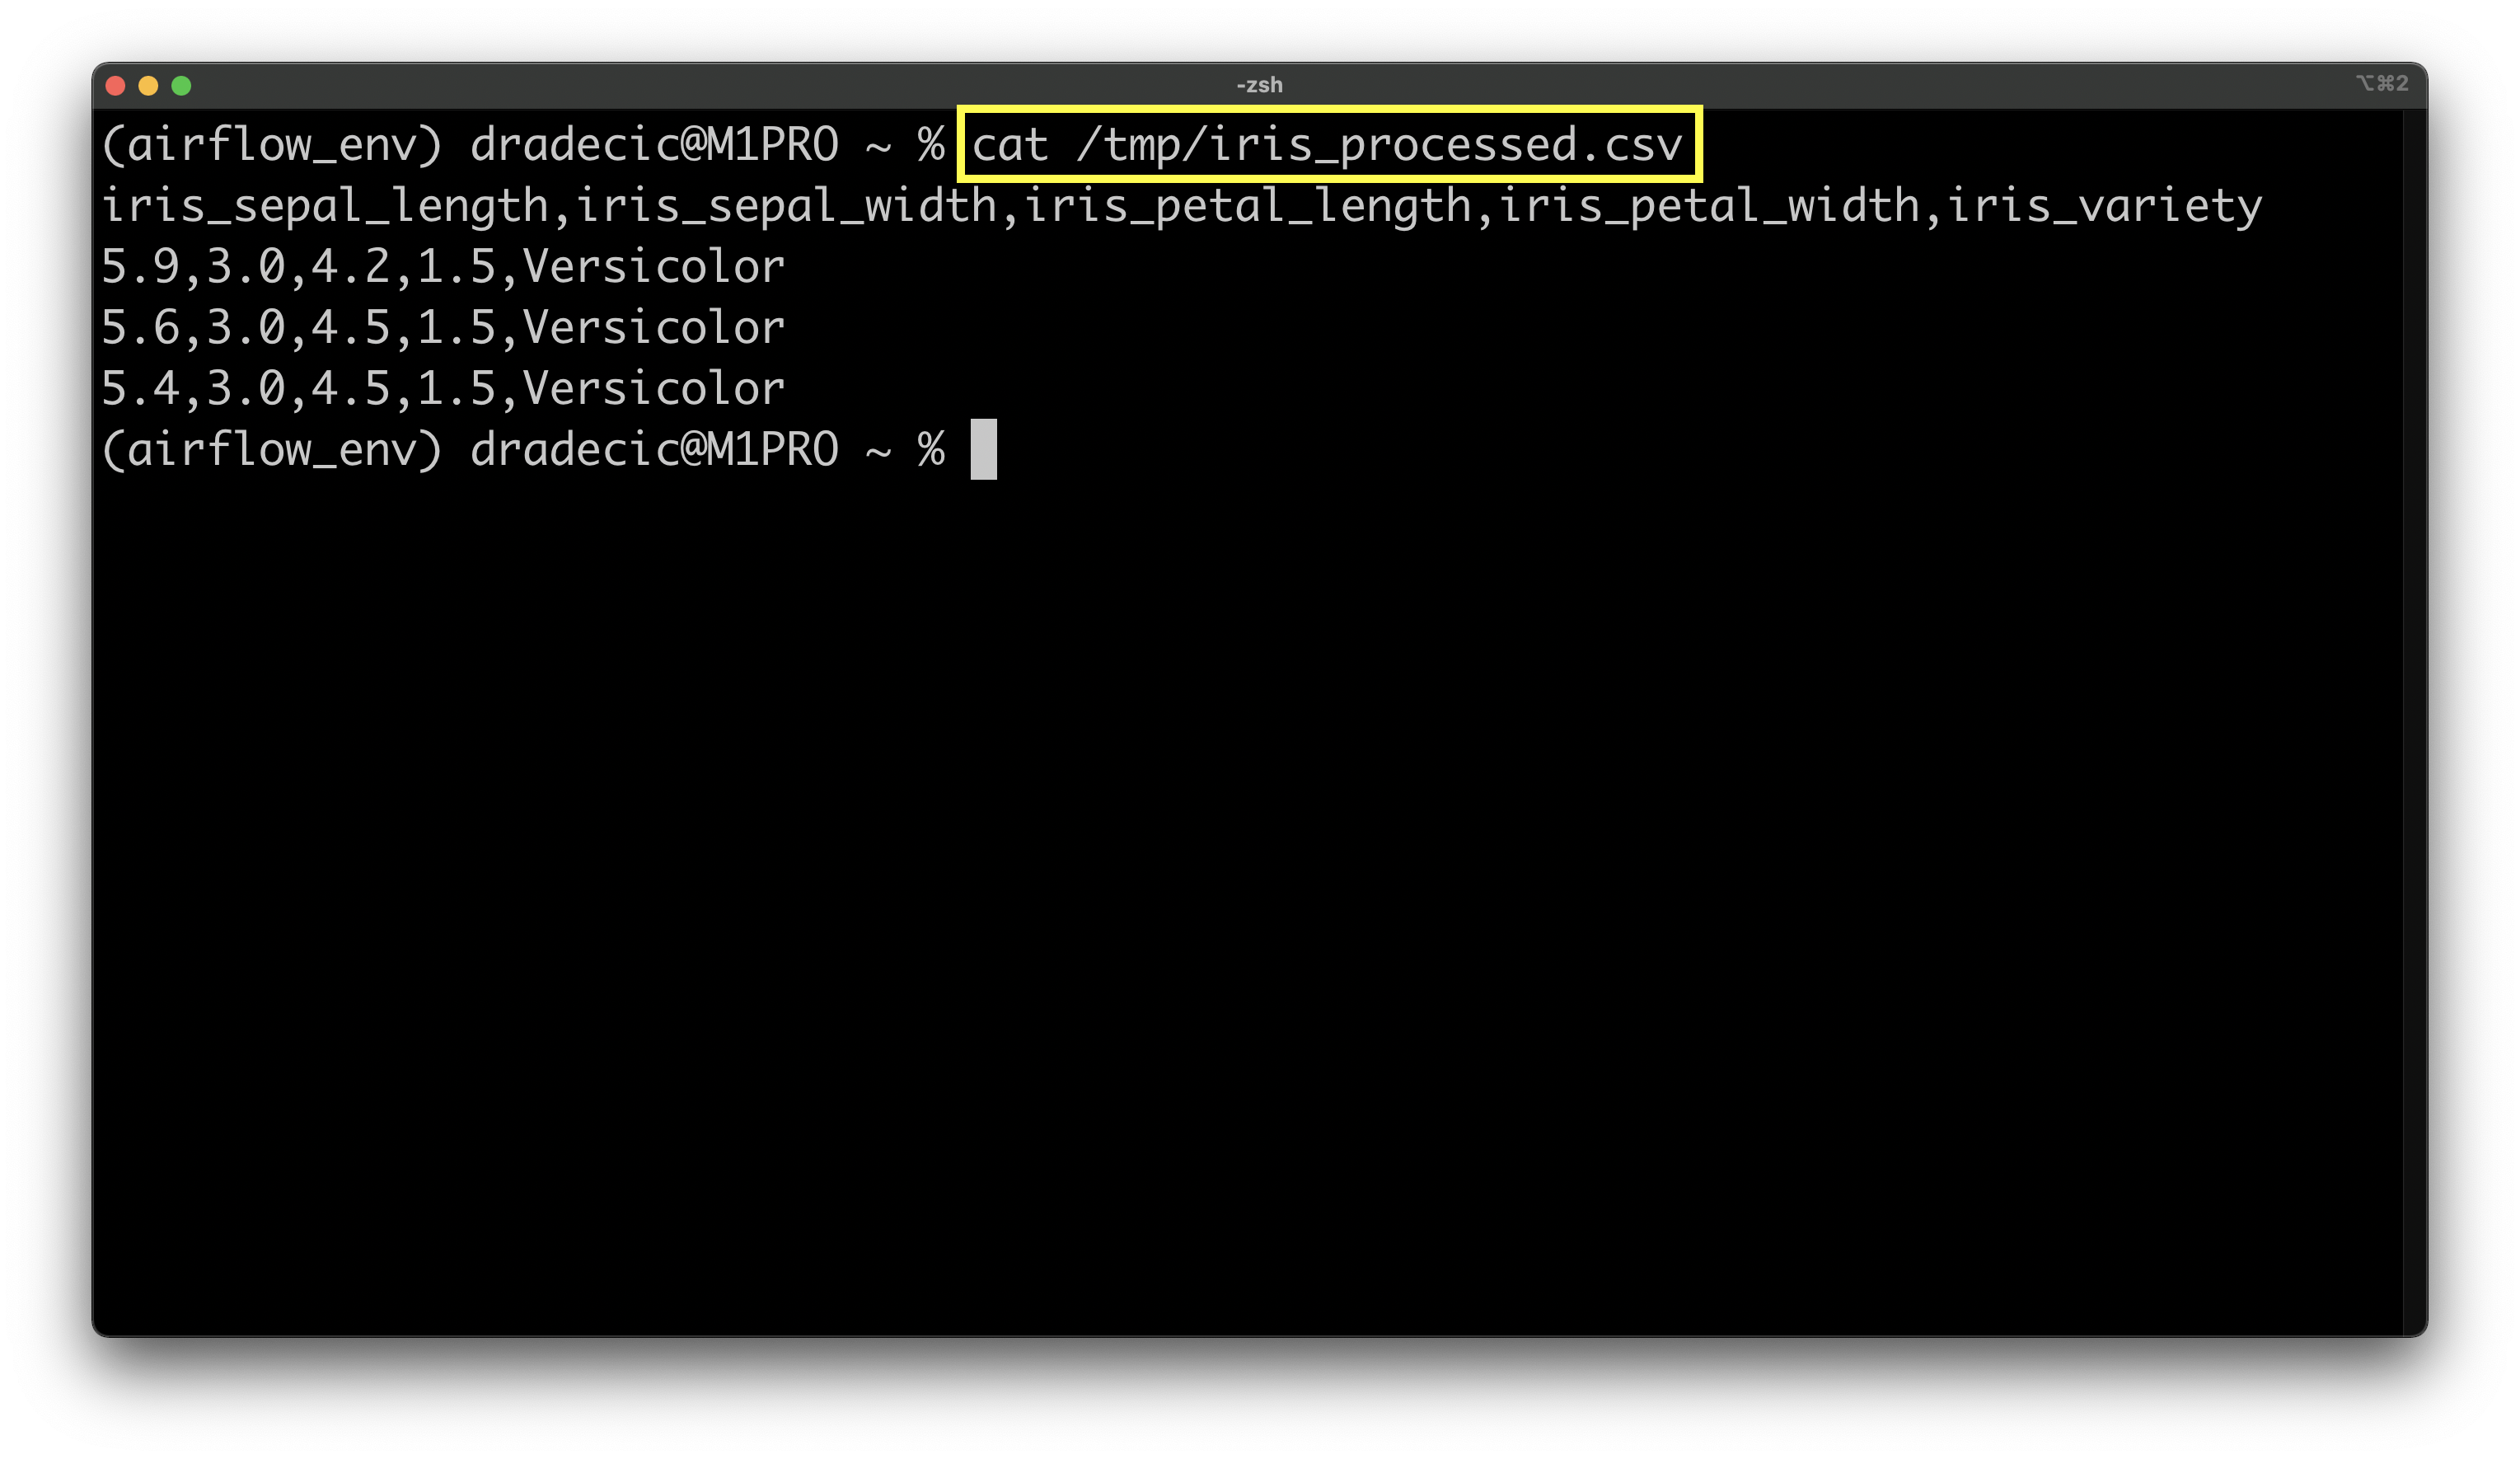
Image 8 - Result of the processing task (image by author)
Only three rows plus the header were kept, indicating the preprocessing step of the pipeline works as expected.
Task #3 - Truncating Postgres table
Our DAG is executed daily, meaning every day three rows will be inserted into a table in the Postgres database. We don’t want values duplicating over time, so we’ll truncate the table before insertion.
That’s where the third task comes in. It uses PostgresOperator to establish a connection to the database and run a SQL statement. The statement is specified under the sql argument:
# 3. Truncate table in Postgres
task_truncate_table = PostgresOperator(
	task_id='truncate_tgt_table',
	postgres_conn_id='postgres_db',
	sql="TRUNCATE TABLE iris_tgt"
)
Let’s test it to see if there are any errors:
airflow tasks test postgres_db_dag truncate_tgt_table 2022-2-1

Image 9 - Result of truncating target table task (image by author)
The task succeeded without any issues, so we can move to the next one.
Task #4 - Loading CSV file into Postgres with Airflow
And finally, we want to load the processed data into the table. We’ll use the BashOperator to do so. It will run a shell command specified under the bash_command argument.
The one we’ll run is quite long, so I decided to split it into multiple lines. Make sure to replace db_test and dradecic with your database name and database username, respectively:
# 4. Save to Postgres
task_load_iris_data = BashOperator(
	task_id='load_iris_data',
	bash_command=(
		'psql -d db_test -U dradecic -c "'
		'COPY iris_tgt(iris_sepal_length, iris_sepal_width, iris_petal_length, iris_petal_width, iris_variety) '
		"FROM '/tmp/iris_processed.csv' "
		"DELIMITER ',' "
		'CSV HEADER"'
	)
)
Let’s see if it works:
airflow tasks test postgres_db_dag truncate_tgt_table 2022-2-1
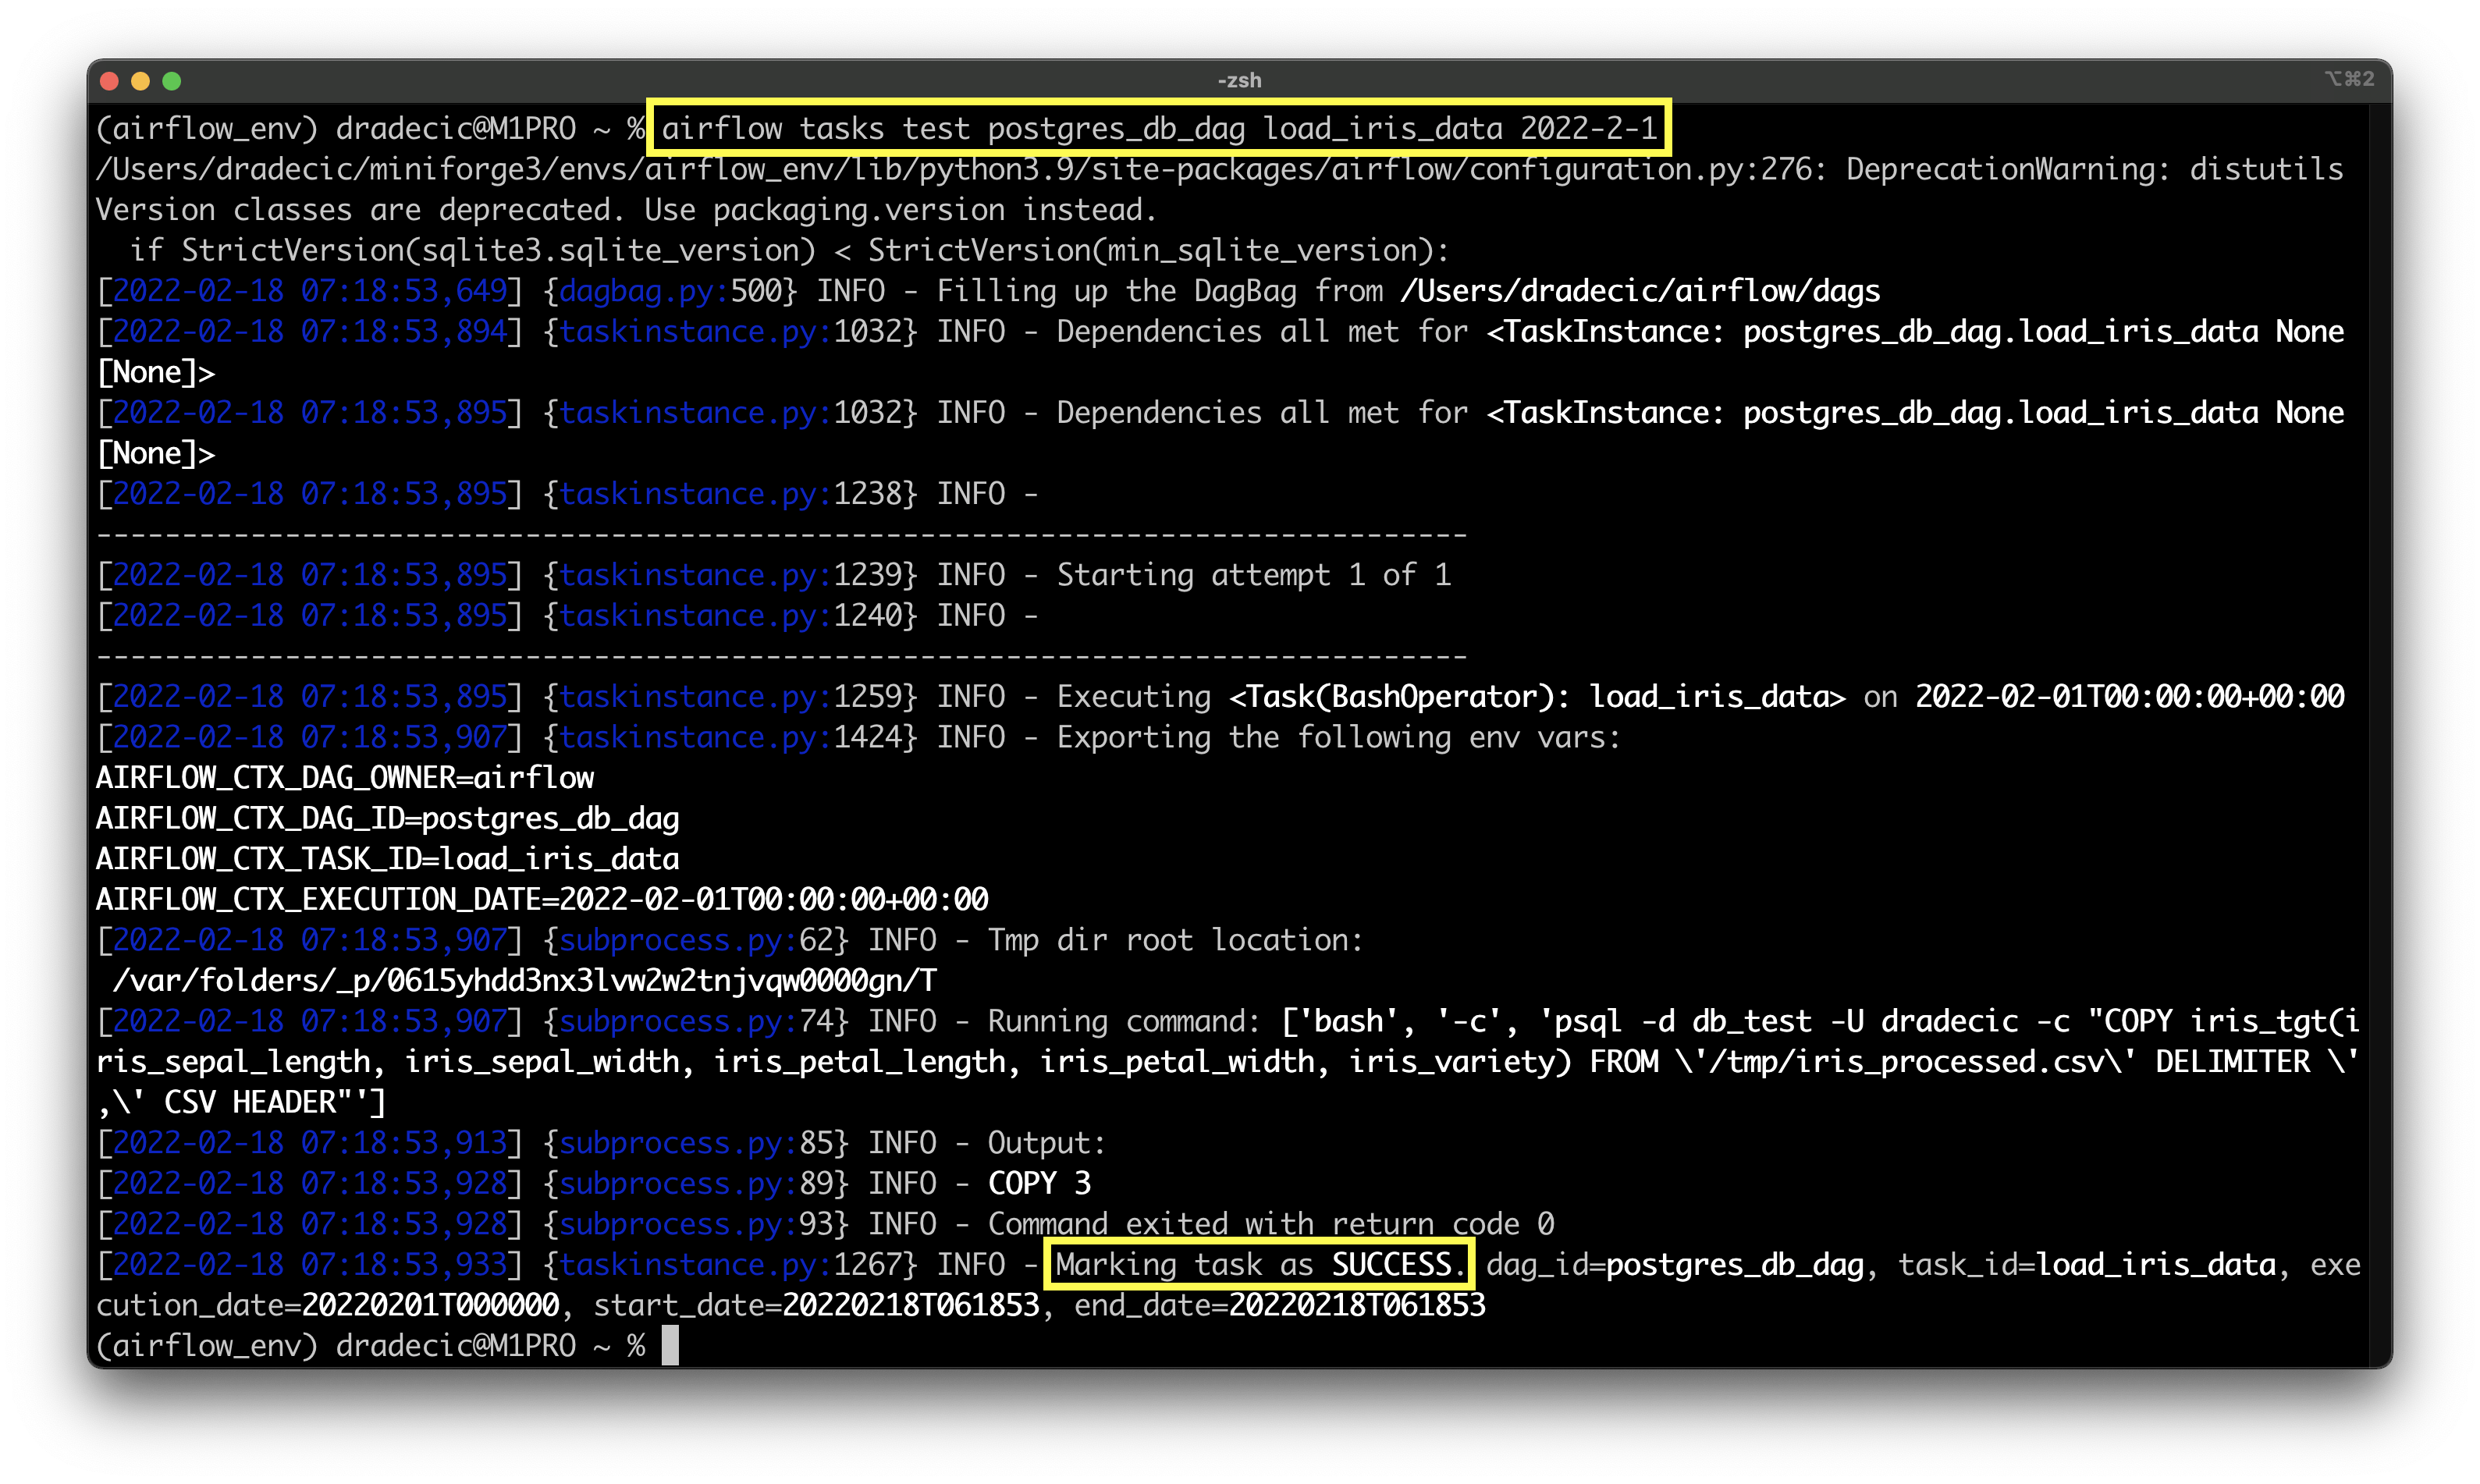
Image 10 - Testing the task of data insertion (image by author)
Wonderful! It looks like the task succeeded and that three rows were copied to the table. We should now have a fully working DAG, and we’ll test it in the upcoming sections.
If you’ve missed anything, use the code snippet from the following section as a reference.
Airflow to Postgres DAG - The Complete Code
Here’s the entire code for the DAG + task connection at the bottom:
import pandas as pd
from datetime import datetime
from airflow.models import DAG
from airflow.operators.python import PythonOperator
from airflow.hooks.postgres_hook import PostgresHook
from airflow.models import Variable
from airflow.operators.bash import BashOperator
from airflow.providers.postgres.operators.postgres import PostgresOperator


def get_iris_data():
    sql_stmt = "SELECT * FROM iris"
    pg_hook = PostgresHook(
        postgres_conn_id='postgres_db',
        schema='db_test'
    )
    pg_conn = pg_hook.get_conn()
    cursor = pg_conn.cursor()
    cursor.execute(sql_stmt)
    return cursor.fetchall()


def process_iris_data(ti):
    iris = ti.xcom_pull(task_ids=['get_iris_data'])
    if not iris:
        raise Exception('No data.')

    iris = pd.DataFrame(
        data=iris[0],
        columns=['iris_id', 'iris_sepal_length', 'iris_sepal_width',
                 'iris_petal_length', 'iris_petal_width', 'iris_variety']
    )
    iris = iris[
        (iris['iris_sepal_length'] > 5) &
        (iris['iris_sepal_width'] == 3) &
        (iris['iris_petal_length'] > 3) &
        (iris['iris_petal_width'] == 1.5)
    ]
    iris = iris.drop('iris_id', axis=1)
    iris.to_csv(Variable.get('tmp_iris_csv_location'), index=False)


with DAG(
    dag_id='postgres_db_dag',
    schedule_interval='@daily',
    start_date=datetime(year=2022, month=2, day=1),
    catchup=False
) as dag:

    # 1. Get the Iris data from a table in Postgres
    task_get_iris_data = PythonOperator(
        task_id='get_iris_data',
        python_callable=get_iris_data,
        do_xcom_push=True
    )

    # 2. Process the Iris data
    task_process_iris_data = PythonOperator(
        task_id='process_iris_data',
        python_callable=process_iris_data
    )

    # 3. Truncate table in Postgres
    task_truncate_table = PostgresOperator(
        task_id='truncate_tgt_table',
        postgres_conn_id='postgres_db',
        sql="TRUNCATE TABLE iris_tgt"
    )

    # 4. Save to Postgres
    task_load_iris_data = BashOperator(
        task_id='load_iris_data',
        bash_command=(
            'psql -d db_test -U dradecic -c "'
            'COPY iris_tgt(iris_sepal_length, iris_sepal_width, iris_petal_length, iris_petal_width, iris_variety) '
            "FROM '/tmp/iris_processed.csv' "
            "DELIMITER ',' "
            'CSV HEADER"'
        )
    )

    task_get_iris_data >> task_process_iris_data >> task_truncate_table >> task_load_iris_data
We’ll next take a look at how to run the DAG through Airflow.
How to Run the DAG Through Airflow
If you open the Airflow’s home page now, you’d see another DAG listed:
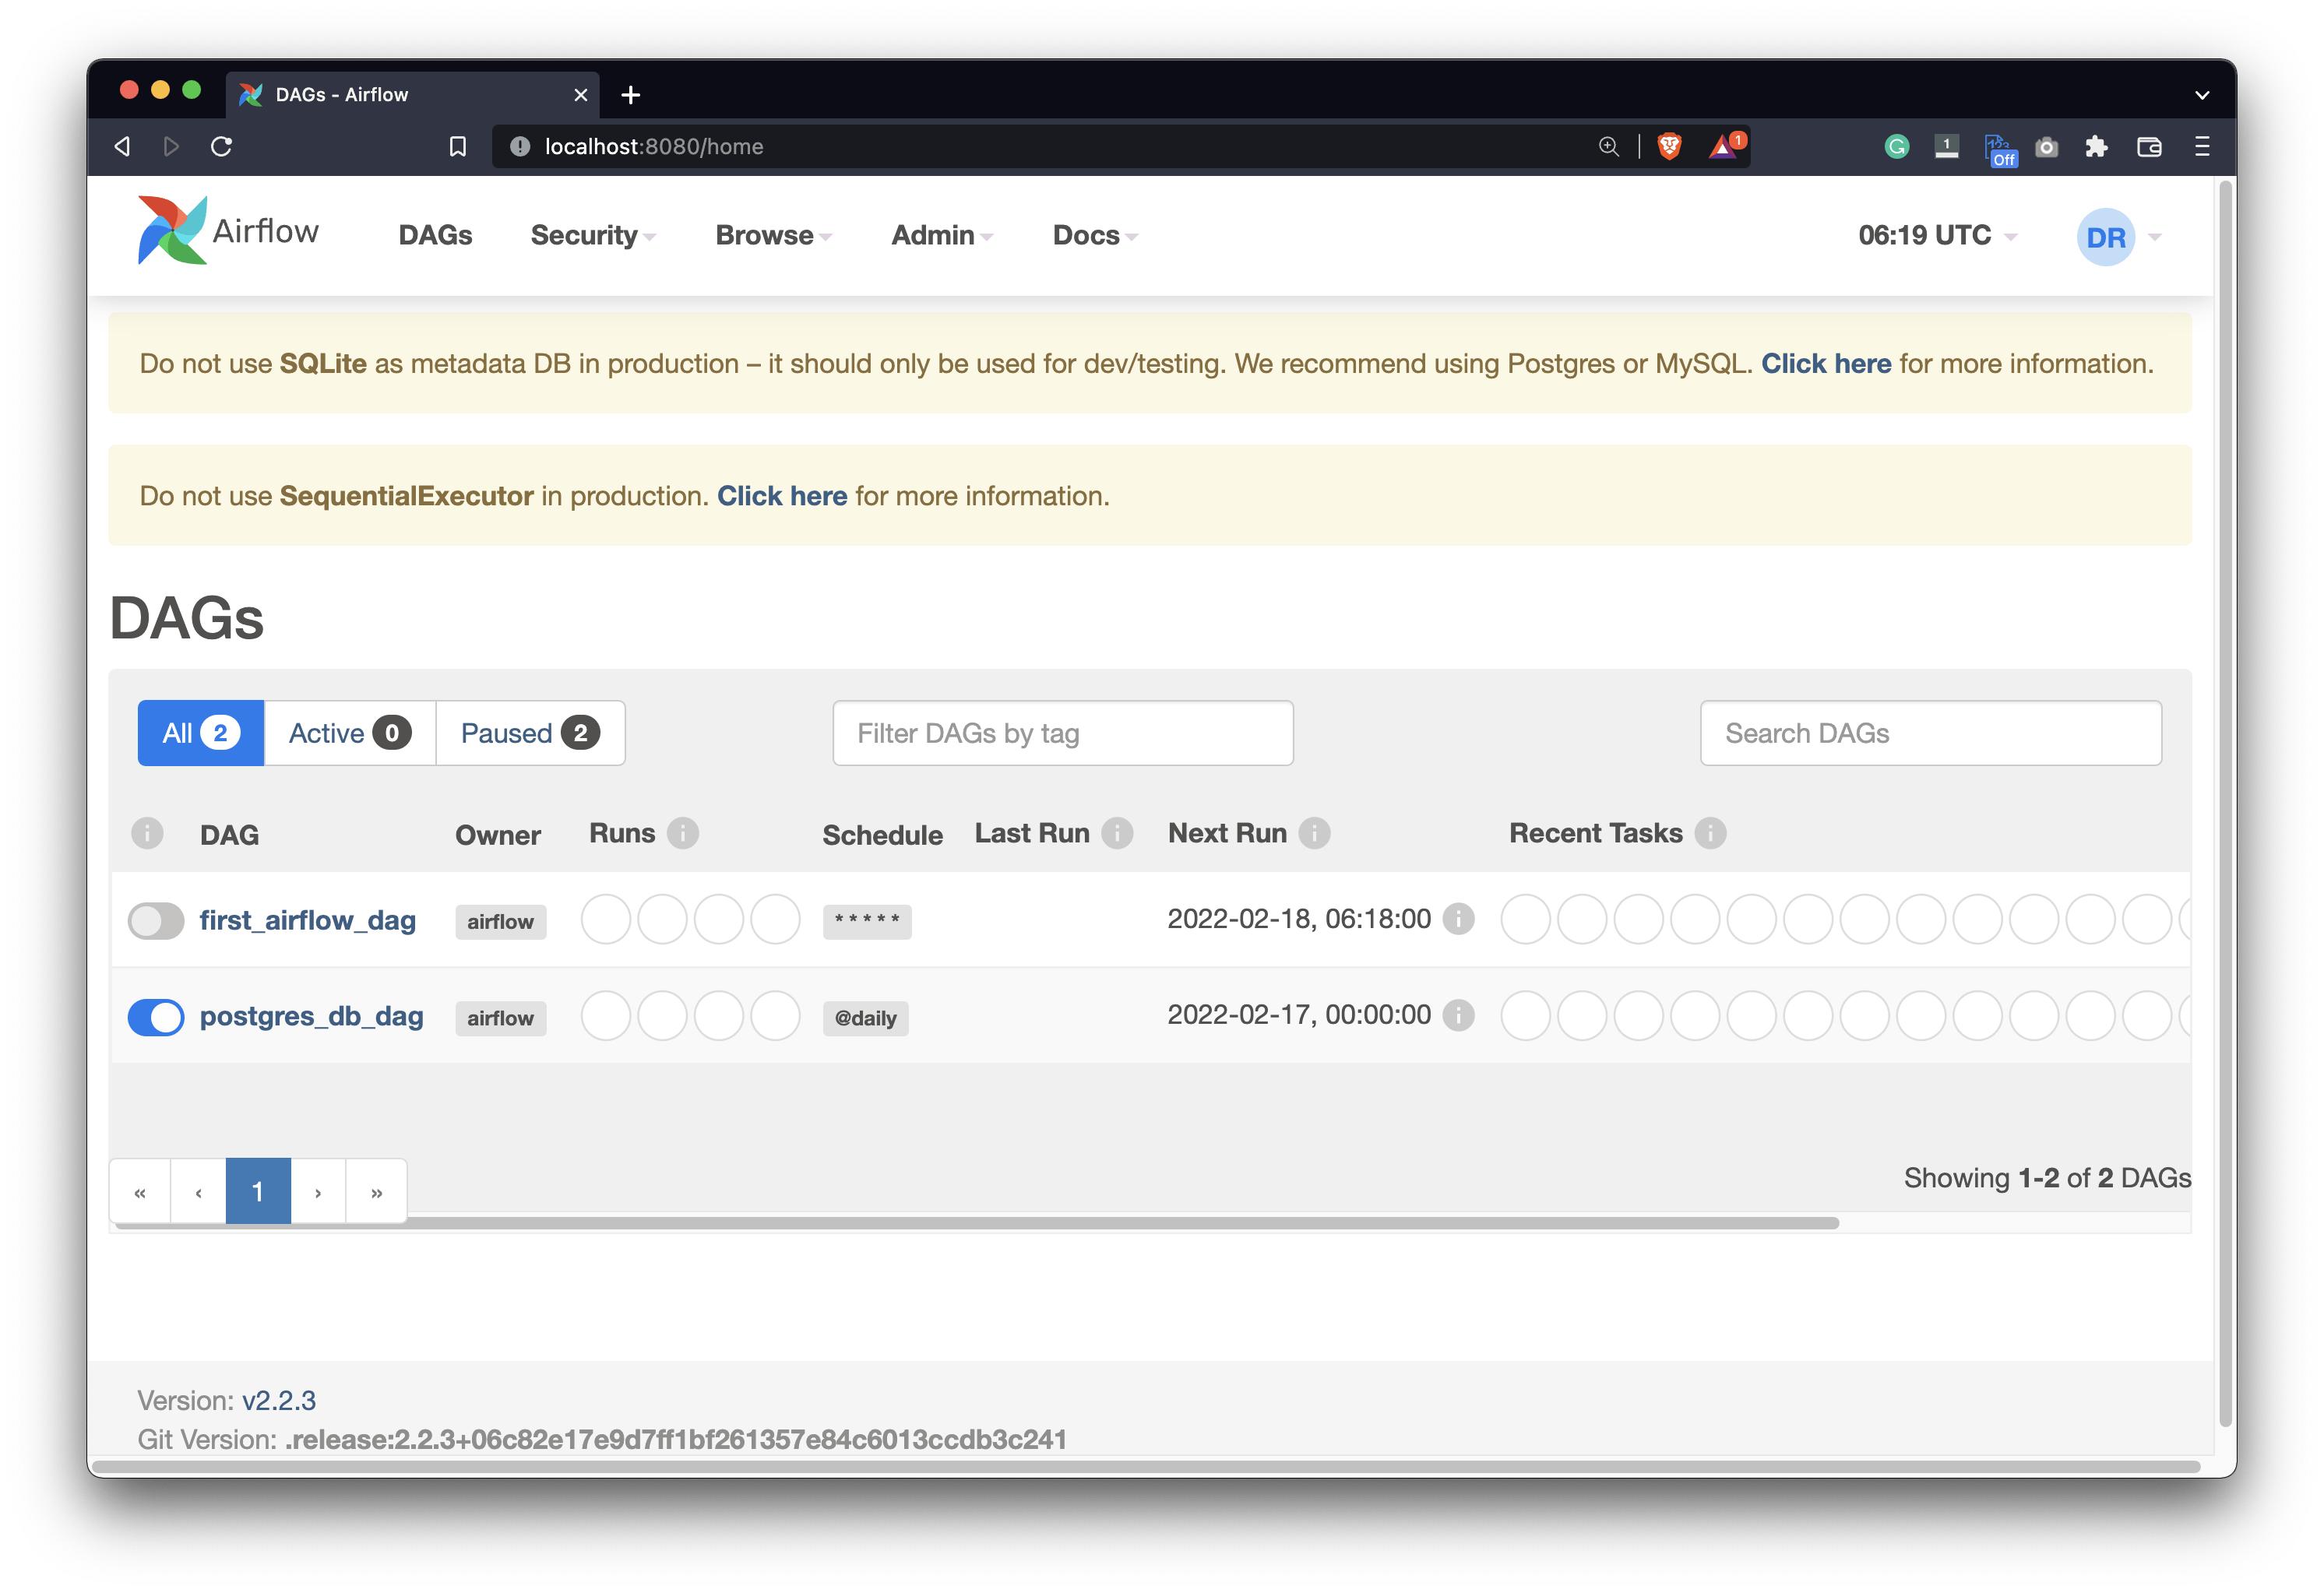
Image 11 - All Airflow DAGs (image by author)
Make sure to turn it on by flipping the switch. Open the DAG and press the Play button to run it. All of the tasks should become dark green after a couple of seconds, indicating they finished successfully:
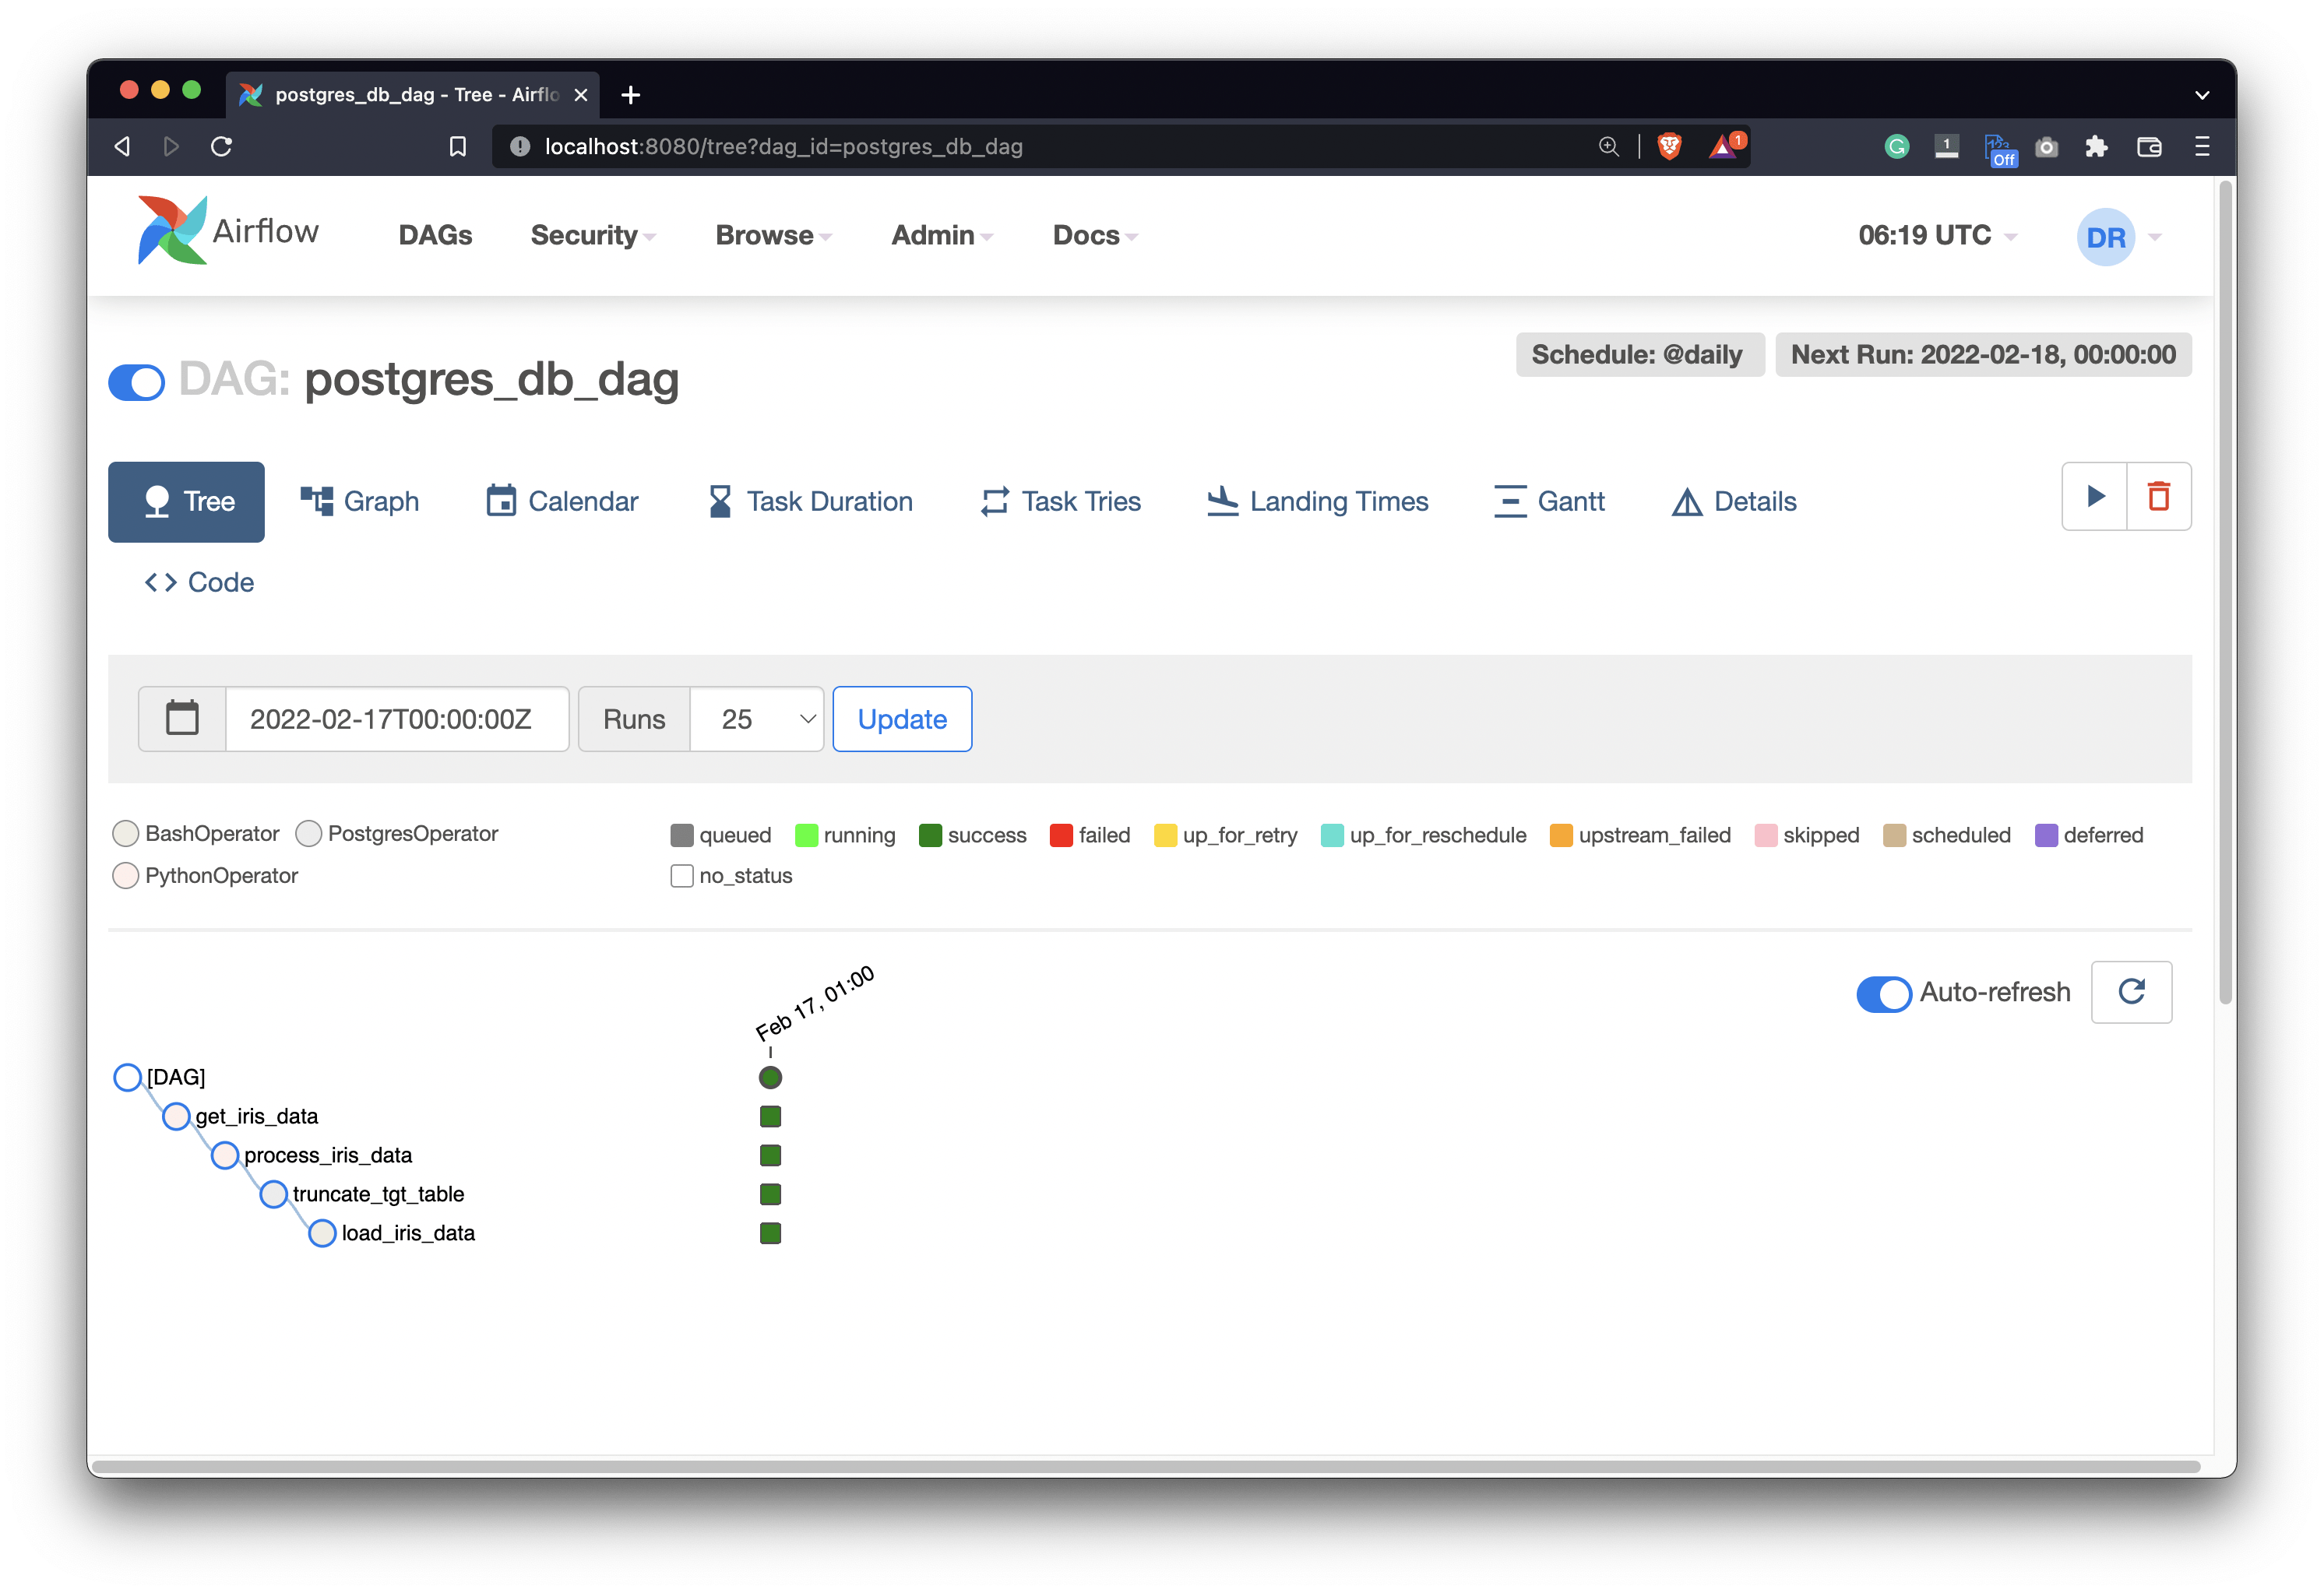
Image 12 - Running our Airflow DAG (image by author)
In the database, you can now see three rows inserted, representing all the flowers that matched our filtering criteria:
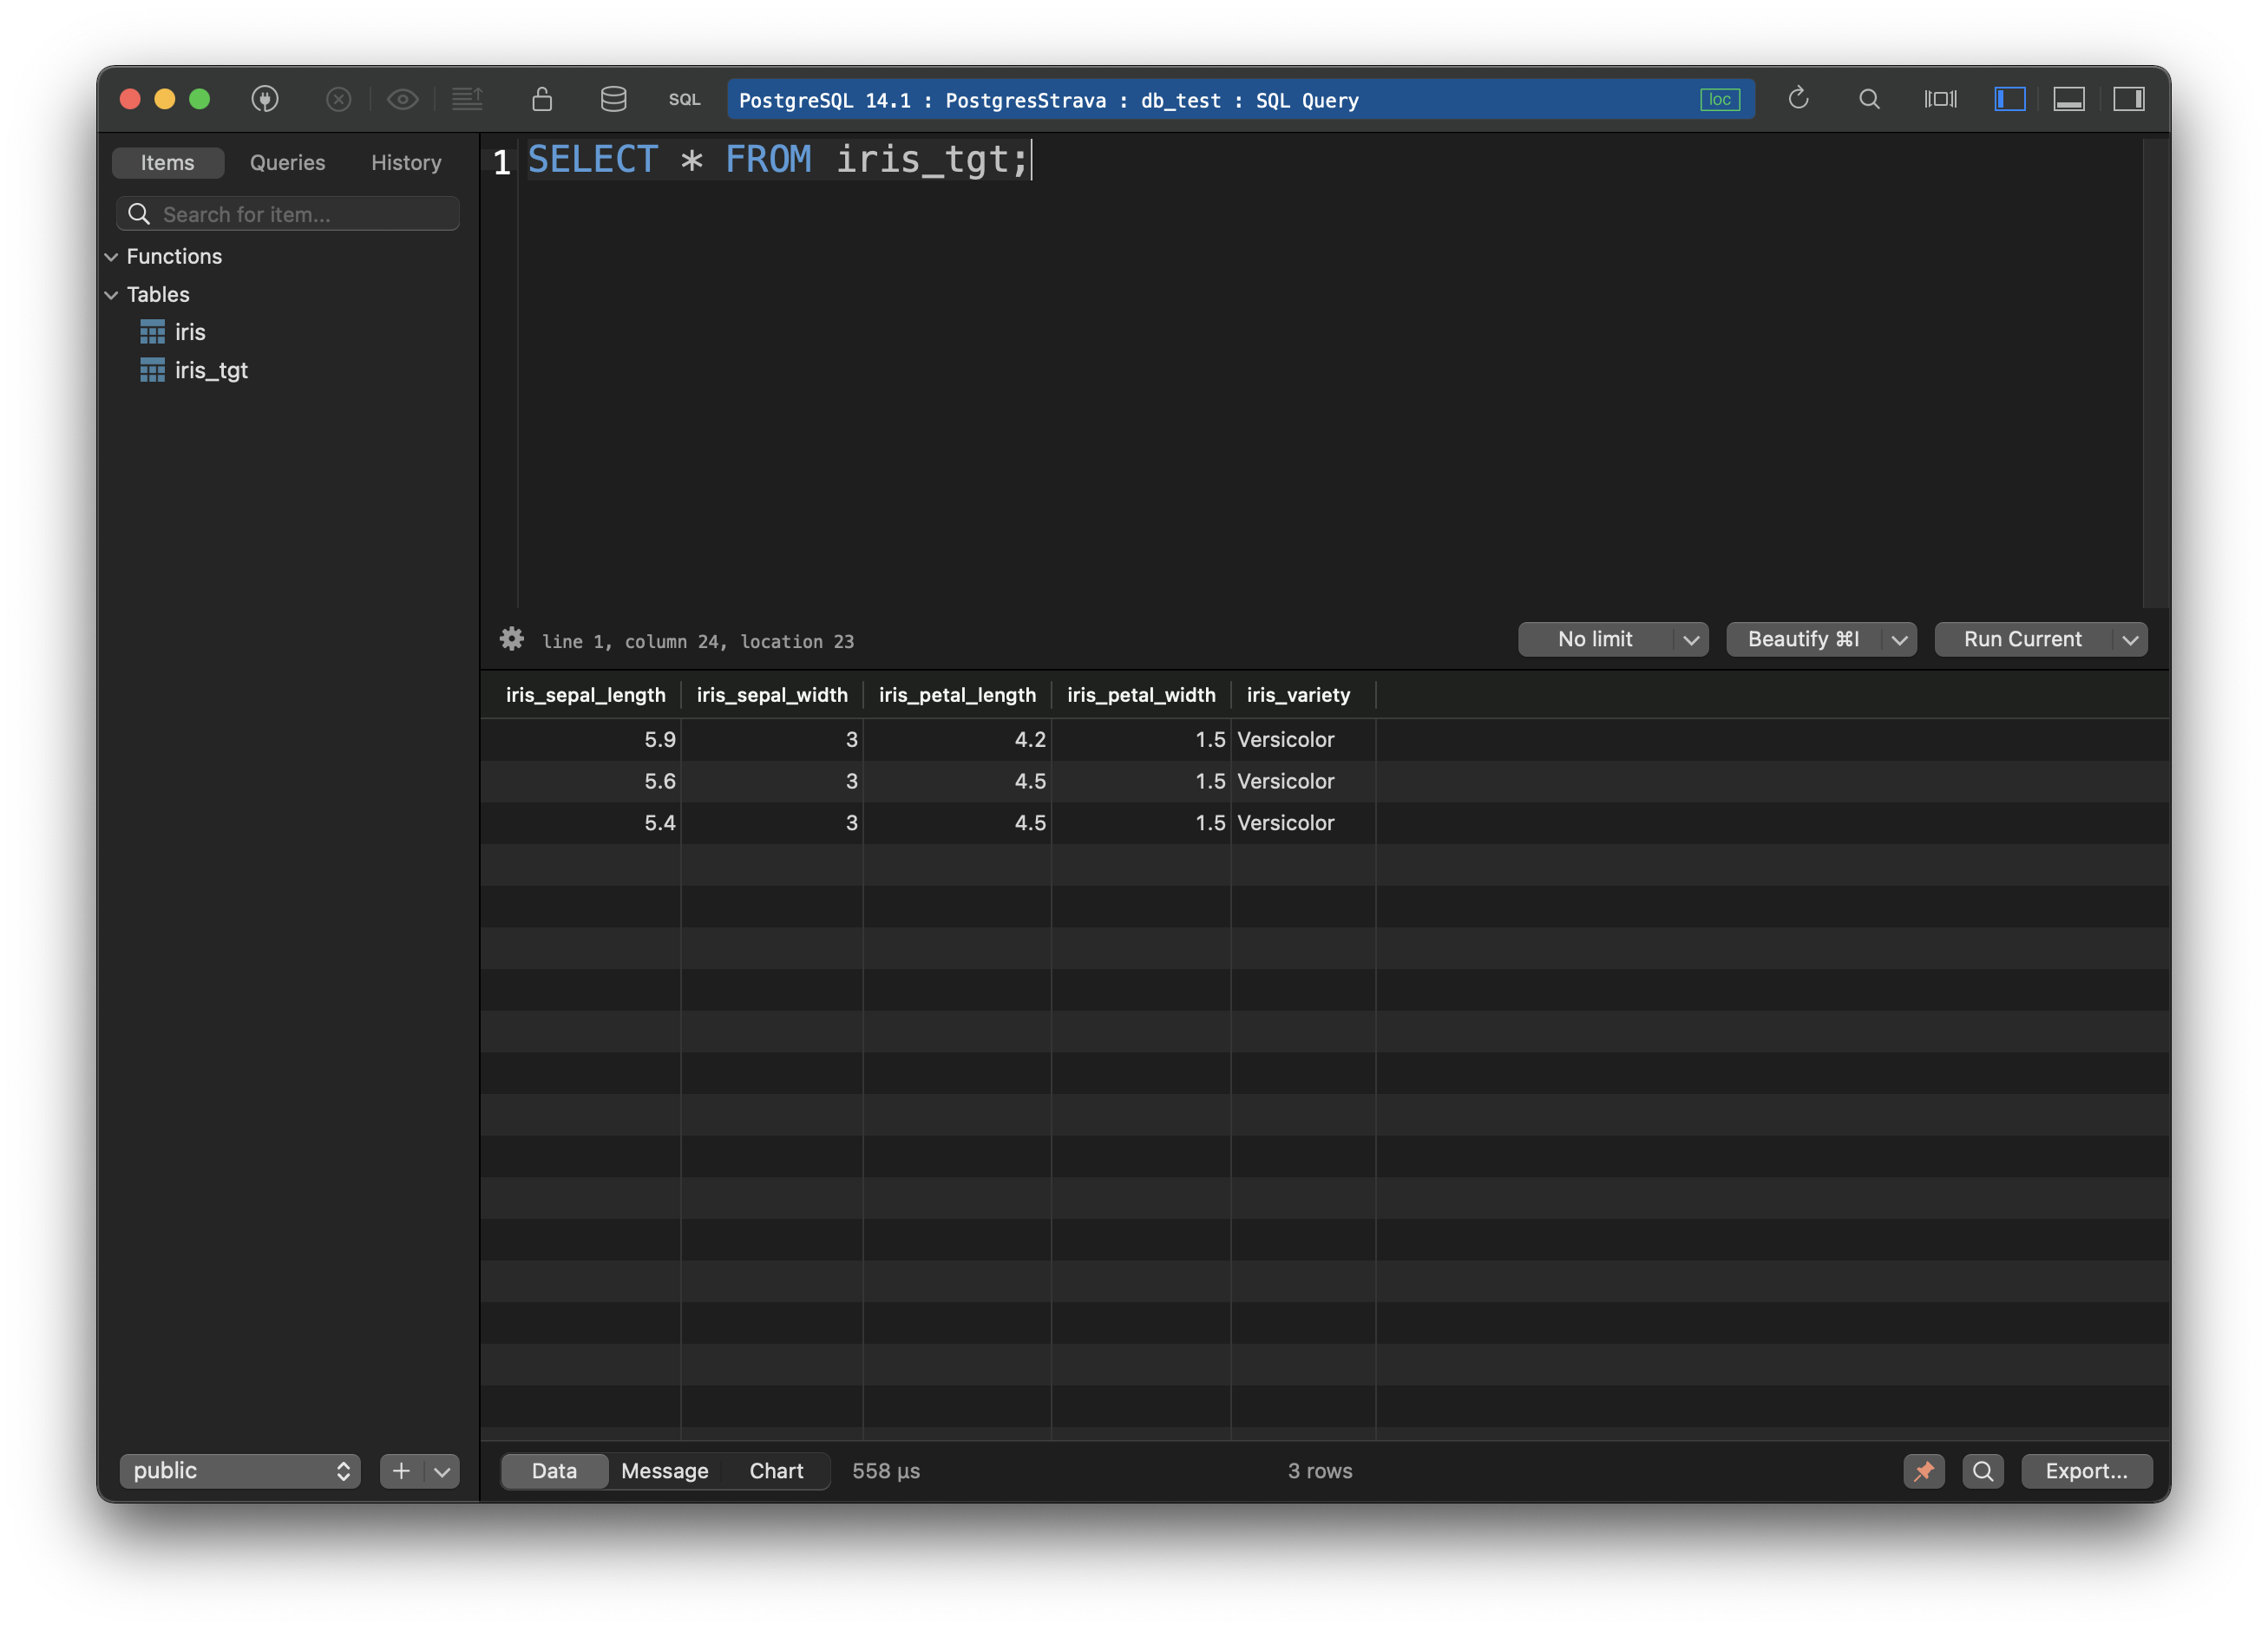
Image 13 - Records loaded into the Postgres database (image by author)
That’s it - the DAG runs without issues, so let’s call it a day at this point.
Summary and Next Steps
Airflow’s primary use case is orchestration, not necessarily extracting data from databases. Still, you can do it with hooks. Today we’ve explored how to work with hooks, how to run SQL statements, and how to insert data into SQL tables - all with Postgres. You can easily apply the same logic to different databases. The changes in the DAG would be minimal.
As a homework assignment, you could try to insert a Pandas DataFrame directly to Postgres, without saving it to a CSV file first. That’s something we’ll cover in the upcoming articles, so stay tuned if you can’t find a solution.
Thanks for reading!
Recommended reads
- 5 Best Books to Learn Data Science Prerequisites (Math, Stats, and Programming)
- Top 5 Books to Learn Data Science in 2022
- How to Install Apache Airflow Locally
Stay connected
- Hire me as a technical writer
- Subscribe on YouTube
- Connect on LinkedIn